Output Settings
The Output tab shapes the picture: how big it is, what shape it is, which way up it is, and how many Clips can be on it at once. It applies to Visibox as a whole, not to one Project, so a setting made here survives switching Projects.
Where the picture goes after it is made (extra displays, video walls, NDI, DeckLink, recording) is in Canvas Settings.
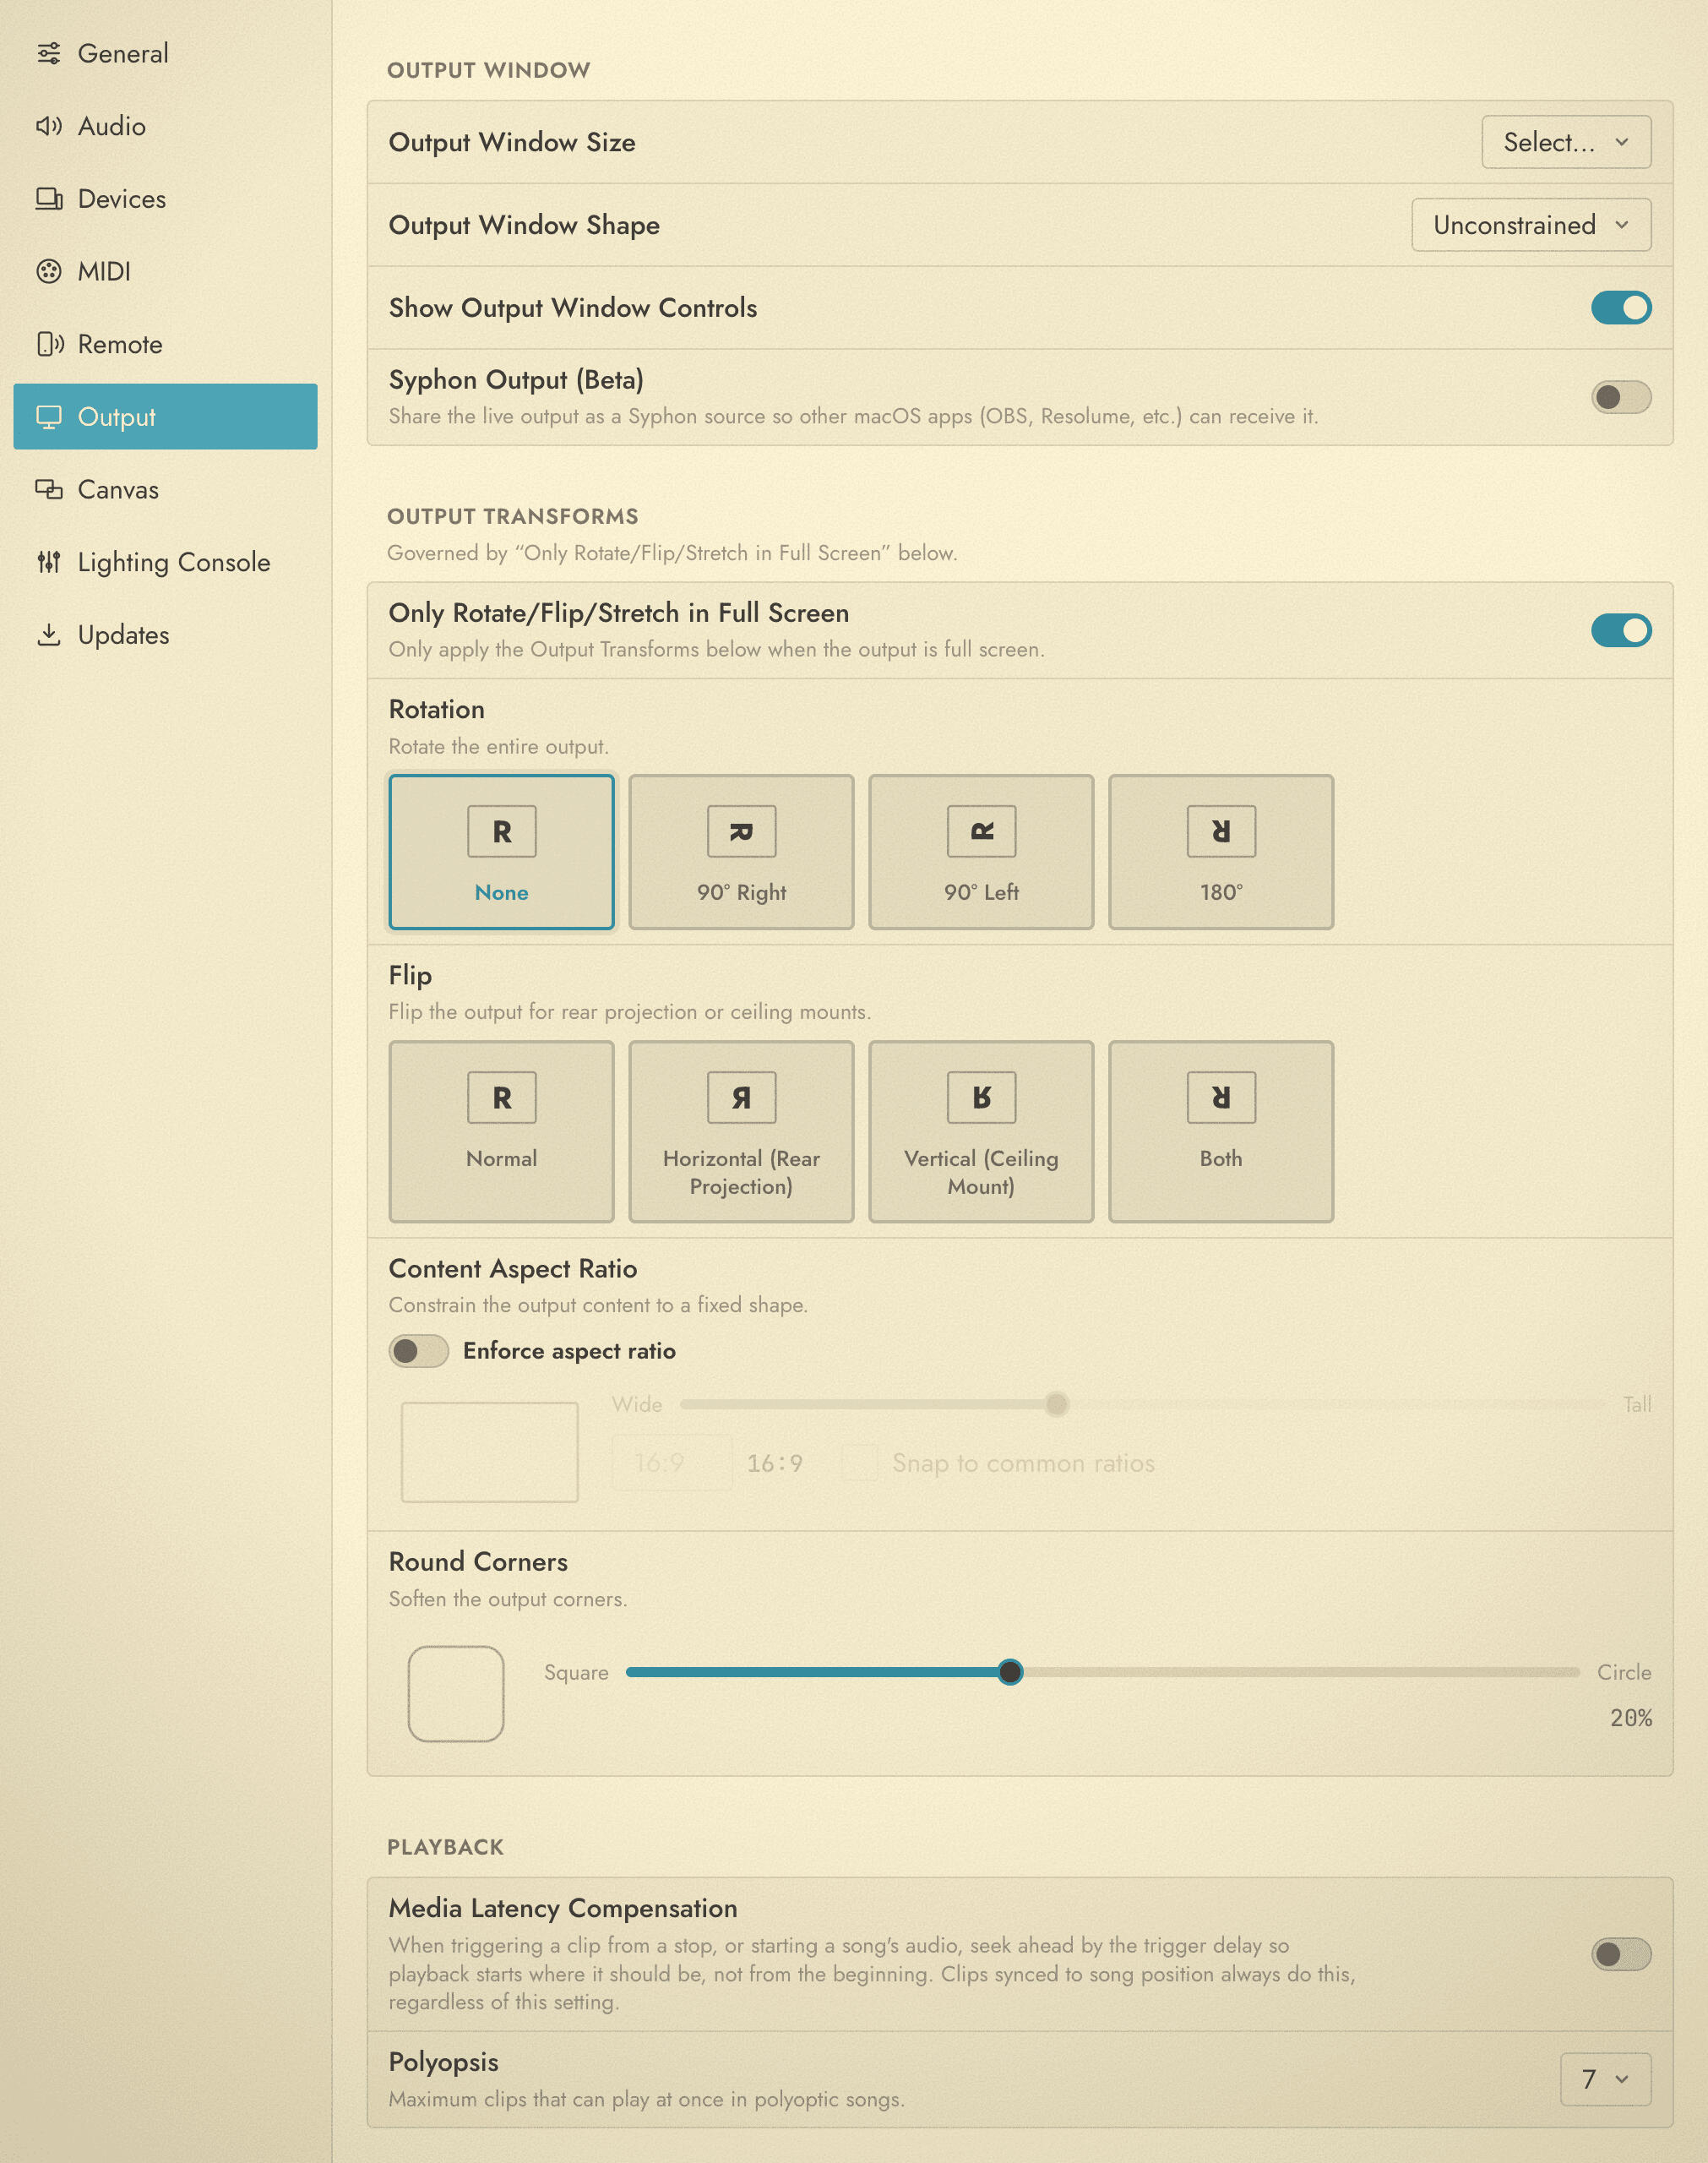
Output window
| Setting | What it does |
|---|---|
| Output Window Size | Sets the size of the Output window on screen when it is not full screen. Pick a preset from VGA up to 8K, or choose Custom, type a width and height, and click Apply. See the note below. |
| Output Window Shape | Constrains the Output window to a fixed shape: Unconstrained, 1:1, 4:3, 16:9, 16:10, or a custom ratio you type. |
| Show Output Window Controls | Shows on-screen controls on the Output window. Useful while setting up, and worth turning off before an audience sees the window. |
Output Window Size sets how large the window is, and nothing else. A windowed Output renders at a fixed size, 1920 along its longest edge, shaped by the Project’s aspect ratio when one is set. The picture is then fitted into whatever window you chose. It used to be rendered at the window’s own size. That meant a small window quietly starved a recording, or an NDI, DeckLink, Syphon or Spout target, of the pixels it had asked for.
Fitted means the picture fills the window and any overhang is cropped. To see the whole canvas with bars instead, turn on Letterbox Output window, which is also on the Output window’s right-click menu.
Full screen is unaffected: the Output renders at the display’s own resolution, as it always did.
Syphon Output shares the live output as a Syphon source, so other macOS applications such as OBS and Resolume can receive it. See Output, Canvas, and Displays.
Turn on Settings > General > Enable Beta Features to see this.
Output Transforms
These four controls adapt the output to the room: a projector hung upside down, one firing through the back of a screen, a screen that is the wrong shape, a display you want to soften the edges of.
Only Rotate/Flip/Stretch in Full Screen decides when they apply. Leave it on and the transforms only take effect once the output is full screen, which keeps the Output window the right way up while you build the show. Turn it off to see the transforms in the windowed output too.
Rotation
Rotates the entire output: None, 90° Right, 90° Left, or 180°.
Use 180° for a ceiling-mounted projector hung upside down, and 90° for a vertical banner screen. Your projector or your operating system’s display settings may offer rotation of their own, which is usually the tidier place to do it if the option is there.
Flip
Mirrors the output: Normal, Horizontal (Rear Projection), Vertical (Ceiling Mount), or Both.
Horizontal is for rear projection, where the audience sees the picture through the screen and would otherwise read it backwards. Vertical is for a ceiling mount that flips the image the other way.
Content Aspect Ratio
Turn on Enforce aspect ratio to hold your content at a fixed shape regardless of the display’s shape, adding bars to make up the difference.
The slider runs from wide to tall, with 1:1 in the middle, and the readout names the ratio you are on. Turn on Snap to common ratios to have the slider settle on the standard shapes instead of moving freely.
This is worth setting when you do not know what you will be projecting onto. Your content then reads the same on a 16:9 projector, a 16:10 one, and whatever the venue actually owns.
Round Corners
Softens the output’s corners, from Square through to Circle.
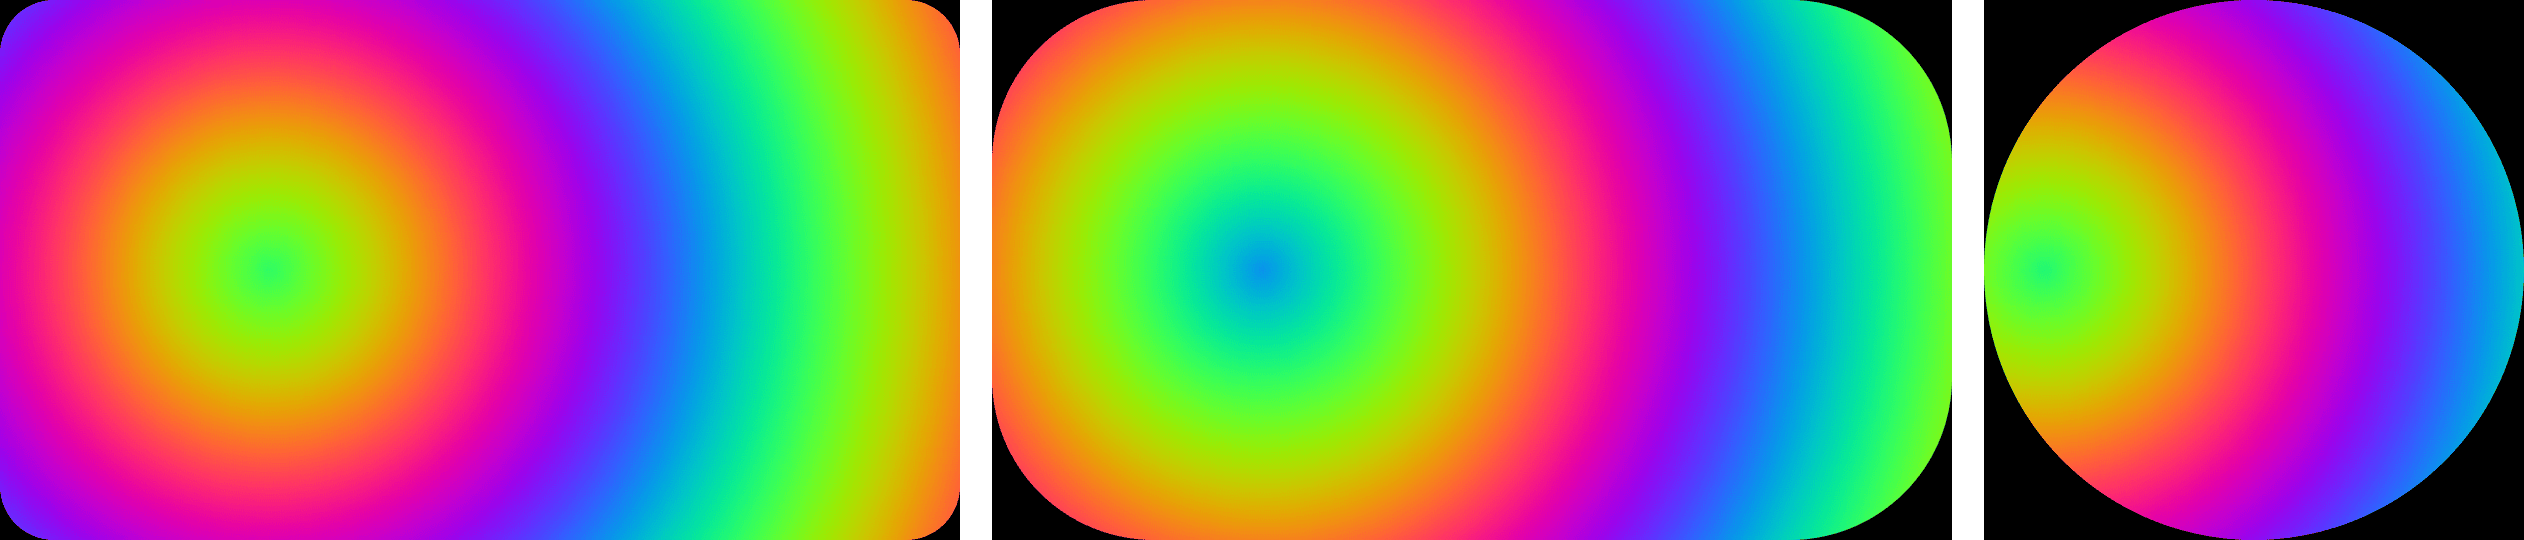
Round displays
Set Round Corners to Circle and enforce a 1:1 content aspect ratio and you get a circular display area, whatever shape the screen behind it is.
Playback
Media Latency Compensation
Triggering a Clip is not instant, and neither is starting a Song’s backing track. Whether the trigger is a MIDI note, a Stream Deck button or an API call, Visibox needs a moment to get the Clip ready, and that moment is longest the first time a Clip plays. The Clips in a Project’s first Song are made ready as the Project opens, so this setting is about the rest.
Off (the default) waits until the Clip is ready and plays it from the very beginning. You get every frame and every sample, and the Clip lands slightly late.
On starts the Clip in sync with the trigger by giving up the moment it spent getting ready, at the cost of the first few milliseconds of content. That trim is hard to notice on steady footage, but it can clip the front off a percussive audio track, which may be the whole reason you were triggering on the beat.
Clips set to Sync to Song Position stay locked to the Song’s timeline on their own, and this setting does not affect them.
Polyopsis
Polyopsis is the ceiling on how many Clips can play at once in polyoptic Songs, from 2 to 8.
A Song’s Poly Mode decides how simultaneous Clips share the stage. Polyopsis decides how many of them there can be before the oldest one gives way. Higher numbers ask more of the machine, so set it to what your show needs rather than to the maximum.