Adding Clips
Once a Project has Songs in it, you can start filling those Songs with Clips. A Clip is one piece of content you can trigger: a video, an image, a live camera, a Visualizer, a solid color, or an audio file.
This page covers getting Clips into a Project and arranging them. What a Clip does once it plays is on Clip Playback Options, Launch Modes and Poly Mode.
Adding a Clip
The quickest way is to drag a video or image file from your desktop straight into a Song row. The Clip’s thumbnail appears in the row as soon as it lands.
There are four other ways in:
- Select files in the Finder or File Explorer, copy them, then select the target Song in Visibox and paste.
- Choose Song > Add Media Files…, or right-click the Song and choose the same item.
- Choose Song > Add Audio Clip… to add sound files as Clips.
- Press ⇧⌘C with a Song selected.
Drop a single audio file on a Song and Visibox asks what you meant by it, because there are now two right answers. See Audio Clips.
Clip types
Not every Clip comes from a file.
- Video and image Clips come from media you add. These are the ones you drag in.
- Camera Clips show a live video input: a USB webcam, an HDMI capture device, or a virtual camera. See Connecting Cameras & Video Inputs.
- Visualizer Clips render live audio-reactive graphics rather than playing a file. See Visualizers.
- Color Clips are a solid color. See below.
- Audio Clips play a sound file. See below.
Each Clip tile carries its type’s icon at the top of the thumbnail, and the hover tooltip leads with the same icon, so you can tell a Camera Clip from a video Clip across the row.
Right-click a Song and choose Add Camera Clip, Add Visualizer Clip, Add Color Clip or Add Audio Clip… to create one of the last four.
Color Clips
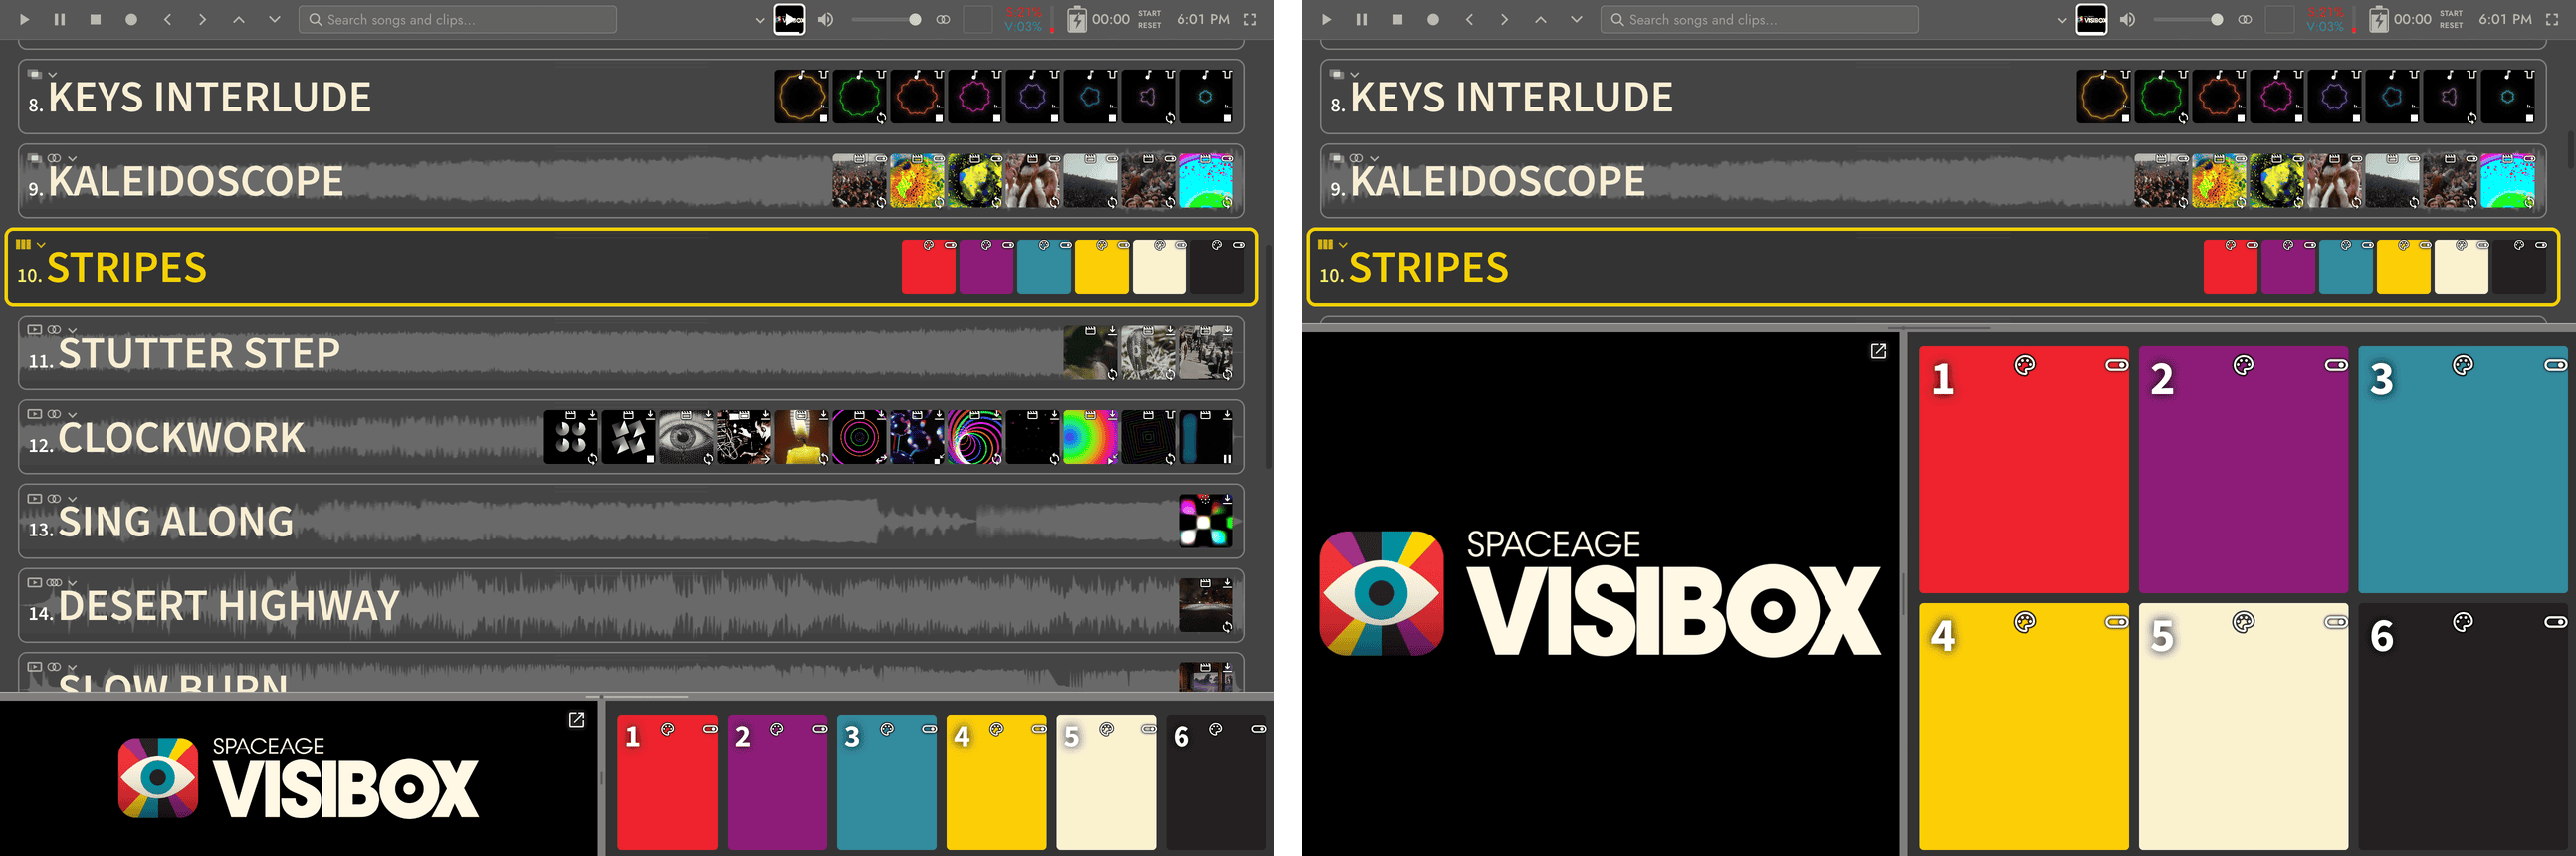
A Color Clip is a solid color, and it replaces the placeholder Clips from older versions. Visibox has to be playing something to play a Song’s audio, so a black Color Clip is how you play nothing visually. That is what you want for a Song that is only a backing track. An Audio Clip is the other way to get sound with nothing on screen, and it is black on its own without needing a Color Clip under it.
To add one, right-click a Song and choose Add Color Clip, or use the Song menu. A color picker opens.
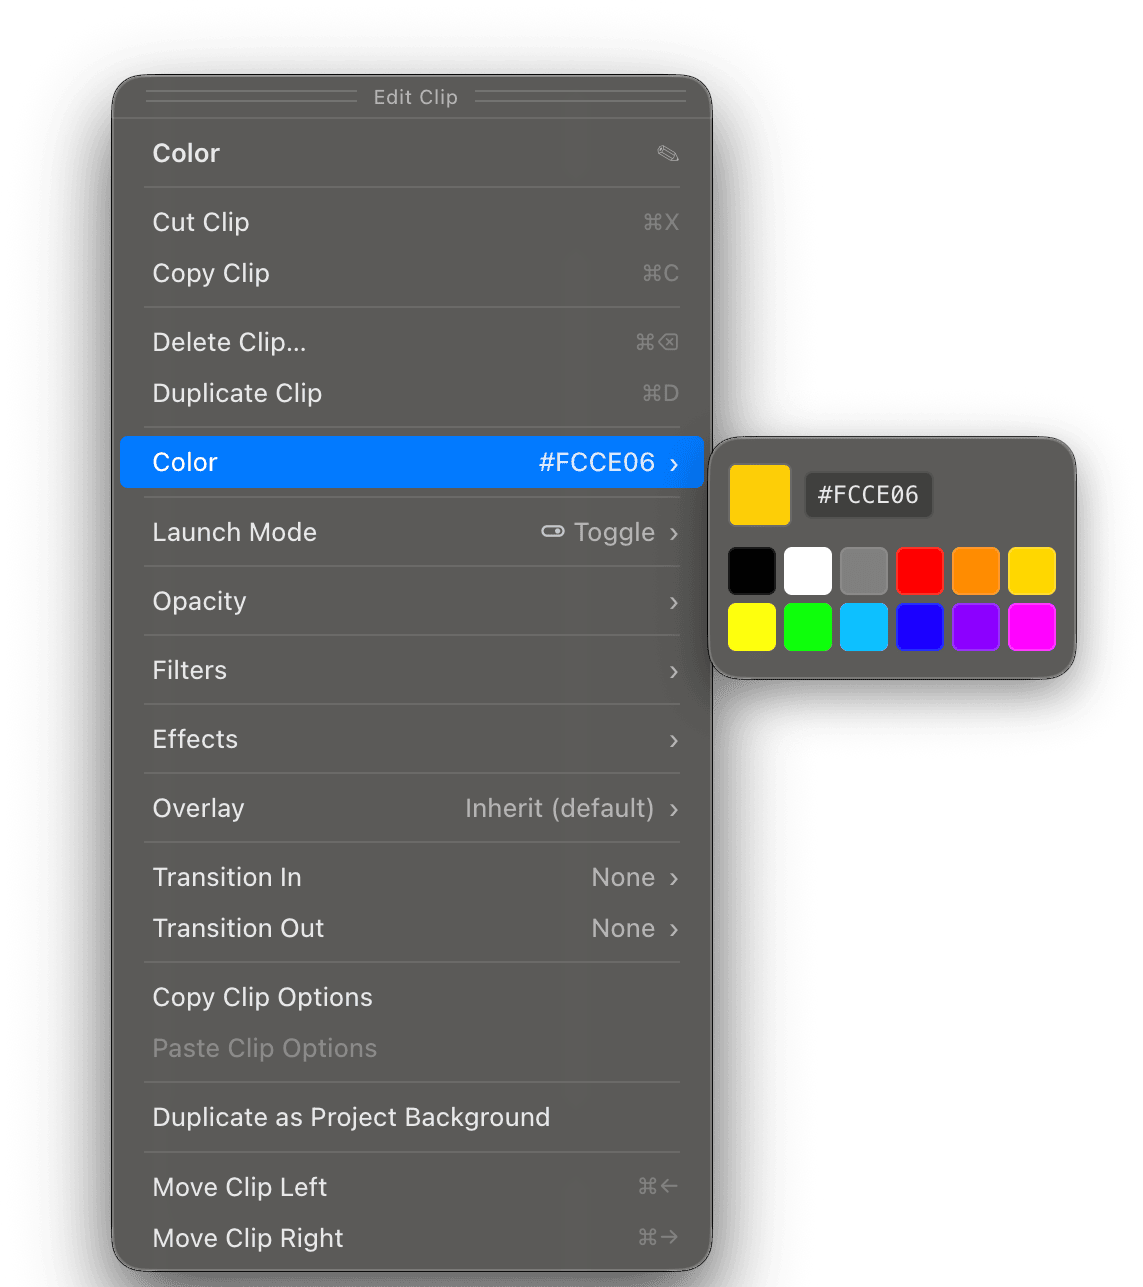
Color Clips earn their place well beyond blackouts:
- Blackouts. A black Color Clip is a clean cut to nothing between songs or sections.
- Backgrounds. A deep blue or a warm amber sets a tone without any footage.
- Canvases. Apply an Effect to a Color Clip and you get texture and motion out of nothing. A white Clip with a glitch or film-burn Effect holds up on stage.
A dark Color Clip with an audio-reactive Effect on it is a fast way to get a minimal, responsive look with no media files at all. See Effects.
Audio Clips
An Audio Clip plays a sound file, and it is a Clip like any other: it sits in a Song, it has a number key, it has a Launch Mode, and it takes Effects. A Song can hold as many as you like.
That makes it the piece a Song’s single attached backing track cannot be. Use one for a stinger you fire on cue, an intro bed you leave running, a sound effect, or a second track you drop in over the first.
To add one, choose Song > Add Audio Clip…, or right-click the Song and choose the same item. Pick as many files as you like and each becomes its own Clip, named after its file.
Attach to the Song, or make a Clip
Drop a single audio file on a Song and Visibox asks whether to attach it as the Song’s backing track or create an Audio Clip from it. See Attached track, or Audio Clip for the choice and what dropping several files at once does instead.
What the audience sees
An Audio Clip has no picture of its own, so it plays black by default. You have two ways to give it one, and they are alternatives rather than layers:
- A color. Pick one in the Clip Editor Panel and the Clip plays as that solid color.
- A Visualizer. Pick one and it draws live from the audio, exactly as a Visualizer Clip does. Choosing a Visualizer clears the color, and choosing a color clears the Visualizer.
Paired with a Visualizer, an Audio Clip gets the Fit Mode, Flip and Rotate rows that a picture needs. On its own it behaves like a Color Clip and does not.
In the Controller, an Audio Clip’s thumbnail shows the file’s waveform until you pair a Visualizer with it, at which point it shows the Visualizer instead.
What an Audio Clip cannot do
Everything that plays a Clip backwards needs a reversed copy of the media, and Visibox only makes those for video. So on an Audio Clip:
- Direction is not offered at all. Select an Audio Clip together with video Clips and the row disappears for the whole selection.
- End Action has no Bounce.
- Retrigger Action has no Reverse and no Scratch.
- Resume Action has no Sync to Song Position, which needs video frames to follow.
- Loop Crossfade is video only, for the same reason as Bounce.
Everything else is there: trim points, Speed, Launch Mode, Mute, Volume, Velocity Sensitivity, Filters, Effects, Overlay and Transitions.
Reacting to its own sound
Pair an Audio Clip with a Visualizer and an Audio Source row appears, with a value the other Clip types do not have: This Clip. It makes the Visualizer react to that Clip’s own sound rather than to everything Visibox is playing, so two Audio Clips running at once each drive their own picture.
It reads the Clip’s level after its Volume, so turning the Clip down calms the Visualizer with it. New Audio Clips start on This Clip. See Audio Source.
Arranging Clips
Drag a Clip thumbnail to a new position to reorder it. ⌘← and ⌘→ move the selected Clip left and right. You can also drag a Clip from one Song into another.
Clip tiles play on press, so dragging a tile from anywhere on its face would start it. Hover a tile in the Song list and a grip appears along its top edge; drag from the grip to move the Clip. Clips in the Preview Pane cannot be dragged while Trigger Clips on Press is on. See Launch Modes for the setting that controls this.
To duplicate a Clip, right-click it and choose Duplicate Clip, or press ⌘D. Duplicates can be dragged into other Songs. All duplicates of a Clip share one media file on disk, so they cost no extra space.
Cut, copy and paste
Clips can be cut and copied like any other content. Select one or more Clips and press ⌘X to cut or ⌘C to copy. A cut Clip stays where it is, outlined and dimmed, until you paste it somewhere.
Select the Song you want them in and press ⌘V to paste. The Edit menu names the item for what is on the clipboard, so it reads Paste Clip or Paste 3 Clips.
The same items are in the Song Editor Panel.
Selecting Multiple Clips
Multiple Clips can be selected the way files are selected in the Finder or File Explorer. Click outside a Clip and drag a rectangle around the ones you want. Selected Clips are outlined in blue.
- Hold ⇧ and drag again to add more Clips to the selection.
- Hold ⌥ and drag to remove Clips from it.
- Hold ⌘ (Mac) or ⌃ (Windows) and click a Clip to toggle it.

Edit > Select > All Clips (⌘A) takes everything. Edit > Select > Deselect All (⇧⌘A) clears the selection, and so does clicking outside any selected Clip in the Controller.
Setting options for several Clips at once
With multiple Clips selected you can drag, duplicate and delete them together, and you can edit any option they have in common. Select five video Clips and one change to End Action applies to all five.
Mix Clip types and the shared list gets shorter. Select a video Clip and an image Clip together and End Action is not offered, because an image has no end to reach.
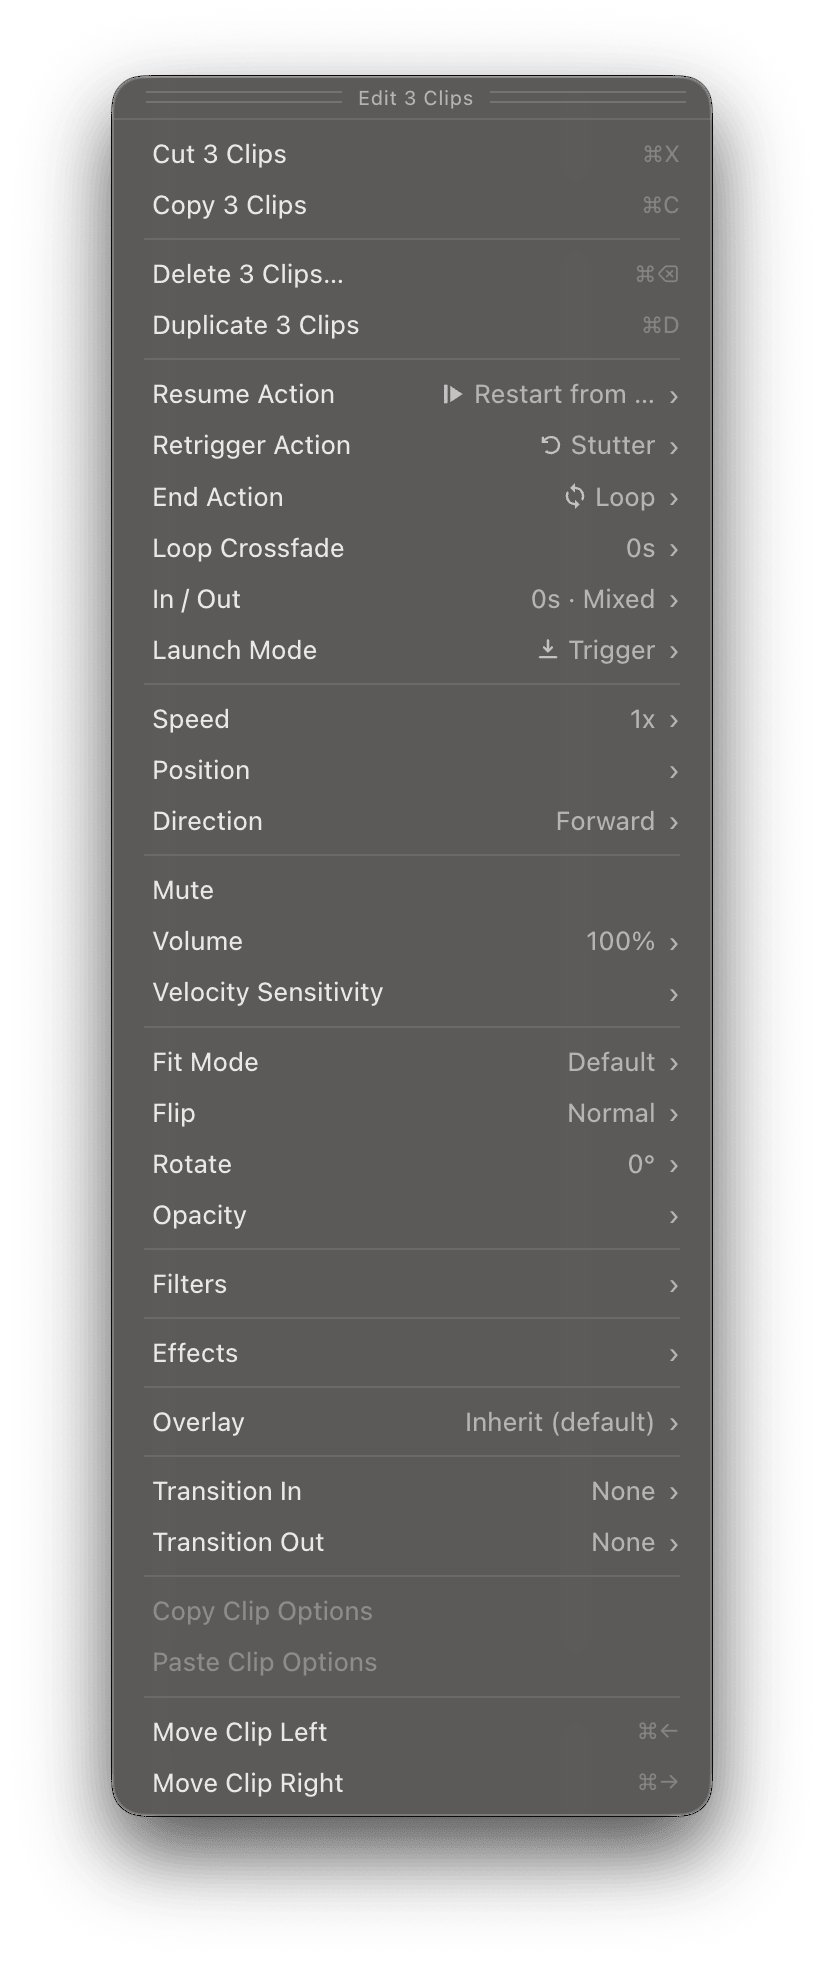
Copy Clip Options and Paste Clip Options do the same job in two steps. Copy the settings off one Clip you have dialed in, select as many Clips as you like, and paste. Only the settings travel; the media does not.
Copying Clips between Projects
Drag Clips from one Project window to another to copy them. Open both Projects, select the Clips you want, and drag them across. One Clip or a whole selection both work.
The Clips arrive with all of their settings, and their media files come with them, so a large transfer takes a moment.
The Background Clip
A Project can have a Background Clip: a Clip that plays underneath, showing whenever no other Clip is up. It can be a video, an image, a camera, a Visualizer or a color.
To promote a Clip you already have, right-click it and choose Duplicate as Project Background. See Working with Projects for the rest.
Clip audio
A video Clip with an audio track plays that audio when it plays, and an Audio Clip is nothing but audio. Right-click either and use Mute to silence it, or Volume to set its level against the rest of your material.
Clip volume and Song volume both go past 100%. The slider stops at 200%, and you can click the value and type a higher number when a Clip is much quieter than everything around it. This is per Clip and per Song, not the output volume.
When a Clip is making sound, a green level meter appears on the left edge of its thumbnail in the Controller. It tells you at a glance which Clip the audio is coming from, which matters when a Song has both a backing track and Clips with audio. See Audio Metering.
A Song’s backing track and every Clip playing sound are added together, each at its own volume. Nothing ducks anything else, so an Audio Clip fired over a running backing track plays on top of it.
Clips in the Preview Pane
When a Song is active, its Clips appear in the Preview Pane at the bottom of the Controller window. Each Clip carries a number in its top-left corner, which is the key that triggers it. Clips 1 through 9 are on the number keys, and a MIDI controller can be mapped to the same positions.
The Preview is a reference, not a timeline. Any Clip in it can be triggered at any time, in any order.
Drag the bar at the top of the Preview to make it taller or shorter, which helps when you are reading it from across a stage. Click the bar to hide the Preview entirely.
Seeking through Clips
Click a Clip’s progress bar in the Preview to jump to a point in it. This is how you find a spot in a long video without playing from the top.
Playback Timers
The Controller shows elapsed and remaining time on both Clip and Song progress bars, updating as they play.
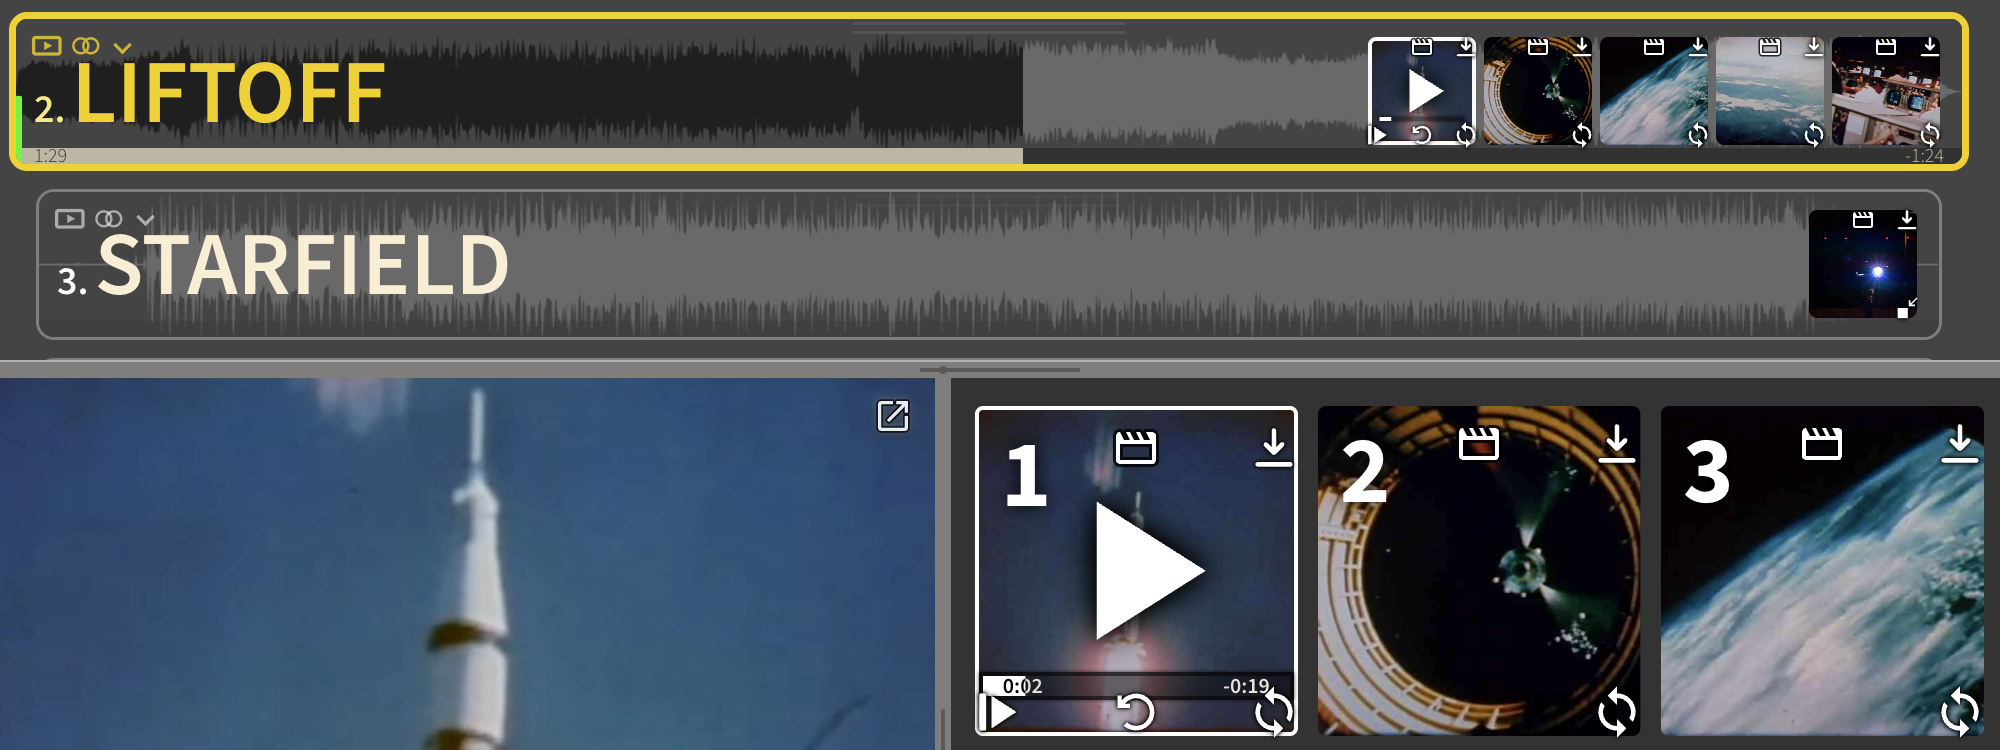
A glance tells you how long is left on a backing track or a video before you need to move.
Playback options
Everything a Clip does once it starts is set in its Clip Editor Panel, and covered on Clip Playback Options. Three of those settings decide most of a Clip’s character.
Clip end behaviors
End Action decides what happens when a Clip runs out. The default is Loop, so a Clip keeps playing until you move on. It can also stop, freeze on its last frame, start the next Clip, or move the Song along. An icon in the bottom-right corner of the thumbnail shows the current choice. See End Action.
Clip retriggering behaviors
Retrigger Action decides what a second press does to a Clip that is already playing. Restart is the default; Stutter jumps back a moment, and Do Nothing protects a Clip from an accidental press. See Retrigger Action.
Sync to Song Position
Sync to Song Position locks a Video Clip’s position to the Song’s audio track, so picture and track stay together however you cut around. It is one of the Resume Action choices. See Sync to Song Position.
Try it
Now that you can add and arrange Songs and Clips, take Visibox for a spin.
Download a fully built demo Project from inside the app: Help > Download/Open Demo Project…. Trigger the first Clip in the first Song and watch it play. The Output window is the easiest place to watch while you learn; if you cannot see it, choose Window > Output Window (⌘1).
Then start changing things. Reorder the Songs. Rename a few. Move Clips around and watch what their end behaviors do. Switch a Clip’s Fit Mode between Crop and Letterbox to see how Visibox fills the frame. Add a Clip of your own; any video or image you have will do.