Setting Up for Live Performance
You arrive at the venue, you have twenty minutes, and the projector belongs to someone else. This page is the show-day routine: get the picture on the screen, get it aimed and focused, and check the things that fail quietly.
For rigs with more than one screen, a video wall controller, NDI, a DeckLink card or a screen recording, see Output, Canvas, and Displays.
Basic hardware setup
Visibox is built to run on any current Mac or Windows laptop connected to almost any projector or screen. A faster machine with a solid-state drive loads and plays high-resolution media better. A bright projector (3000 lumens or more) at 720p or better holds up in a room with stage lighting.
Use two displays
You can run Visibox on one screen by putting the Output window into full screen, but that hides the Controller and leaves you flying blind: no song list, no preview, no clock. Two displays is the normal setup. The Controller stays on the laptop screen, and the Output goes to the projector.
Set which display carries which window in Settings > Canvas. See Output, Canvas, and Displays.
Common laptop video outputs
- USB-C (or Thunderbolt 3 and later)
- HDMI
- DisplayPort or Mini DisplayPort
- DVI
- VGA
- Thunderbolt 1 or 2
Common projector inputs
- HDMI
- VGA
- DVI
Adapters exist between HDMI and all of these, so HDMI is usually the common denominator. A new MacBook Air and an old VGA-only projector need a USB-C to HDMI adapter, a long HDMI cable, and an HDMI to VGA adapter. Adapters vary a lot in quality, so carry a spare and try another if the first one gives you nothing.
Going full screen
Choose Window > Present Full Screen (⌥⌘F) to put the Output window full screen on its display. Press ⎋ to come back out.
If the Output and the Controller have ended up on the wrong screens, Window > Swap Presentation Displays (⌥⌘X) trades them.
Use full screen rather than dragging the Output window’s corner out to cover the screen. A hand-resized window keeps its title bar and its edges, and both of those end up on the projector.
On macOS, full screen across two displays needs the “Displays have separate Spaces” setting turned on in System Settings > Mission Control. Visibox tells you if it is off and offers to fix it automatically. The change takes effect after you log out and back in, so check this before show day rather than at soundcheck.
Aiming and focusing with Calibration and Focus
You often have minutes to aim, focus, and calibrate a borrowed projector. Window > Calibration and Focus (⌘K) throws up a test image built for exactly that: fine lines for focus, saturated colors for color calibration, grayscale steps for contrast, and marked aspect ratios so you can tell what shape the screen actually is.
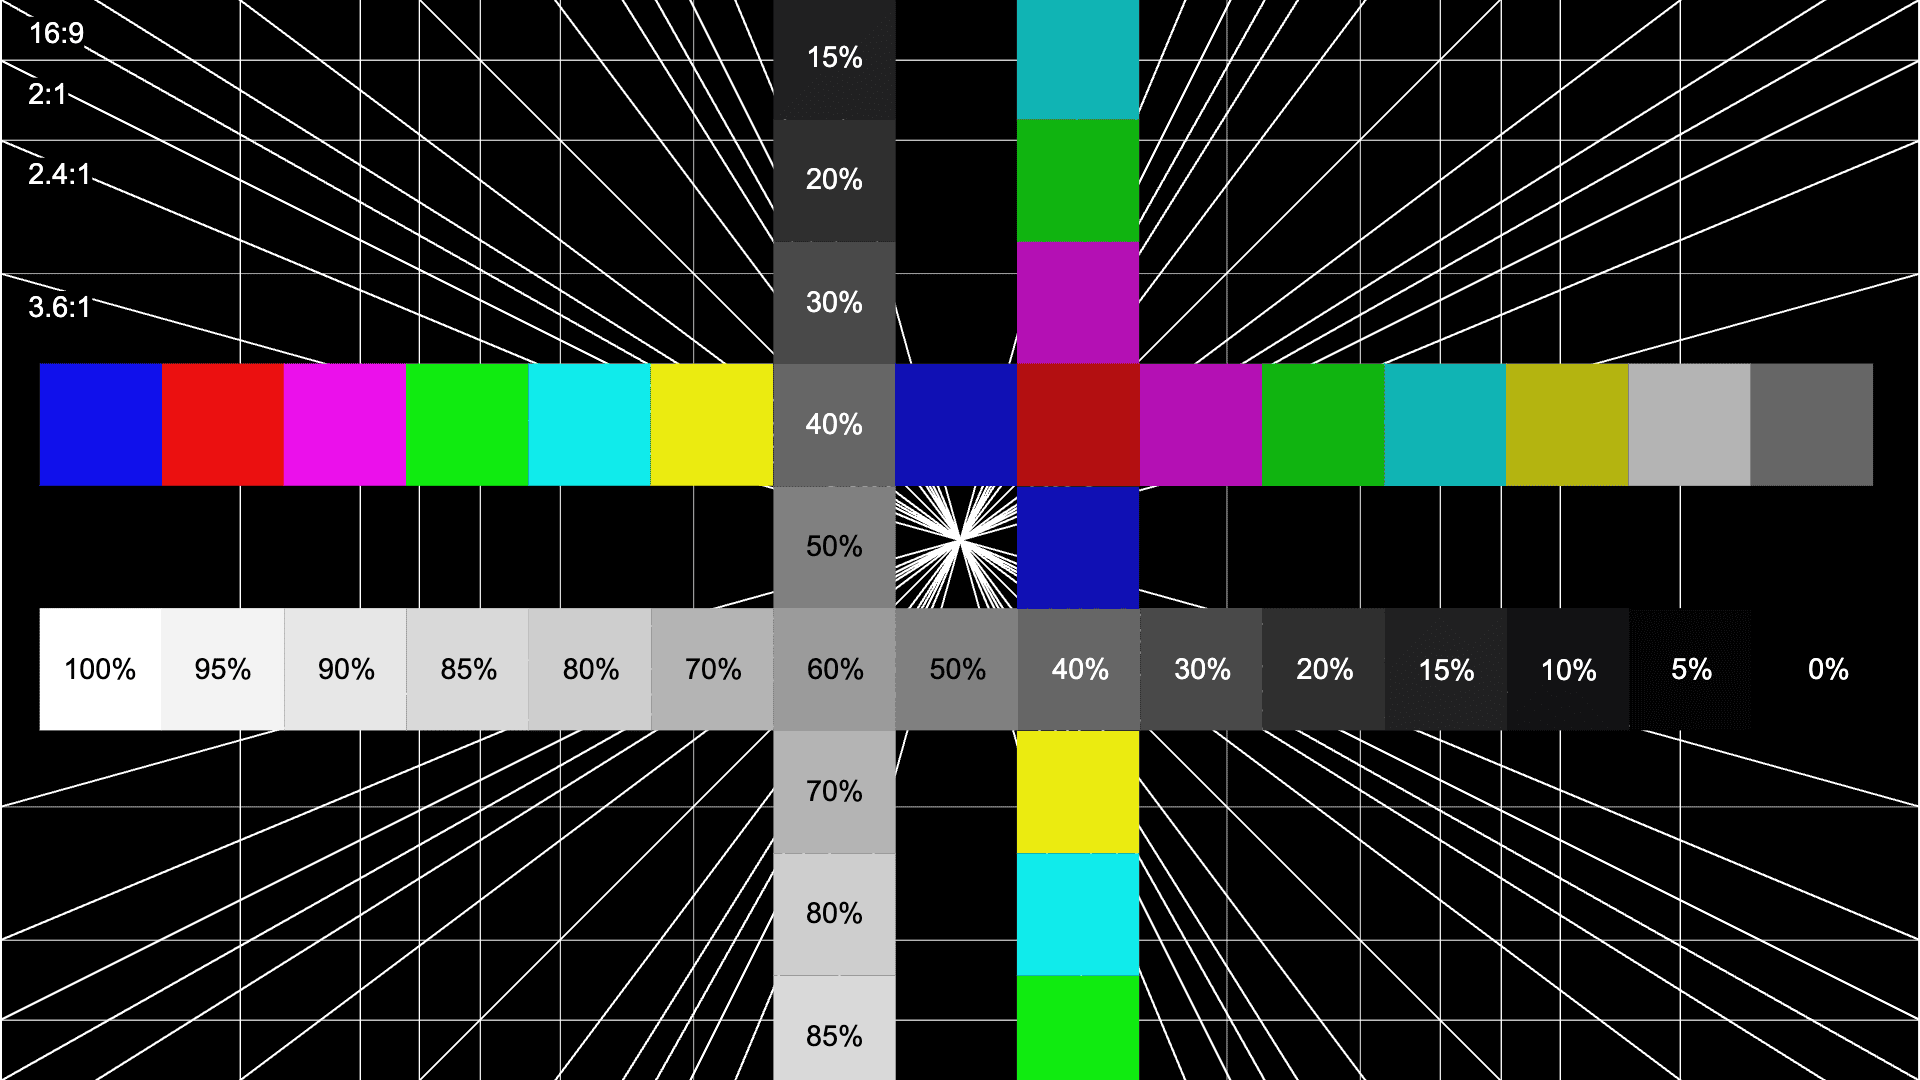
Press ⌘K again to take it away.
Fitting the picture to the screen
A borrowed projector may be ceiling mounted, behind the screen, or a different shape from your content. Visibox has a control for each of those, and they are all in Output Settings:
- Rotation for a projector hung upside down, or for a vertical banner screen.
- Flip for rear projection or a ceiling mount.
- Content Aspect Ratio to hold your content at a fixed shape no matter what shape the screen is.
- Round Corners to soften the output’s edges.
All four, and the switch that limits them to full screen only, are covered in Output Settings. That switch is on by default, so check the result full screen on the display you are correcting for, not in the windowed Output.
Resolution
A video’s resolution is how many pixels wide and high it is. Displays have resolutions too: a typical 720p projector is 1280 by 720.
A low-resolution video shown on a higher-resolution display gets scaled up and can look soft or blocky. A much higher-resolution video looks great but is harder to play back smoothly. Where you have the choice, pick media in the same ballpark as the screen you are playing it on.
When playback stutters on several displays
Several large screens can ask for more pixels per frame than a modest machine can render smoothly. Resolution Limit in Settings > Canvas caps the size of the picture Visibox renders, however many screens are attached, and gives the frame rate back at the cost of some sharpness.
It takes one click and it is reversible, so try it before you re-encode any media. Optimizing Visibox explains how it works and where it sits in the tuning order.
Soundcheck checklist
- Plug the laptop into AC power. Do not run a show on battery.
- Connect the projector and confirm you have a picture.
- Run Calibration and Focus (⌘K) and check the aim and focus.
- Put the Output into full screen (⌥⌘F) and confirm it landed on the right display.
- If a MIDI controller drives the show, trigger a few Clips and check that any indicator lights respond.
- If the Project uses sound, play a Clip with audio and confirm it reaches the desk and the monitors.