Clip Playback Options
Every Clip carries its own set of playback settings: where it starts, what it does when it reaches the end, how fast it runs, how it arrives on stage, and how it fills the frame. Set them once and they travel with the Clip.
Right-click a Clip thumbnail in the Controller to open its Clip Editor Panel, where all of these live. Select several Clips first and the panel edits every option they have in common at once.
Two shortcuts save a lot of clicking once you have one Clip dialed in. Copy Clip Options captures everything on the Clip except its media, and Paste Clip Options applies that set to the whole current selection. Both are in the Clip Editor Panel and in the Clip menu.
In and out points
A video Clip does not have to play the whole file. The In / Out row picks the section you want, and everything else about the Clip works from there: looping returns to the In Point, and the progress bar measures the trimmed section rather than the file.
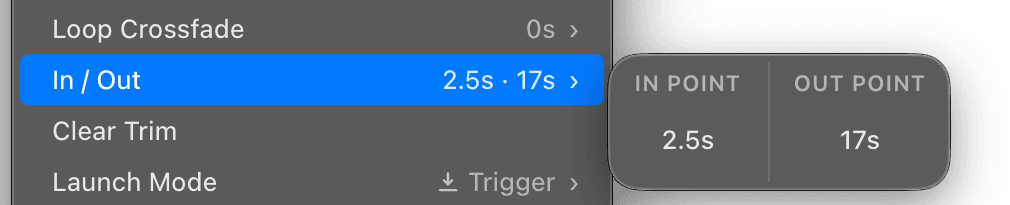
The row shows both times side by side. Open it and the panel holds an In Point field and an Out Point field: click a value to type an exact time. Leave a point alone and the Clip uses the natural edge of the file.
There is a faster way to set them while the Clip is playing. Let it run to the frame you want, then choose Set In Point at Playhead or Set Out Point at Playhead. Both rows appear only while the Clip is playing or paused, and only when a single Clip is selected. Clear Trim removes both points and returns the Clip to the full file.
Trimming is the quickest fix for a downloaded loop with a few dead frames at the head or a logo sting at the tail. Set the points, and the Clip behaves as if the file had been cut.
End Action
End Action decides what happens when the Clip reaches its out point. The default is Loop, so a Clip keeps playing until you move on.
An icon in the bottom-right corner of the thumbnail shows the current choice, in both the Song row and the Preview.
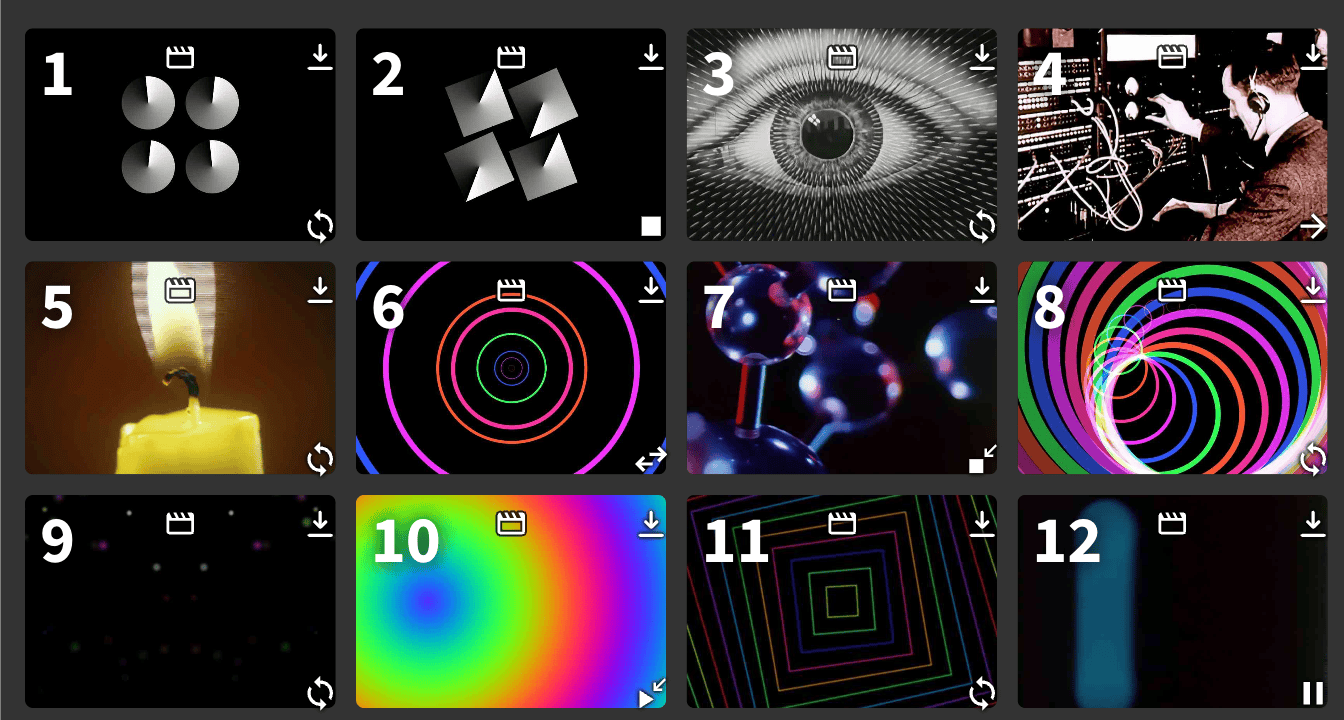
| Icon | Name | What it does |
|---|---|---|
| Loop (default) | The Clip starts over. | |
| Bounce | The Clip reverses direction at each end. | |
| Stop (One-Shot) | The Clip plays once and stops. The output returns to black or the Background Clip, and the audio stops. | |
| Freeze | The Clip holds on its last frame. | |
| Start Next Clip | The next Clip starts playing. | |
| Cue Next Song | The next Song is activated but does not start. | |
| Start Next Song | The next Song is activated and starts playing. |
Stop (One-Shot) is the End Action value: the Clip plays through once and stops on its own. Stop is a separate value in Retrigger Action, where it means a second press stops the Clip. The two are different settings with similar names.
Retrigger Action
Retriggering means triggering a Clip that is already playing. Retrigger Action decides what that second press does.
| Icon | Name | What it does |
|---|---|---|
| Restart (default) | The Clip plays from the beginning. | |
| Stutter | The Clip jumps back about a second. | |
| Scratch | The Clip shuttles back and forth at speed, like a record scratch. | |
| Reverse | The Clip reverses its current direction. | |
| / | Pause/Resume | The Clip pauses. The next press resumes from that point. |
| / | Pause/Restart | The Clip pauses. The next press restarts it. |
| Stop | The Clip stops and the output returns to black or the Background Clip. | |
| No icon. | Do Nothing | The press is ignored. Use this to protect a Clip from an accidental retrigger. |
Setting a Clip’s Launch Mode to Toggle overrides this: a second press always stops a Toggle Clip. The Clip Editor Panel grays the Retrigger Action row in that case and shows Stop as the value in effect.
Resume Action
The first time you play a Clip it starts at the beginning. Resume Action decides where it picks up after you have played something else and come back.
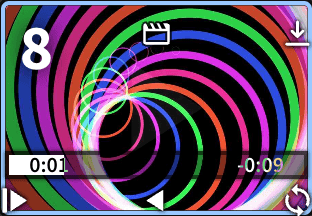
The choice shows as an icon in the lower-left corner of the Clip thumbnail, visible on hover or while the Clip is active.
| Icon | Name | What it does |
|---|---|---|
| Restart from Beginning (default) | The Clip plays from the start every time. | |
| Resume from Last Point | The Clip picks up where it left off. Good for a long video you keep cutting away from. | |
| Sync to Song Position | The Clip stays locked to the Song’s audio timeline. See Sync to Song Position. |
Sync to Song Position
Sync to Song Position keeps a video Clip’s position matched to the Song’s audio track at all times. Seek the Song audio to 1:30 and the video jumps to 1:30 with it.

While a Clip is synced:
- The video tracks the Song audio the whole way through.
- You can cut away to an unsynced Clip, such as a camera, and when you cut back the synced Clip is at the position it would have reached had it never stopped.
- Some options are restricted, because the Song is deciding the position rather than the Clip. Retrigger Action, End Action and Direction each fall back to the value that sync allows, and Loop Crossfade is grayed.
- A clock icon () stays on the thumbnail so you can spot synced Clips at a glance, whether or not you are hovering.
This is what you want for music videos, timed sequences, and anything where the picture has to stay with the track.
Loop Crossfade
Most loops do not wrap cleanly. The last frame and the first frame rarely match, so a looping Clip shows a visible jump every time it comes around.
Loop Crossfade blends the end of the loop into its beginning. Set a duration in seconds and Visibox prepares a version of the Clip whose tail dissolves into its head, so the wrap point stops reading as a cut. A second or two is usually enough.
The row appears only when End Action is set to Loop, since a Clip that stops or freezes has no loop point to hide. It is shown but grayed for a Clip playing backward or set to Sync to Song Position, because neither of those can use the prepared version.
Visibox prepares the crossfaded version in the background. Until it is ready, the Clip loops with a hard cut as it always did, then picks up the crossfade on its own.
Speed
Speed changes how fast a video Clip plays without touching the file. The slider runs from 0.0625x to 4x, with snap points at 0.25x, 0.5x, 1x, 2x and 4x. Click the value to type an exact number, including one past the ends of the slider.
Double-click the slider to return the Clip to 1x.
Direction
Direction sets a video Clip to play Forward or Backward. A Clip playing backward is muted, and it cannot use a Loop Crossfade.
The row is not offered for an Audio Clip, and selecting one alongside video Clips takes the row away for the whole selection.
Fit Mode
Most video for a live show is there to give the stage texture, not to be watched as a film. So by default Visibox crops Clips to fill the Output edge to edge, and you can drop in footage of any shape without editing it first.
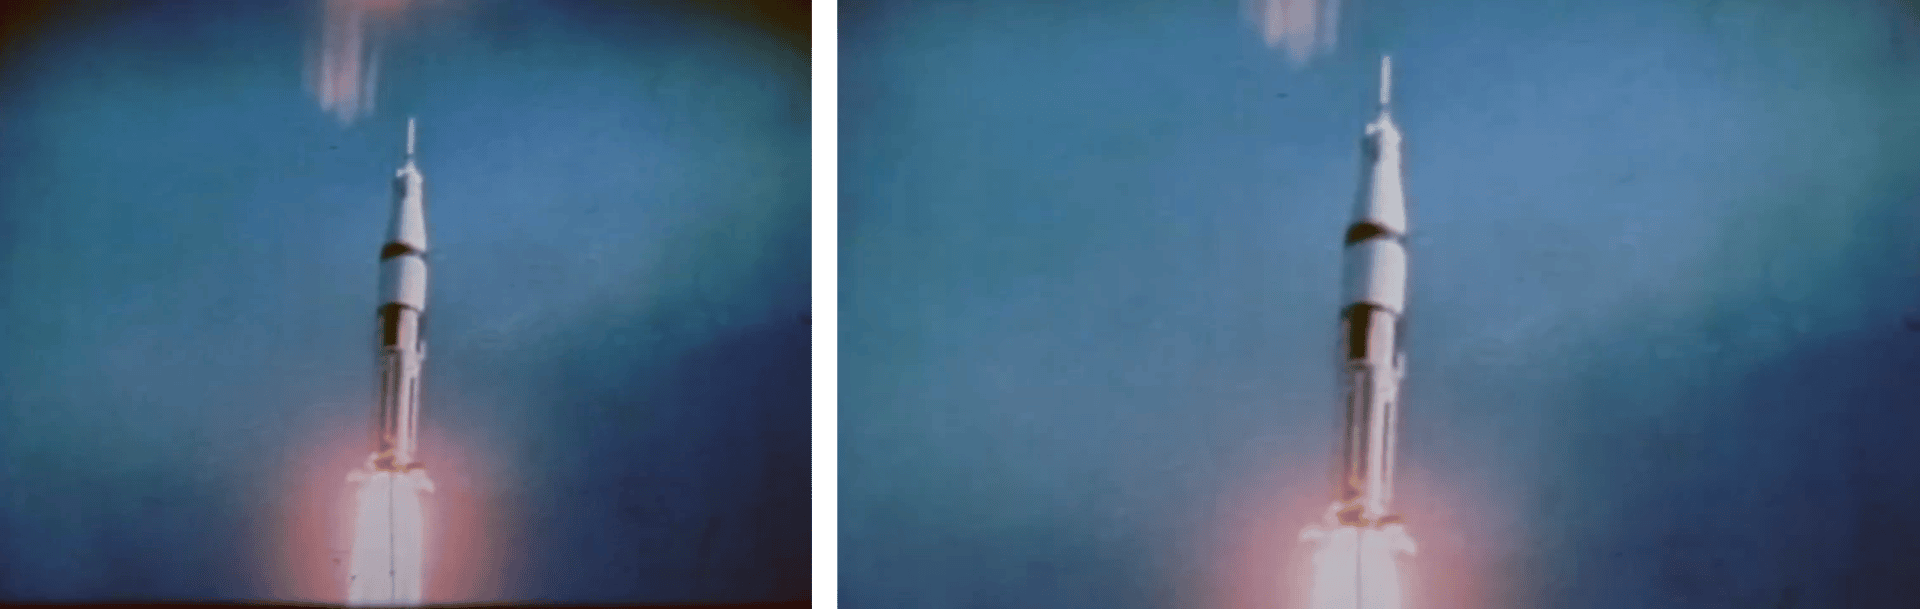
Fit Mode overrides that per Clip:
- Default uses the Project’s own Fit Mode, set in the Project Settings window (⇧⌘,).
- Crop fills the Output edge to edge and cuts off whatever does not fit.
- Letterbox shows the whole Clip, adding black bars to keep its shape.
- Stretch fills the Output with no bars, which distorts the shape.
Fit Mode belongs to Clips that carry an image: video, image and camera Clips. Visualizer and Color Clips render to the frame rather than into it, so they have no Fit Mode.

Projectors, televisions and monitors rarely match the shape of your footage, so leave Letterbox off unless a Clip has something near its edges you cannot afford to lose. Most background video survives a little cropping, and Crop means you never spend a soundcheck working out why the house projector is 16:10 instead of 16:9.
Rotate and Flip
Rotate turns a Clip to any angle. Drag the slider anywhere from 0 to 360 degrees, or click the value and type an exact one. The slider snaps at 0, 90, 180 and 270 so the square turns are easy to hit, and any angle between them is available for a tilted or diagonal look.
Flip mirrors the Clip: Normal, Horizontal, Vertical or Both.
Both settings are live, so the original file is untouched. Neither applies to a Color Clip, since turning or mirroring a solid color changes nothing to see.
Transitions
Transition In and Transition Out decide how a Clip arrives on stage and how it leaves. Each one carries a shape and a duration together.
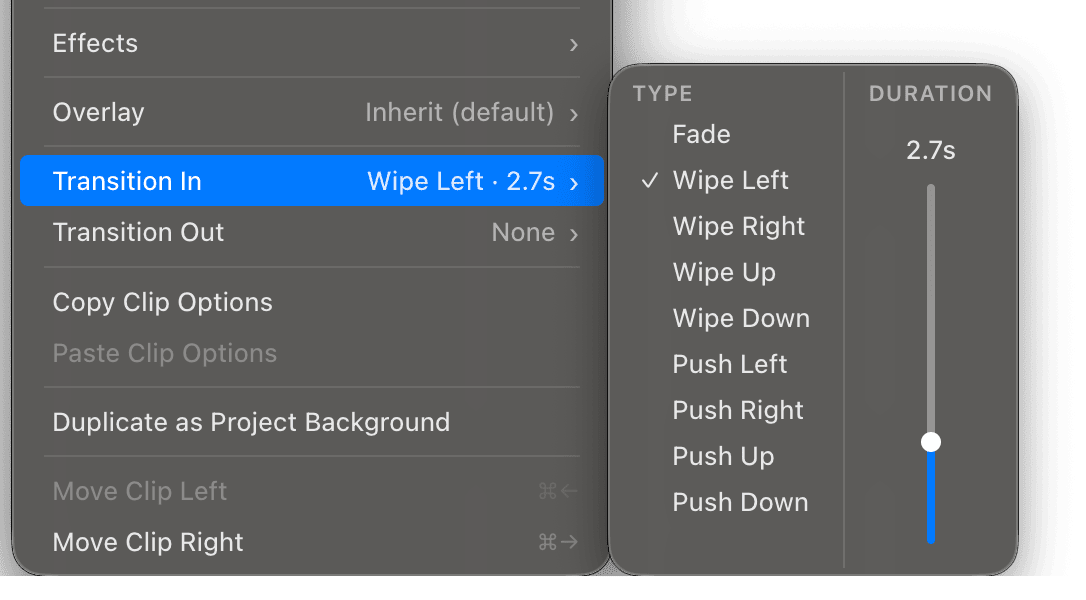
The shapes are:
- Fade dissolves between the two Clips.
- Wipe Up, Wipe Down, Wipe Left and Wipe Right reveal the incoming Clip across the frame, with the outgoing Clip staying put underneath.
- Push Up, Push Down, Push Left and Push Right slide the incoming Clip in and carry the outgoing one off with it.
Wipes and pushes are named for the direction the incoming Clip travels toward. Push Left brings the new Clip in from the right and carries the old one off to the left.
A duration of zero is a cut, whatever shape is selected, and the row reads None.
Transition In also sets the crossfade time between the previous Clip and this one, and it takes precedence over the previous Clip’s Transition Out. If the Project has a Background Clip, a Clip transitions to and from that rather than to black.
For a video Clip with an audio track, the audio fades with the picture.
A Clip with a Transition Out keeps playing for the length of that transition after you stop it.
Velocity Sensitivity
Velocity Sensitivity lets a MIDI controller’s playing dynamics reach the Clip’s audio. Hit the pad harder and the Clip’s audio plays louder.
The slider is per Clip, video and Audio Clips only, and set to 0 by default, so nothing changes until you ask for it. At 0 the Clip always plays at its Volume setting. Turn it up and a MIDI note’s velocity scales that level, with the full response at 100%.
Volume stays the Clip’s level in your mix. Velocity Sensitivity decides how far a single hit is allowed to move it.
Triggers that carry no velocity of their own play the Clip at full level whatever the setting: the mouse, the keyboard, a Stream Deck, OSC, the API and the Song Timeline all behave this way.
With Retrigger Action set to Stutter, Scratch, Reverse or Do Nothing, velocity applies only to the first hit. Every hit after that keeps the level the first one set, for as long as the Clip keeps playing. The Clip Editor Panel captions the slider First hit only when that is the case.
Where else these settings appear
- The Clip Editor Panel is the full set, with sliders and pickers.
- The Clip menu handles the Clip itself: duplicating, moving, deleting, and copying and pasting its options. Edit Clip… opens the panel where the settings above are set.
- Launch Modes covers what the trigger gesture itself does, which is a separate decision from any of the above.
- Poly Mode covers what happens when several Clips in one Song play at the same time.