The Visibox Interface
Opening a Visibox Project gives you two windows: the Controller window and the Output window. Here is what is in each.
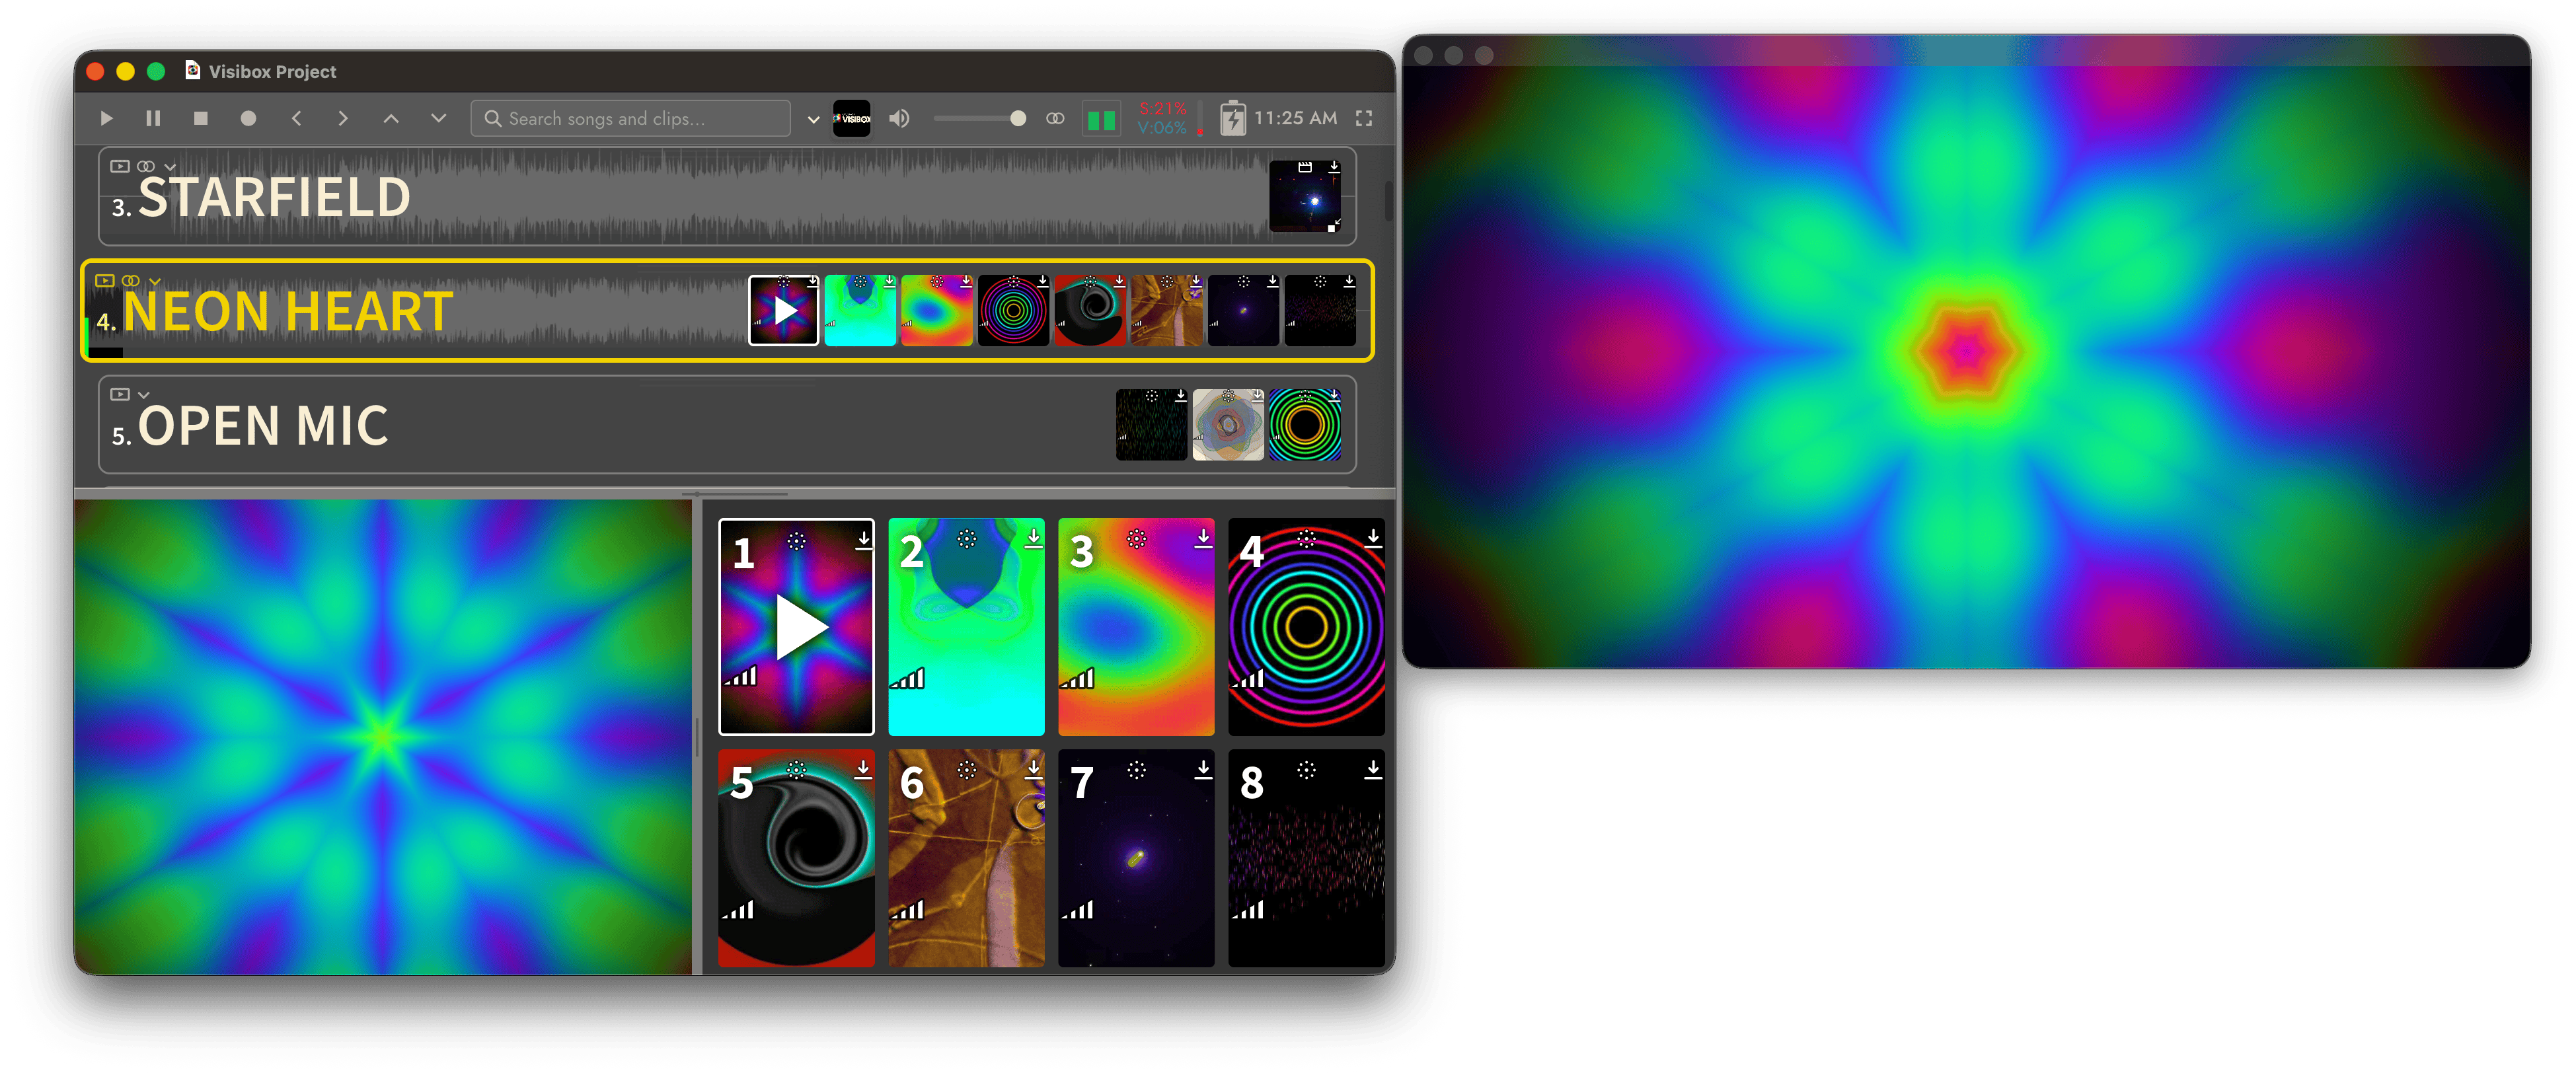
Controller window
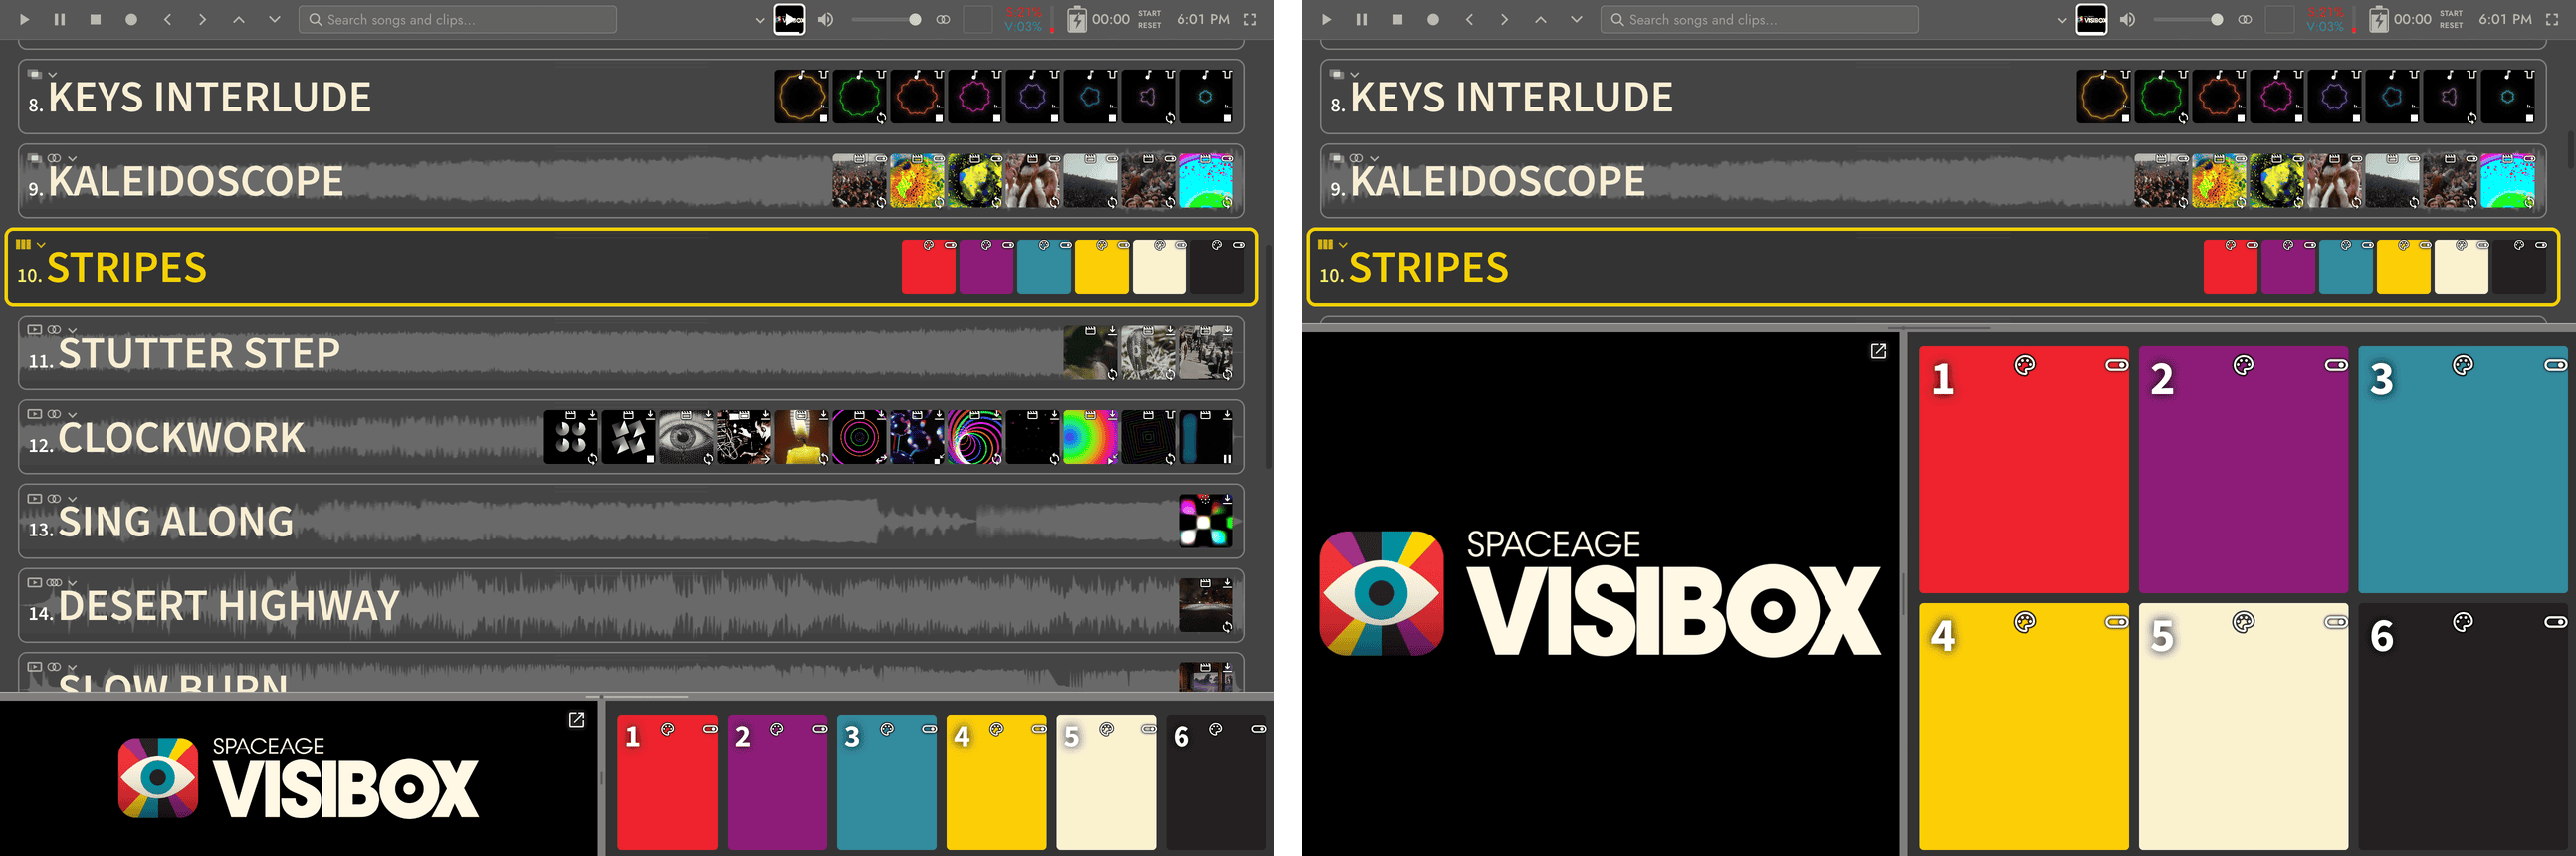
The Controller window is where you build a Project and where you drive it during a show. It holds the Songs and Clips, shows what is playing, and gives you everything you need to change what happens next. In performance it usually sits on a display only you can see.
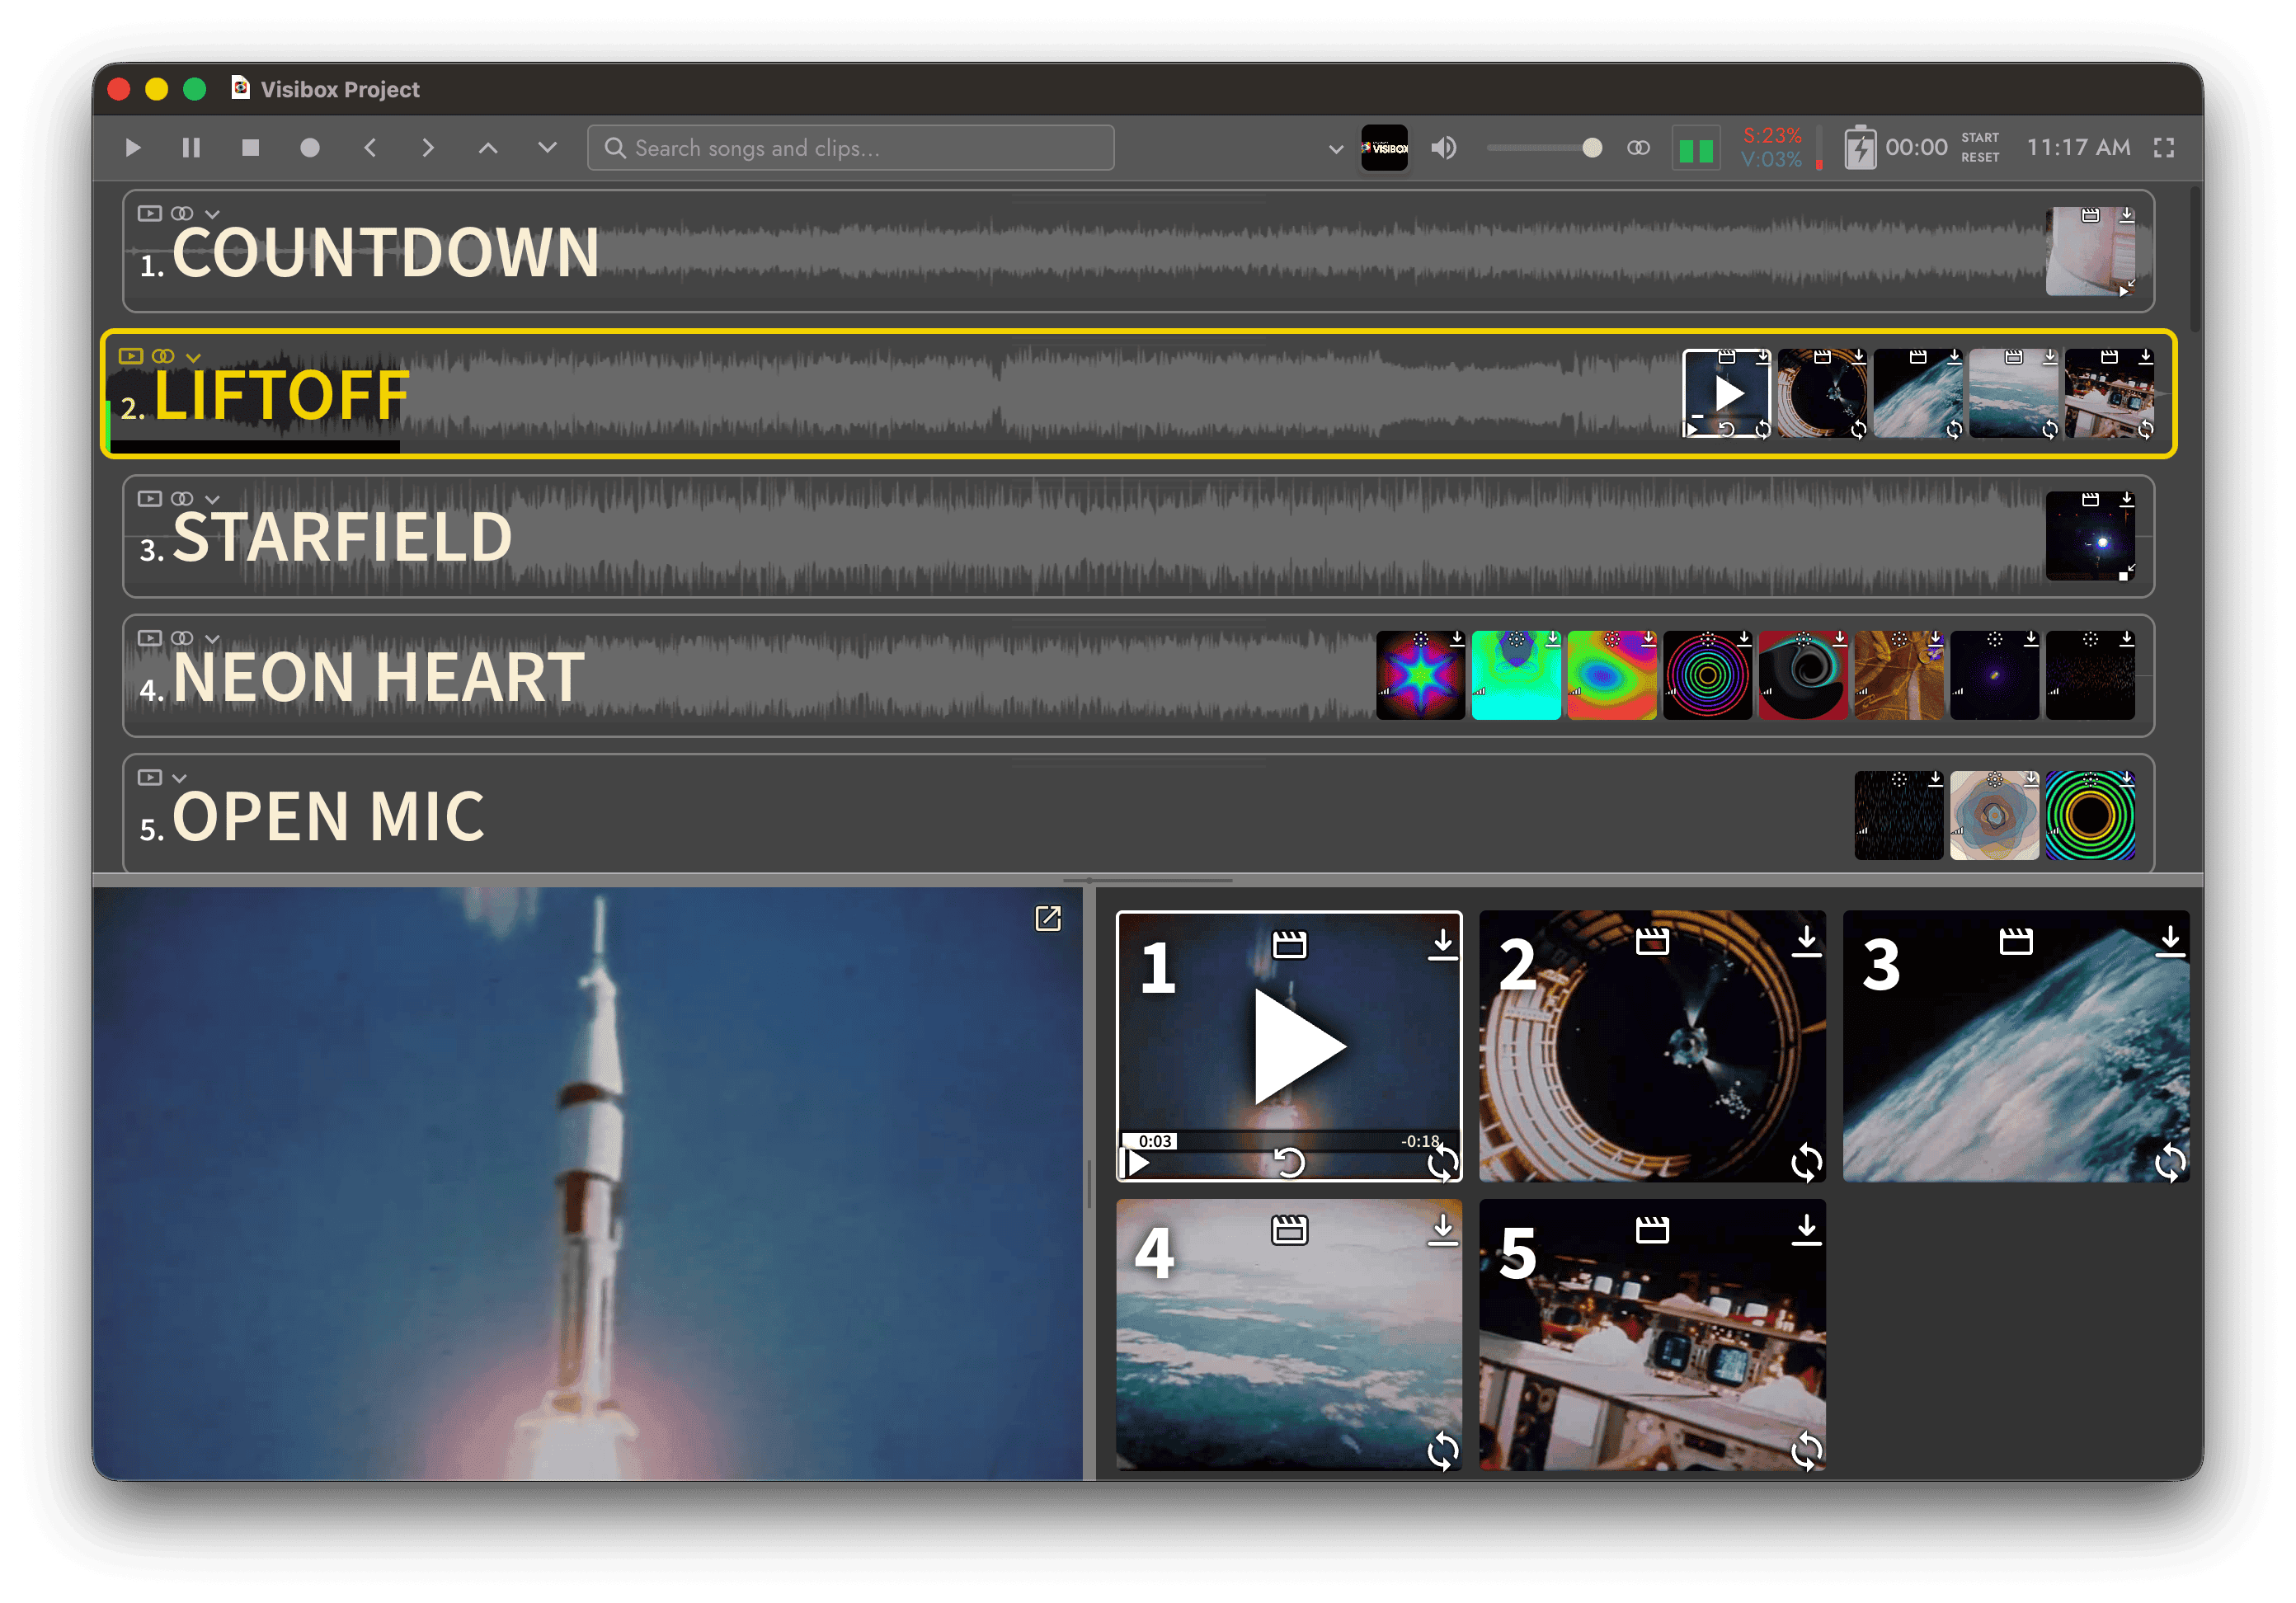
- Find
- Project Name
- Transport Controls
- Song Badges
- Active Song
- Song List
- Preview Pane
- Volume Controls
- Audio Level Meter
- Battery Level
- Time
- Full Screen Toggle
- Playing Clip
- Audio Waveform
- Clip Thumbnails
- Output Preview
- Preview Resize Handle
- Clip Preview
The Control Bar
The Control Bar runs along the top of the Controller window. It gives you transport controls, readouts, and the information worth having in front of you during a show. Turn it on and off in Settings > General.

The left of the Control Bar holds the transport buttons:
| Button | Description |
|---|---|
| Play | Starts the first Clip in the selected Song. |
| Pause | Pauses the playing Clip. |
| Stop | Stops the playing Clip. |
| Record | Records the Output to a file. See Record. |
| Previous Clip | Plays the previous Clip in the selected Song. |
| Next Clip | Plays the next Clip in the selected Song. |
| Previous Song | Cues the previous Song in the Project. |
| Next Song | Cues the next Song in the Project. |
Record
The Record button sits with the transport controls and captures what the Output is showing.
Click it and a small menu offers two ways to start:
- Start Recording Now begins immediately.
- Start Recording on Next Trigger arms the recording and waits, so the file starts on the first frame of the next Clip you fire rather than on a black stage.
The button lights up while recording is in play: pulsing red once it is armed and waiting, steady red once it is recording. While it records the icon becomes a stop square, and clicking it ends the recording. Clicking an armed button cancels the arming instead of starting anything. Both commands also sit in the Play menu, and Start Recording Now carries the ⌥⌘R shortcut.
Find
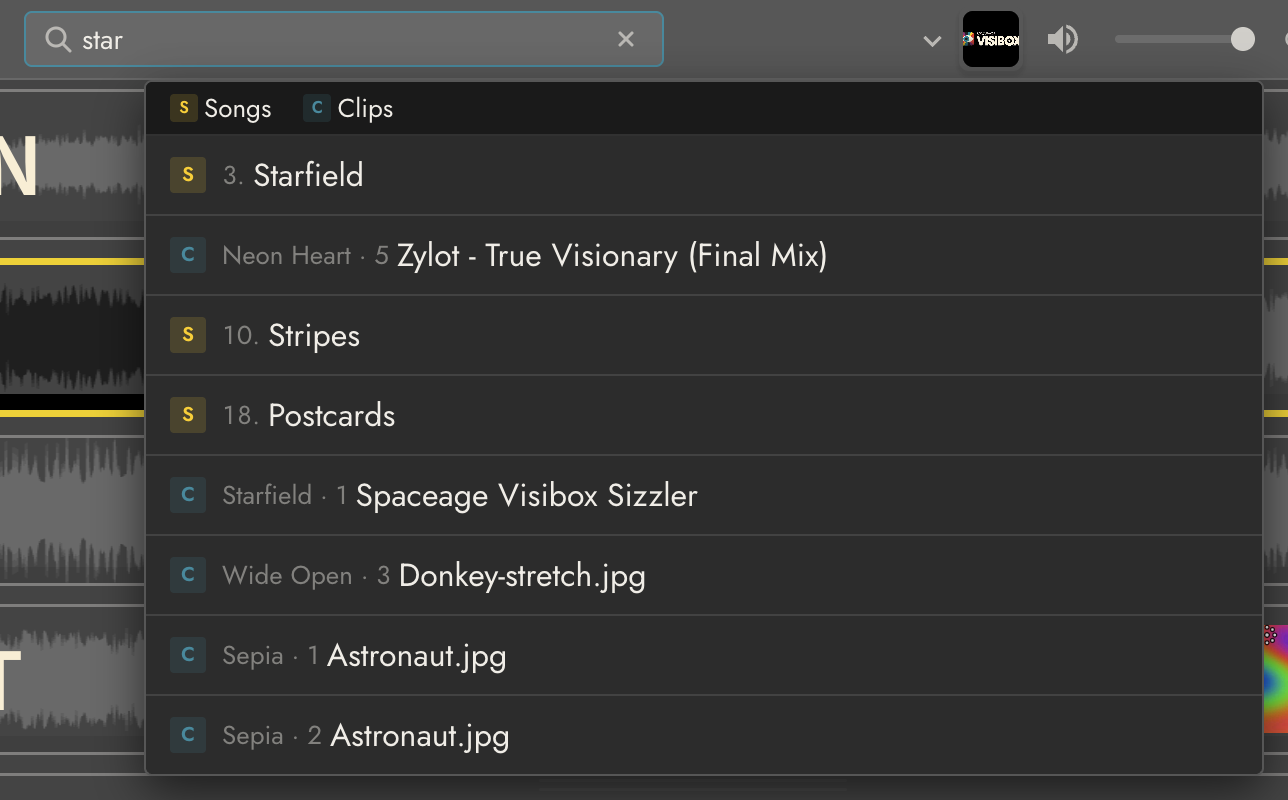
The Find box in the center of the Control Bar jumps you to any Song or Clip in the Project. Type a few letters of a Song title or a Clip filename and matches appear as you type. On a large Project it is the fastest way to get somewhere.
To use Find:
- Click in the Find box, or press ⌘F to focus it.
- Start typing. Results appear as you go.
- Use the Up and Down arrow keys to move between results.
- Use the Left and Right arrow keys to choose an action for the selected result.
- Press Enter to run the selected action, or click an action button directly.
Each result carries action buttons on the right:
For Songs:
| Button | Description |
|---|---|
| Activate | Makes this the active Song. This stops the playing Clip by default; hold Shift to keep it playing. |
| Trigger | Activates the Song and plays its first Clip. |
| Show | Scrolls the Song into view and highlights it. |
For Clips:
| Button | Description |
|---|---|
| Trigger | Activates the Clip’s Song and plays the Clip. |
| Show | Scrolls the Clip into view and highlights it. |
Two buttons sit at the top of the list: Songs and Clips. Each one turns its own category off. Turn off Clips and the list shows Songs only. Turn off Songs and it shows Clips only. You cannot turn both off. Visibox remembers the choice.
Find matches loosely, so you do not need the exact name. Typing “intro” finds “Introduction Video”, “Intro Music”, and anything else with those letters in it.
The right of the Control Bar holds readouts and controls.
| Control | Description |
|---|---|
| Project menu | A small chevron beside the Background Clip. Click it to open the Edit Project panel. |
| Background Clip | Shows whether the Project has a Background Clip, with a thumbnail and playing status. Click to add, remove, or change it. |
| Master Volume | Sets the audio level of Visibox. |
| Imaging | Click to switch the audio between stereo, mono, and multichannel. |
| Audio Level | A meter for the audio playing in Visibox. |
| Resource Meter | CPU use for the system and for Visibox. Hover for the detail. |
| Stopwatch | Click to start, stop, and reset the timer. |
| Time | The current time of day. Click to adjust the readout. |
| Battery Level | Battery level and charging status. The Control Bar changes color on battery and flashes when power is low. |
| Panic Button | Full screen only. Reloads every window if something goes wrong. |
| Swap Presentation Displays | Full screen only. Click to trade the Controller and Output displays. |
| Full Screen Button | Enters and leaves full screen. |
Tooltips
Hovering an element in the Controller window brings up a tooltip. Clips report their filename, dimensions, duration, frame rate, bitrate, file size, codecs, media type, and Launch Mode. Control Bar elements describe themselves and show live figures, such as current CPU use on the Resource Meter. Tooltips appear immediately, so you can sweep across several elements in a row.
The Song list
The Song list is the body of the window: the Songs in your Project, each with its Clips, in the order you will play them. Drag Songs and Clips to reorder them, and drag a box across the grid to select several at once.
If the Project has more than one running order saved, the Song list shows the one that is active. Choose a different one from Project > Setlists, or open Manage Setlists… from the same submenu to build and edit them.
Song badges
Each Song row starts with a small cluster of marks.
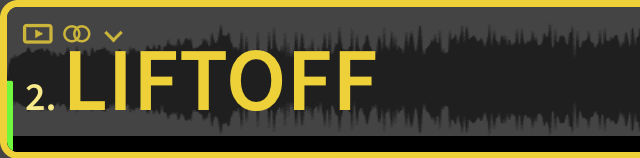
- The Poly Mode mark shows how this Song shares the stage when several Clips play at once. Every Song has one, including a Song set to Mono, which plays one Clip at a time. Hover it and the tooltip names the mode and what it does.
- The audio mark appears on Songs with attached audio and shows whether that audio is mono, stereo, or multichannel.
- The chevron opens the Song’s editor panel, the same one you get by right-clicking the row.
Launch Mode indicators
Each Clip tile carries a small Launch Mode indicator showing what pressing and releasing that Clip does: start it, hold it, or toggle it. The indicator shows the mode that is actually in effect, which is not always the one stored on the Clip. A Clip left on the default plays as Trigger in a Mono Song but as Toggle in a Song whose Poly Mode lets Clips co-play, and the indicator reflects that rather than the setting.
Hovering the tile spells the mode out in the tooltip.
The Preview Pane
The bottom of the Controller window holds the Preview Pane, split into the Output Preview and the Clip Preview. Drag the handle at the top of the pane to resize it. To turn the pane off, double-click the handle or drag it all the way down.
The Output Preview
This shows what the Output is currently displaying. When the Output is on a screen behind you, this is how you see what the audience sees without turning around.
If the Output window is closed or hidden, a button appears in the corner of the Output Preview to open it. It disappears once the window is open.
The Clip Preview
This is a closer look at the Clips in the active Song. It is not a timeline: any of these Clips can be fired at any time. The numbers on the thumbnails are the keys that trigger them, and the icons show what happens when a Clip ends or is retriggered (covered in Clip End Behaviors and Clip Retrigger Behaviors).
Clicking the progress bar on a playing video Clip scrubs through it.
The Edit Project panel
Right-clicking the empty background of the Song list opens the Edit Project panel, which holds the settings that apply to the Project as a whole. The Project menu chevron in the Control Bar, to the left of the Background Clip, opens the same panel with a click.
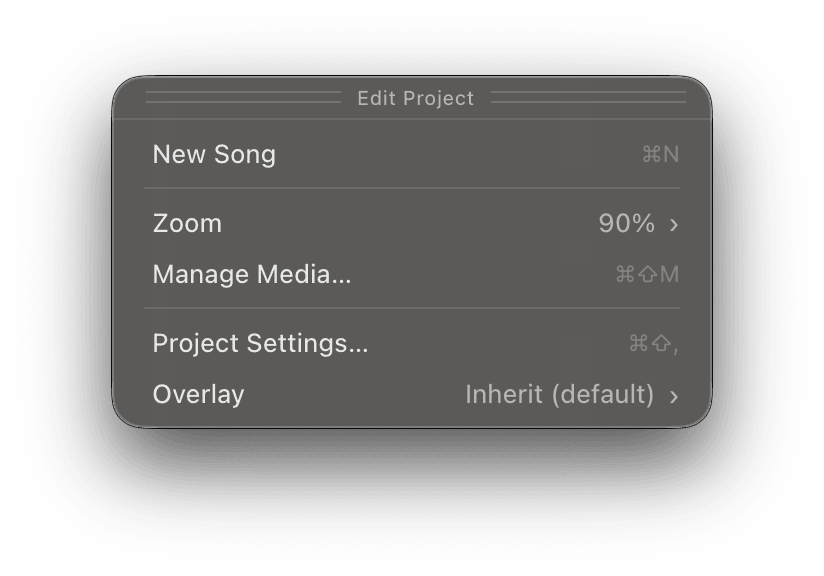
| Row | Description |
|---|---|
| New Song | Adds an empty Song to the Project. ⌘N |
| Zoom | A slider that scales the Song list. The value reads out as a percentage and snaps to 100%. |
| Manage Media… | Opens and closes the Media window, where you review and optimize the Project’s media. ⇧⌘M |
| Project Settings… | Opens the Project Settings window. ⇧⌘, |
| Overlay | Assigns an Overlay to the whole Project. Songs and Clips inherit it unless they set their own. |
Output window
The Output window shows what Visibox is playing. It is the destination you get without setting anything up, and while you build a Project it is the easiest way to watch your work beside the Controller.
It is one destination of several. Visibox paints a single picture, the output canvas, and hands slices of it to whatever you have switched on: a projector, a second projector, a video wall, an NDI stream, a DeckLink card, Syphon or Spout, and a recording. The Output window takes the same picture they all take. See Output, Canvas, and Displays for the rest of them.
While you are working you can resize the window to whatever suits you. The size of the window is only the size of the window, and does not change the picture Visibox renders. In performance the Output usually goes full screen on its own display rather than staying in this window, and it takes the shape of that display. What you see now may not be the shape you get then.
The Output window is black when nothing is playing, so it is easy to miss when you first open a Project.
You can shape the Output to suit the room. Flip or rotate it for rear projection, a ceiling mount, or a vertical screen. Control cropping with Fit Mode and aspect ratio. Spread it across several screens for a video wall. Those settings live in the Settings window.
With the Output Preview showing in the Controller, you may not want the Output window open while you edit. Close it and reopen it later from the Window menu, from the keyboard shortcut, or from the button in the corner of the Output Preview.