Overlays
An Overlay is an image that sits above everything the Output shows. A band logo in a corner all night, a lower third naming the act, a sponsor mark for one Song. Clips, Visualizers, cameras and the background all play underneath it.
This is not the Media Overlay panel in Manage Media. That panel is for reviewing and optimizing the files in a Project. Overlays are graphics that appear on the Output.
Opening the Overlays Editor
Choose Visibox > Overlays… to open the Overlays Editor.
You can also get there from any Overlay row in a popup menu by choosing Edit Overlays… at the bottom of its list.
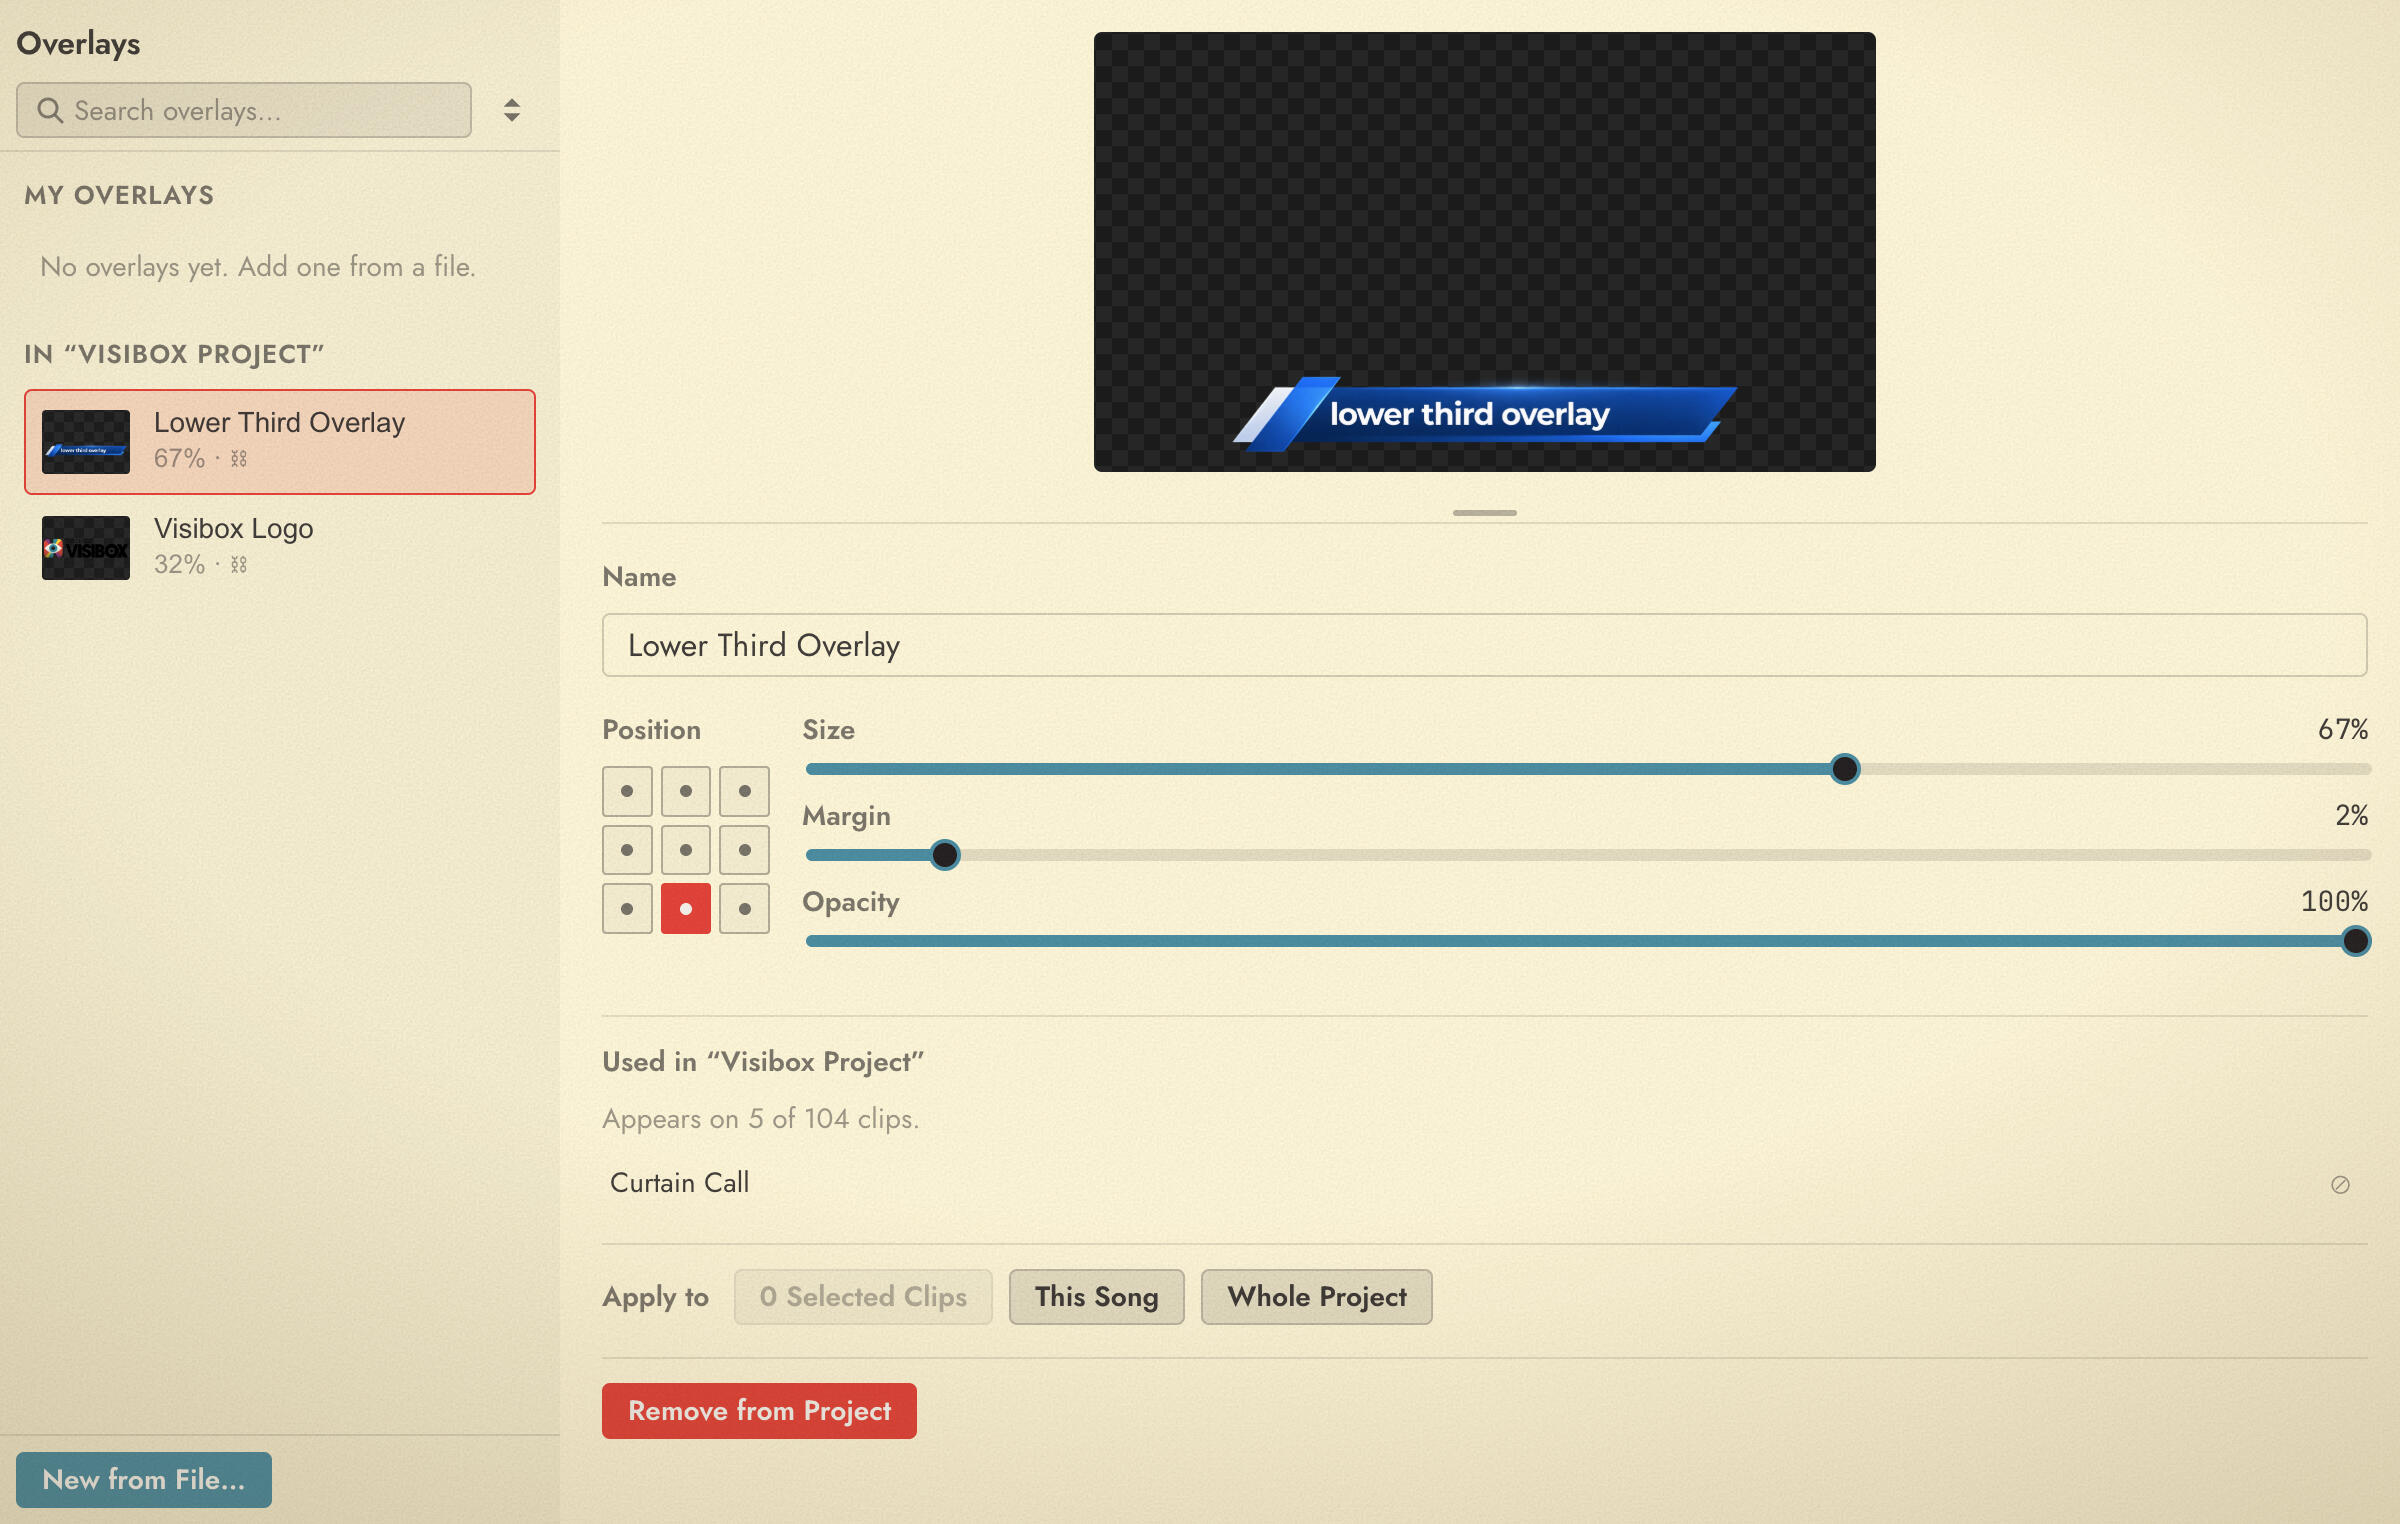
Adding an Overlay
Drag one or more image files onto the editor window, or click New from File… and pick an image.
The left side of the window holds two lists. My Overlays is your own library, which follows you between Projects. In This Project holds the Overlays this Project actually contains. Applying a library Overlay to a Project copies its image into the Project folder, so the Project travels with its graphics.
Both lists can be searched and sorted by name or by size.
Placing an Overlay
Select an Overlay to edit it. The preview above the controls is framed at the shape your Output is set to, so what you position against is what the audience gets.
| Control | What it does |
|---|---|
| Name | What the Overlay is called in the library and in every Overlay menu. |
| Position | A three by three grid of anchor points: the corners, the edge centers, and the middle. |
| Size | Overlay width as a percentage of the Output width, from 1% to 100%. Height follows the image’s own shape. |
| Margin | Distance from the anchored edges, as a percentage of the Output’s shorter side. Up to 50%. |
| Opacity | How solid the Overlay is, from invisible to fully opaque. |
Because size and margin are percentages rather than pixels, an Overlay keeps its proportions when the Output resolution changes. A logo set up on a 1080p rehearsal screen lands in the same place on a 4K wall.
Layout belongs to the Overlay itself, not to the Clip it appears over. Change the margin once and every place that Overlay is used moves with it.
Assigning an Overlay
Overlays are assigned at three levels, each with its own Overlay row:
- Project in the Project menu, for something that should be up all night.
- Song in the Song Editor Panel, for a lower third that belongs to one number.
- Clip in the Clip Editor Panel, for a mark tied to one piece of media.
The fastest way to assign the current selection is the Apply to bar at the bottom of the Overlays Editor, which offers the selected Clips, the current Song, or the whole Project.
Each Overlay row offers Inherit, None, and your Overlay library. The row reports what it currently resolves to, so an inheriting Song reads as “Inherit (Tour Logo, from Project)” rather than a bare “Inherit”.
How the levels stack
The three levels add up rather than replace each other. A Project logo and a Song lower third both appear.
- Inherit is the default. The level passes through whatever the levels above it produced.
- Choosing Overlays at a level adds them on top of what was inherited.
- None suppresses everything inherited so far. A Song set to None hides the Project logo for that Song, and a Clip set to None hides both.
Up to eight Overlays can be stacked at each level. They paint in order, so an Overlay added lower in the hierarchy sits in front of one added higher up.
Removing an Overlay
The button at the bottom of the editor changes with what is selected. On a Project Overlay it reads Remove from Project and takes the Overlay out of this Project, leaving your library untouched. On a library Overlay it reads Delete Overlay and takes it out of the library.
Adding, editing and deleting a library Overlay can all be taken back. Press ⌘Z while the editor is showing, or use Edit > Undo, and the Edit menu names the step: Undo Add Overlay, Undo Update Overlay and Undo Remove Overlay. A deleted Overlay keeps its image until then, and Visibox clears out images no Overlay uses the next time it starts.
The usage panel above that button lists every Clip, Song and Project the selected Overlay appears in, so you can see what a removal costs before you make it. Song and Clip entries can be revealed in the Controller, and any entry can be unassigned on the spot.
When an image goes missing
Overlay images live in the Project folder like any other media. If a file is moved or deleted, Visibox says which Overlay lost its image and keeps the entry so the layout survives. Add the image again to restore it.