Canvas Settings
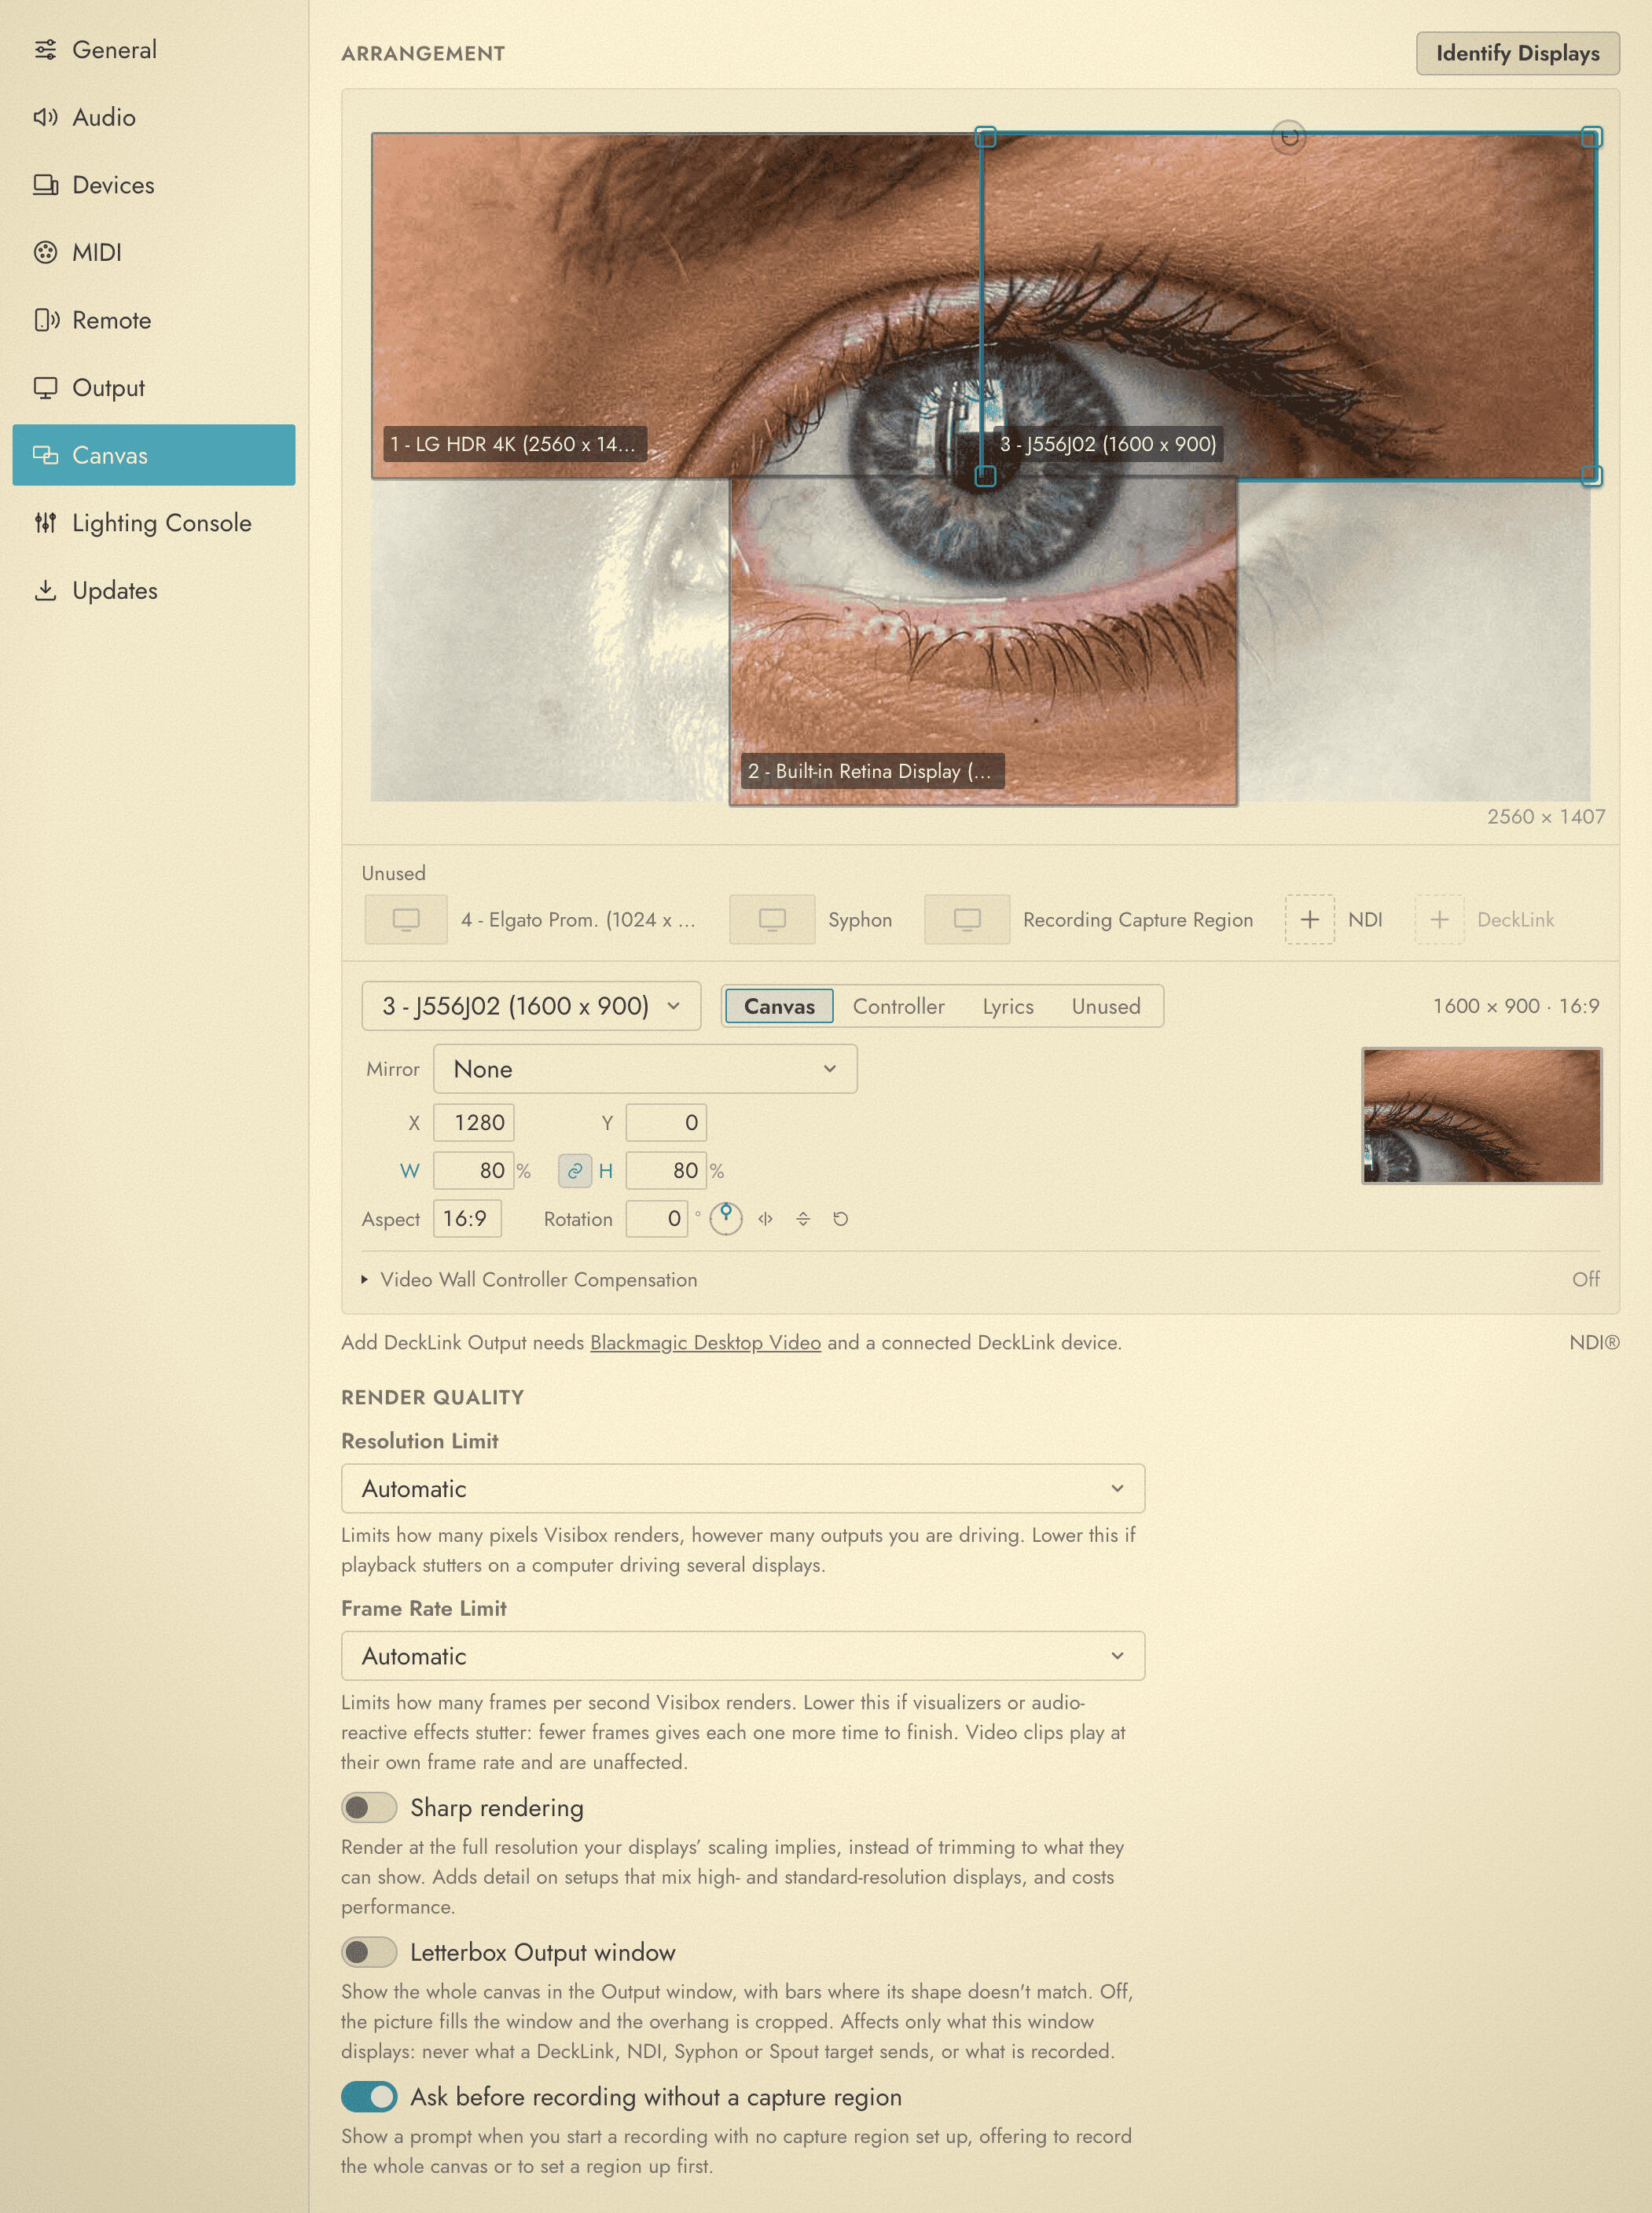
The Canvas tab is the map of where your output goes. Every screen, network stream, capture card and screen recording that takes a piece of the picture is arranged here.
Open it from Settings > Canvas, or from Window > Arrange Displays…, which opens the same tab. The three separate Output Display, Controller Display and Identify Displays rows that used to sit in the Window menu are all replaced by this one tab.
For what the arrangement means and how the pieces fit together, see Output, Canvas, and Displays.
The Arrangement
The arrangement is a scale map of your output. Each rectangle on it is one destination, and the part of the picture that rectangle covers is what that destination carries. Sample content is drawn across it so you can see how the picture divides between them.
Anything not currently carrying output waits in the tray beside it, grouped under Controller, Lyrics, and Unused.
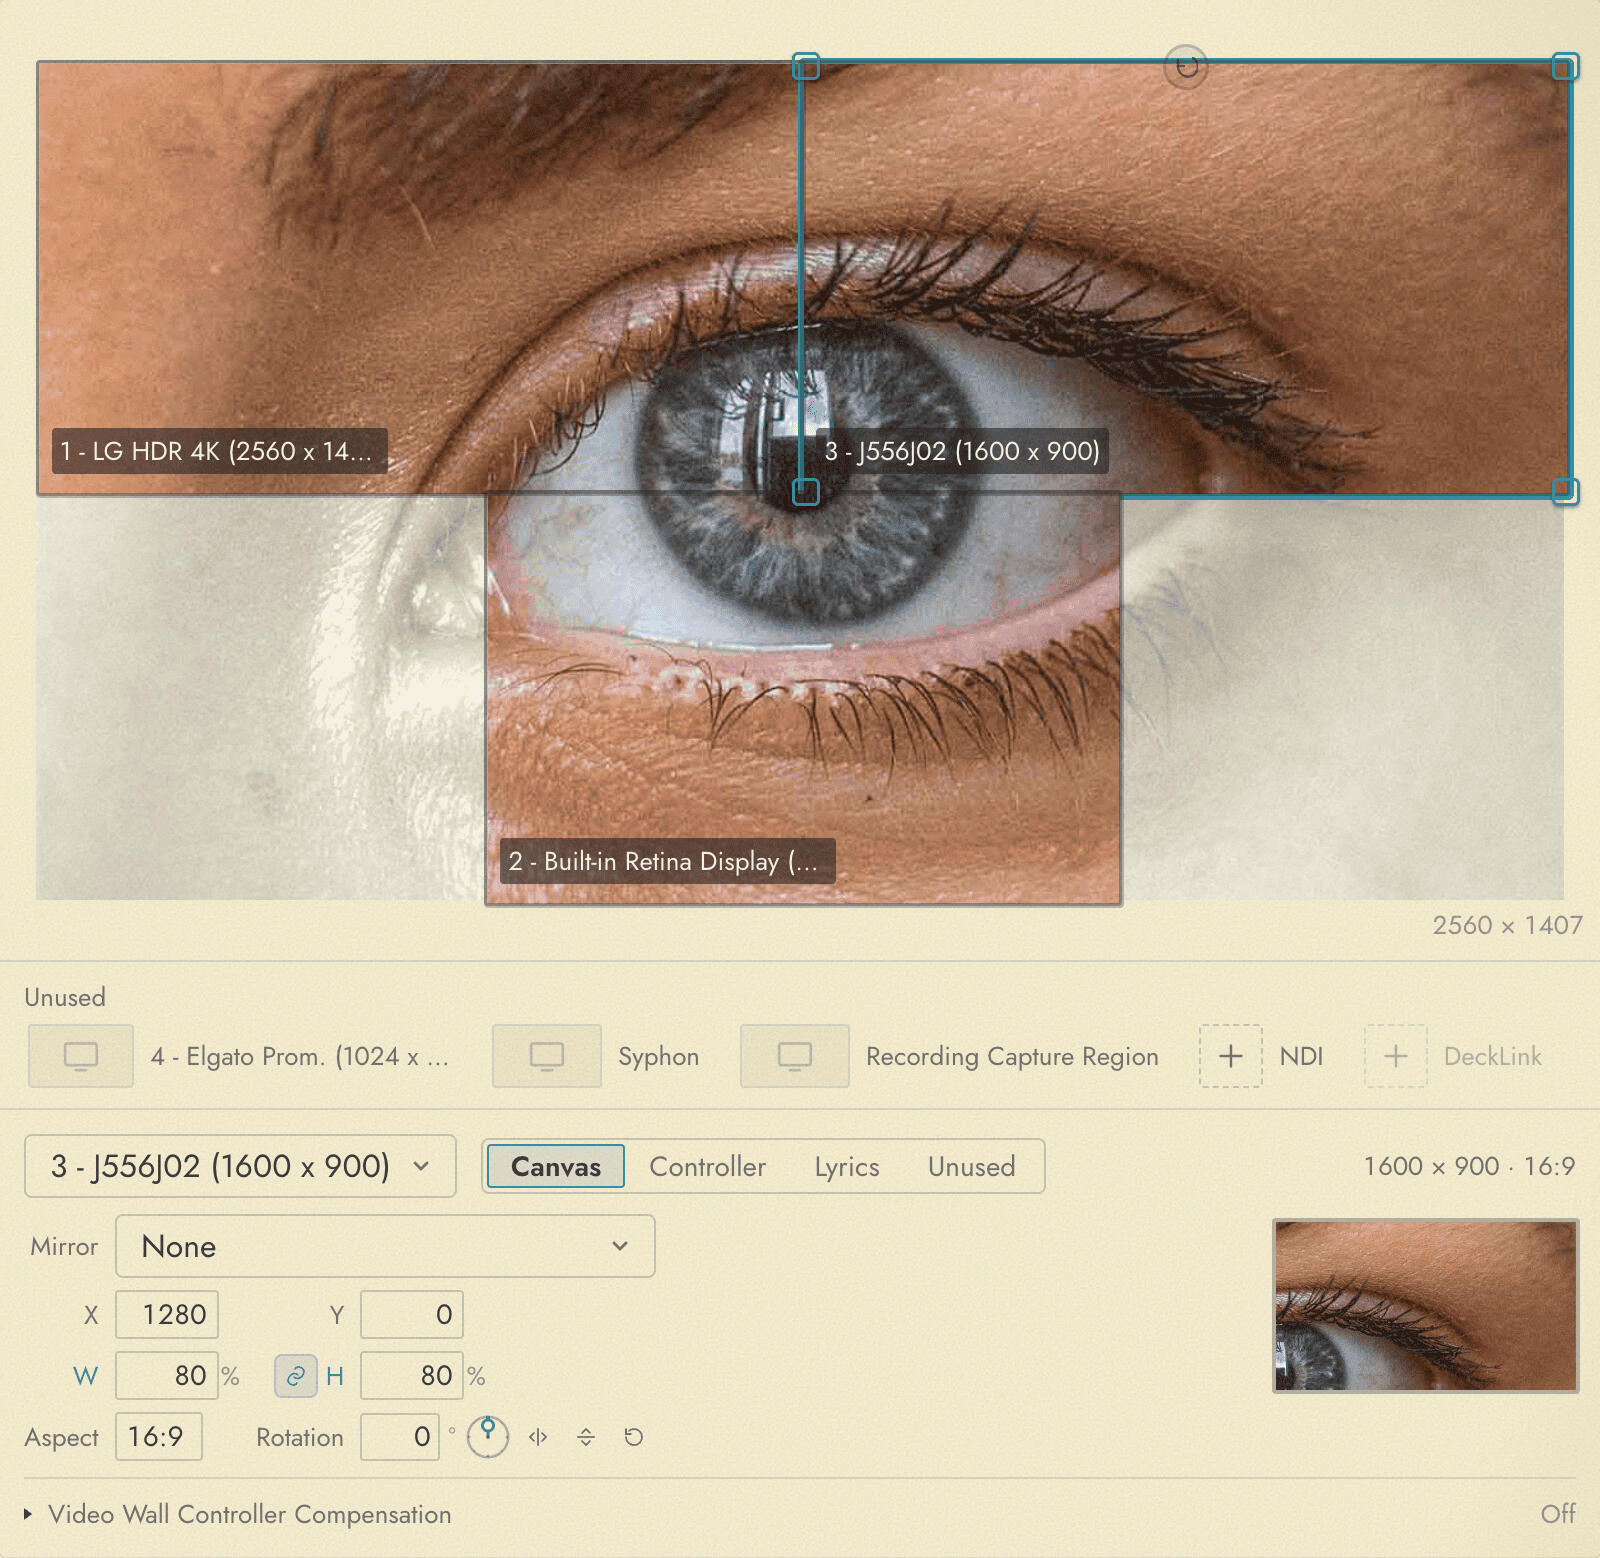
- To turn a display on, drag it out of the Unused tray and drop it on the canvas, or select it and set its Role to Canvas.
- To move a destination, drag its rectangle. The output follows as you drag.
- To inspect or edit one, click it. The Transform panel fills in with its settings.
Smaller rectangles stack on top of larger ones, so a laptop screen sitting inside a projector’s rectangle stays clickable.
Roles
A display does one job at a time, chosen from the Role control at the top of the Transform panel:
| Role | What the display does |
|---|---|
| Canvas | Carries a piece of the output. The display takes a rectangle on the canvas. |
| Controller | Shows the Controller window. The display leaves the canvas. |
| Lyrics | Shows the Lyrics window. The display leaves the canvas. |
| Unused | Shows nothing from Visibox, and waits in the Unused tray. |
One display can be the Controller and one can be the Lyrics display. Choosing a new role releases the old one, so making a display the Controller takes it off the canvas, and making it Unused hands the Controller window back to wherever it was.
NDI, DeckLink, Syphon, Spout, and the recording region are not screens and cannot show a window, so they offer Canvas and Unused only.
The Transform panel
With nothing selected the panel reads “Select a display to inspect”. Select a rectangle and you get:
| Control | What it does |
|---|---|
| Role | What this display is used for. See Roles. |
| Display | Which physical screen this rectangle drives, and its native resolution. |
| Position | X and Y on the canvas, for placing a rectangle exactly rather than by eye. |
| Width and Height | The size of the rectangle, with its resulting aspect shown alongside. |
| Scale | Scales the rectangle. Link width and height keeps its shape while you do. |
| Rotation | Rotates the rectangle on the canvas. You can also drag the rotate handle on the rectangle itself. |
| Flip H and Flip V | Flips what this destination shows, horizontally, vertically, or both. |
| Mirror | What this destination shows instead of its own slice of the canvas. See Mirror. |
| Mirror Fit | How mirrored content fills this destination when the shapes differ. |
| Reset | Returns the selection to an unscaled, unrotated, unflipped rectangle. |
Corner handles scale the rectangle from the opposite corner, so the corner you are not dragging stays put.
The recording region gets two controls of its own, described under the recording region.
Mirror
By default every destination shows its own slice of the canvas: whatever the arranger has placed under its rectangle. Mirror changes that. Set it to:
- None, the default. The destination shows what its rectangle covers.
- Full canvas, and the destination shows the whole arrangement, scaled to fit its frame. A Syphon or Spout share set this way hands the whole show to the receiving application rather than one screen’s worth of it.
- Another destination by name, and this one repeats that one.
A mirroring destination stops reserving space on the canvas, because it is no longer showing a part of it. It cannot be dragged and its Position fields are locked, since it follows whatever it mirrors. Flip H and Flip V still apply.
Mirror Fit decides what happens when the mirrored content and the destination are different shapes:
| Fit | What it does |
|---|---|
| Crop | Fills the frame and cuts off the overhang. The default. |
| Letterbox | Shows all of the mirrored content and draws black bars in the gap. |
| Contain | Shows all of it, with the surrounding canvas filling the gap instead of bars. The canvas grows to hold it. |
| Stretch | Distorts the mirrored content to fit the frame exactly. |
Letterbox and Contain need somewhere to paint, so they are offered for a physical display and for the recording region only. Contain is not offered when mirroring the full canvas, because there is nothing outside the canvas to show.
If the destination you mirrored is turned off or disconnected, the row reads Unavailable and this destination goes back to showing its own slice until the other one returns. The setting is kept, not cleared.
A destination cannot mirror one that is itself mirroring something else.
Video Wall Controller Compensation
Set per destination, in the Transform panel. Rows and Columns describe the panel grid a hardware video wall controller splits this output into, and Visibox pre-compensates so the picture is not stretched.
Leave both at 1 (shown as Off) where no wall controller is involved. The full explanation, including how to work out the numbers, is under Video walls.
Render Quality
These settings describe the machine rather than the show, so they stay put when you open a different Project.
Resolution Limit
Visibox renders once, into a single picture that every destination samples from. Resolution Limit caps how large that picture is: Automatic, 720p, 1080p, 4K, or 8K.
Automatic is the default and means no cap. Visibox renders enough pixels to serve the largest destination on the canvas at its full resolution.
Lower it when playback stutters on a machine driving several displays. The cap only ever reduces, never enlarges, and it keeps the shape of the picture exactly, so nothing is stretched. A display larger than the cap shows the smaller picture scaled up to fill it.
The limit reaches everything, not only screens. A recording, and an NDI, DeckLink, Syphon or Spout target, all take their picture from the same render.
Frame Rate Limit
Frame Rate Limit caps how many frames per second Visibox renders: Automatic, 24, 30, 60, or 120 fps. Lower it when Visualizers or audio-reactive Effects stutter, since fewer frames a second gives each frame more time to finish. Video Clips play at their own frame rate and are unaffected.
Sharp rendering
Off by default. It matters only when you are driving more than one display and they do not all have the same pixel density, such as a laptop’s high-resolution screen alongside a standard projector.
Left off, Visibox trims the render down to what the displays can actually show between them, which costs the high-resolution screen some detail. Turn it on and Visibox renders at the full resolution the high-resolution screen implies. The picture on that screen gains detail, and the machine does more work for it.
On a rig where every display has the same pixel density, this setting changes nothing.
Resolution Limit outranks it. A cap you set is applied after Sharp rendering has asked for more.
Letterbox Output window
Off by default. It changes how the Output window shows the canvas when the window is not the same shape as the canvas.
Off, the picture fills the window and the overhang is cropped. On, you see the whole canvas with bars where the shapes do not match.
This affects that one window and nothing else. What an NDI, DeckLink, Syphon or Spout target sends, and what a recording captures, are untouched by it. The same switch is on the Output window’s right-click menu, which is the quicker route mid-show.
Ask before recording without a capture region
On by default. It controls the prompt that appears when you start a recording with no capture region set up. See Recording the output.
Turn it back on here if you dismissed the prompt with “Don’t ask again” and want it back.
Ask to exclude project folders from antivirus scanning
Windows only, and on by default. It controls the prompt that offers to exclude a Project folder from real-time antivirus scanning when Visibox notices a scanner reading the folder. See Antivirus and file indexing.
NDI outputs
Add NDI Output creates a network video sender. It is the NDI tile in the Unused tray, and the new sender appears in that tray beside it, ready to drag onto the canvas. Turn on Settings > General > Enable Beta Features to see this.
Select it to set:
- Name, which is what receivers on the network see in their source lists.
- Width and Height, the resolution it sends at.
- Remove NDI Output, which asks for confirmation. If you change your mind, Edit > Undo Remove Output puts it back while Settings is still open.
DeckLink outputs (SDI)
Add DeckLink Output plays out over SDI through a Blackmagic DeckLink card. It is the DeckLink tile in the Unused tray, and it needs Blackmagic Desktop Video installed and a DeckLink device connected, and says so when no DeckLink device is found. With more than one card connected, a picker beside the tile chooses which one the new output uses. Turn on Settings > General > Enable Beta Features to see this.
Select a DeckLink rectangle to set its Video Standard, the display mode the card plays out. New outputs start on the card’s first 1080p mode. The panel names the Device the output belongs to, and reports “Device not connected.” when that card is not currently plugged in, so an output configured at home is still recognizable at the venue.
Remove DeckLink Output asks for confirmation. As with NDI, Edit > Undo Remove Output brings it back while Settings is still open.
Syphon, Spout, and the recording region
Three more destinations can appear on the canvas without being screens at all:
- Syphon (macOS) and Spout (Windows), once switched on in Output Settings. Their rectangle decides how much of the canvas the shared source carries.
- The Recording Capture Region, which decides what a recording captures. It starts turned off, and while it is off recording captures the whole canvas, after asking you first. The region never enlarges the canvas, so placing it outside the other rectangles does not give them more picture to show.
Select the recording region and the Transform panel adds two controls the other rectangles do not have:
- Recording Size sets the resolution of the file: 720p, 1080p, 4K, 8K, or a width and height you type, which reads back as Custom. Changing it re-encodes the same area of the canvas at a different resolution. It does not move or resize the rectangle.
- Match Canvas snaps the rectangle to cover the whole canvas, keeping its shape. It is a one-time snap, not a link, so later changes to the canvas do not follow it.
All three behave like any other rectangle: place them, size them, and turn them off again when you are done.
Identify Displays
Identify Displays flashes a large number on every connected screen for a few seconds. Use it when the arranger’s rectangles and the actual screens in front of you have stopped matching up.