Song Editor Panel
The Song Editor Panel is the full set of controls for a Song. Open it three ways:
- Right-click a Song in the Controller window.
- Choose Song > Edit Song… from the menu bar.
- Click the chevron in a Song row’s badge cluster.
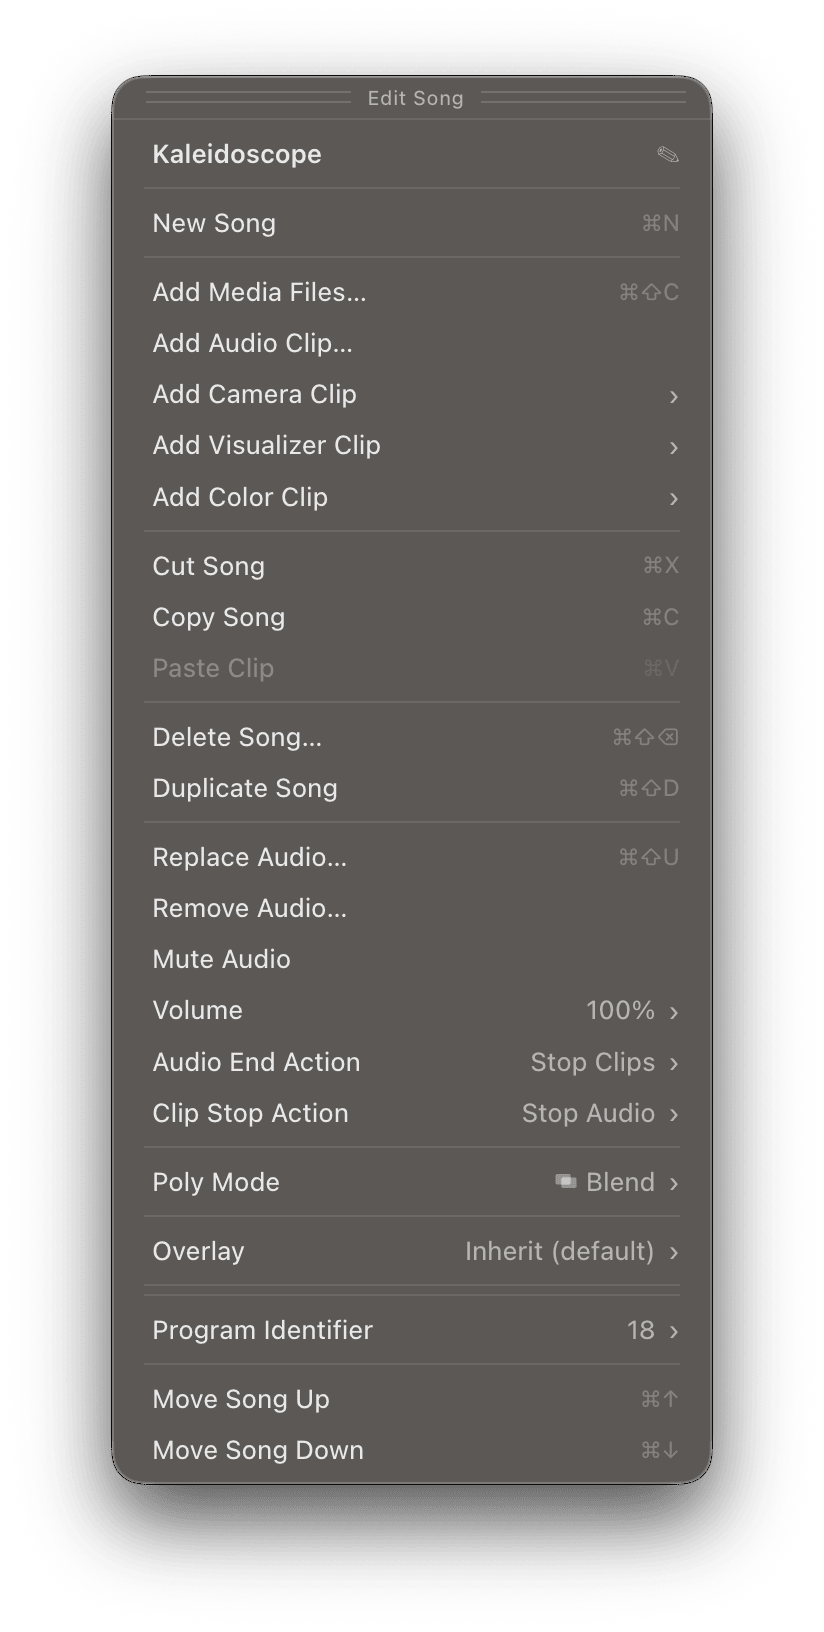
The menu-bar Song menu carries the same actions and the settings that fit a list of choices. What lives only here is what a menu cannot draw: the audio volume slider, the Overlay picker, and the freeform color picker behind Add Color Clip.
Some rows appear only when a single Song is selected. With several Songs selected, the panel edits the settings they have in common and shows a mixed marker where their values differ.
Adding Clips
These rows add new Clips to the Song. They appear when one Song is selected.
Open a file dialog and pick one or more video, image, or audio files to add to the Song. Same result as dragging files from the desktop onto the Song.
Pick one or more audio files and add each as its own Clip. See Audio Clips.
Add a live video feed as a Clip. The subpanel lists every connected camera and video input. Pick one to add it. See Connecting Cameras & Video Inputs.
Add a Visualizer Clip: live, generative, audio-reactive visuals. The subpanel lists your Visualizer presets. Edit Visualizers… at the bottom opens the Visualizers editor. See Visualizers.
Add a solid-color Clip. The subpanel offers a set of preset swatches, from black, white and gray through the warm and cool colors.
A Song needs a Clip playing before it will play Song audio, so a black Color Clip is the clean way to play “nothing” on screen. You can also stack Effects on a Color Clip to build a moving image out of a flat color.
For a color the swatches do not cover, add a Color Clip and then right-click it. The Clip Editor Panel has the full picker with hex values.
Clipboard
Put the selected Songs on the clipboard, with their Clips and settings. Cut removes them from the Project at the same time. With more than one Song selected the rows count them: Cut 3 Songs, Copy 2 Songs.
Paste into another open Project and the media files travel with the Songs.
Paste Clips from the clipboard into this Song. The row counts what it will paste (Paste Clip, Paste 4 Clips) and is unavailable when the clipboard holds no Clips.
Audio
These rows manage the Song’s backing track: audio that plays alongside the Song’s Clips.
Open a file dialog and pick an audio file. Once a Song has audio, the row reads Replace Audio….
Supported formats: MP3, AAC, M4A, WAV, FLAC, OGA, and OPUS.
Take the audio track off the Song. Available only when the Song has one.
Silence the backing track without removing it.
Set the backing track’s level, from 0% to 200%. Click the displayed value to type an exact percentage.
What happens when the backing track finishes:
- Stop Clips stops the playing Clip.
- Clips Keep Playing leaves the Clips running.
- Loop Audio starts the track again from the top.
- Cue Next Song moves to the next Song and waits.
- Start Next Song moves to the next Song and starts it.
What happens to the backing track when the last playing Clip stops. That covers letting go of a Gate Clip, switching a Toggle Clip off, or stopping it any other way:
- Stop Audio stops the track with the Clip.
- Audio Keeps Playing leaves it running, so the next Clip you fire lands on a track that never stopped.
A Song you have not set follows its Poly Mode. A Mono Song stops the audio, as Visibox 5 did. A polyoptic Song keeps it playing, because its Clips are usually voices played over the track. The row shows the value in effect either way.
Playback
Poly Mode decides how this Song puts more than one Clip on screen at once. The subpanel offers Mono (one Clip at a time, the default) plus six ways to share the stage: Blend, Mosaic, Horizontal Stripes, Vertical Stripes, Stack, and Spots.
The Poly Mode page covers what each one looks like and how the app-wide limit on simultaneous Clips works. This panel is where you set it per Song.
Every Song carries a poly mark in its Controller row, Mono included. The mark shows which mode the Song is in, so you can read it without opening the panel.
Assign an Overlay to the Song. Everything the Song plays then shows that logo or lower third on top.
The subpanel lists:
- Inherit takes whatever the Project assigns. The row names what that resolves to, so you do not have to go looking.
- None shows no Overlay for this Song, even when the Project assigns one.
- Each of your Overlays, one row per Overlay. Check more than one to stack them.
- Edit Overlays… opens the Overlays editor.
The panel assigns an Overlay. Position, size, margin, and opacity belong to the Overlay itself and are set in the Overlays editor, next to a live preview.
Song management
Put the Song title into edit mode. Double-clicking the title in the Controller window does the same. One Song only.
Assign a MIDI Program Change number (1 to 128, or 0 to 127 if you have switched the numbering in Settings > MIDI) to the Song, so an external device or piece of software can select it by sending that Program Change. Choose None to clear it. One Song only.
See Selecting Songs via MIDI Program Change.
Actions
Add a new, empty Song to the Project.
Copy the selected Songs. Duplicates point at the same media files as the originals.
Delete the selected Songs and every Clip in them. With several selected the row counts them, as in Delete 3 Songs….
Move the selected Songs through the running order. Dragging a Song frame by its handle does the same. See Setlists for how the running order is stored.