Clip Menu
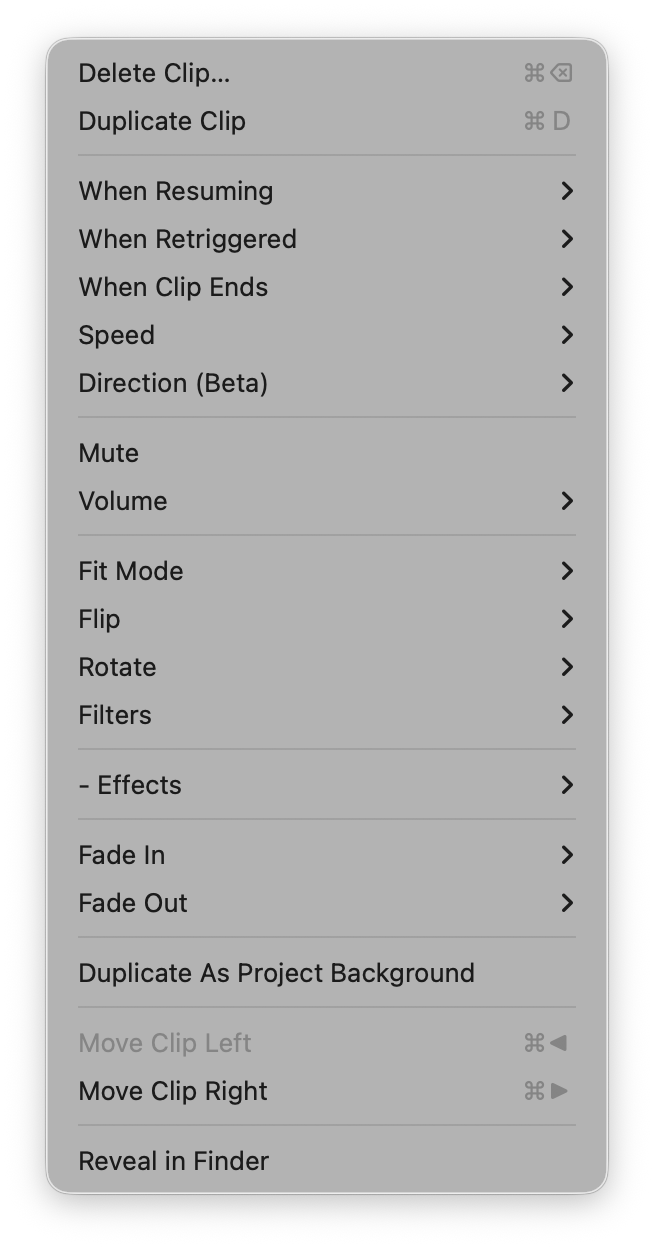
The Clip menu has options for the currently playing Clip. You can also right-click on any Clip thumbnail to open the Clip Editor Panel, which offers the same options with richer controls — visual sliders, a color picker, and a filter editor.
Deletes selected Clips. You may also use the Cmd-Delete keyboard shortcut.
Makes a copy of the selected Clips. Note that this references the same media file as the original, optimizing space on your hard drive.
If your video Clip has an audio track, you can mute it or set its relative volume. This is useful to balance the audio levels across multiple Clips with audio. For continuous volume adjustment, use the Clip Editor Panel.
When you stop playing Clip, you can choose to have it resume from the beginning or from the point where you stopped it.
By default, retriggering a currently-playing Clip starts it playing from the beginning again (Restart). Clips can be set to any of the following behaviors:
- Restart (Default) - Restart from beginning
- Stutter - Jump back a moment
- Scratch (Beta) - Shuttle back and forth like a record scratch
- Reverse (Beta) - Reverse current direction of the Clip
- Pause/Resume - Toggle between pause and resume from current point
- Pause/Restart - Pause, then start from beginning
- Stop - Stop the Clip and the current Song
- Do Nothing - Ensure that the Clip will continue playing if retriggered accidentally.
These are discussed in more detail in the section “Setting Up Your Project” earlier in this guide.
By default, each clip will loop for continuous play. However, any clip can be set to one of the following options:
- Loop (default)
- Bounce (Beta) - Reverse direction
- Stop - Play to end and stop
- Freeze - Play to end and freeze on last frame
- Start Next Clip - Play through and automatically start the next clip in current or next song
- Cue Next Song - Play through and cue the next song
- Start Next Song - Play through, then automatically navigate to the next Song and start playing it
See the “Setting Up Your Project” section for more information about clip end behaviors.
A small icon indicating what happens when the song ends is shown in the bottom-right corner of the Clip thumbnail.
These options fade the Clip in or out over a specified number of seconds. The Fade In value also determines the cross-fade between Clips. It takes precedence over any Fade Out value of the previously-playing Clip. For video Clips with an audio track, the audio will fade in/out with the Clip. If the Project has a Background Clip, fade in/out will cross-fade from/to the Background Clip.
Clips with a Fade Out value will continue to play after stopping Visibox.
Rotates selected Clips 90 degrees clockwise, 90 degrees counter-clockwise, or 180 degrees (upside down).
Flips selected Clips horizontally or vertically.
Add video filters to selected Clips. For a visual filter editor with individual sliders for each filter, use the Clip Editor Panel.
Apply a visual Effect to selected Clips. Choose from the built-in Effect library across categories including motion, glitch, retro, atmospheric, and audio-reactive. Select None to remove an Effect. See the Effects page for full details.
Controls how the Clip’s content fits within the Output Window. Default uses the Project-level setting. Fit shows the entire Clip with black bars to preserve the aspect ratio. Stretch fills the Output Window completely, which may distort the content.
Allows you to adjust the playback speed of selected video Clips at preset increments ranging from 3x to .1x without needing to edit the videos themselves. For continuous speed adjustment with precise text input, use the Clip Editor Panel.
Set the Clip to play Forward (as normal) or Backward. Clips are muted when playing backwards.
This option allows you to duplicate the selected Clip and set it as the Project Background. The Project Background is a Clip that plays when no other Clips are play, providing a consistent backdrop for your performance.
It’s usually easiest to just drag clips into position. However, you can also move the current clip using the Move Clip Left (⌘←) and Move Clip Right (⌘→) menu items and command keys.
Opens the folder containing the Clip’s source media file in the Finder (Mac) or File Explorer (Windows). This is useful for locating the original file on disk.