Clip Editor Panel
Right-click any Clip thumbnail in the Controller Window to open the Clip Editor Panel — a floating tool panel for adjusting all of a Clip’s settings with visual controls.
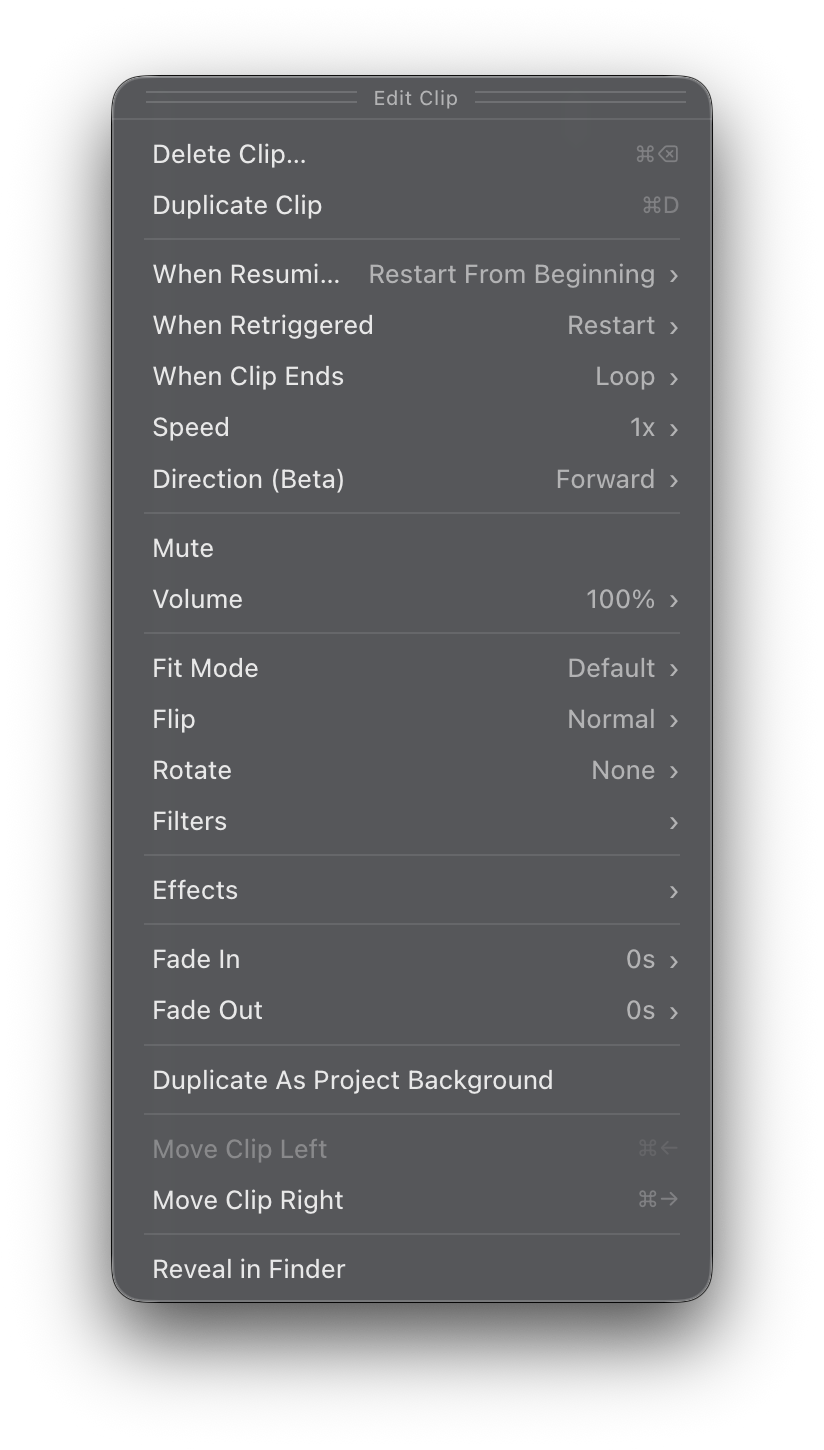
The options that appear depend on the type of Clip you right-click. A video Clip shows playback and audio controls, a Visualizer Clip shows rendering options, and so on. The table below summarizes which sections appear for each Clip type.
| Section | Video | Image | Camera | Visualizer | Color |
|---|---|---|---|---|---|
| Playback | Yes | ||||
| Audio | Yes | Yes | |||
| Display | Yes | Yes | Yes | Yes | |
| Transitions | Yes | Yes | Yes | Yes | Yes |
| Effects | Yes | Yes | Yes | Yes | Yes |
| Filters | Yes | Yes | Yes | Yes | Yes |
| Visualizer | Yes | ||||
| Camera | Yes | ||||
| Actions | Yes | Yes | Yes | Yes | Yes |
Playback
Playback options are available for video Clips.
Controls what happens when a previously-played Clip is triggered again after being stopped:
- Restart From Beginning — Start the Clip from the beginning every time.
- Resume From Last Point — Continue from where the Clip was stopped.
- Sync to Song Position — Lock the Clip’s playback to the Song audio timeline. When enabled, the Clip’s position always matches the current Song audio position. See Sync to Song Position for details.
Selecting Sync to Song Position automatically restricts some other playback options (Retrigger, Loop Type, and Direction) since the Song timeline controls the Clip’s position.
Controls what happens when a currently-playing Clip is triggered again:
- Restart (Default) — Restart from the beginning.
- Stutter — Jump back a short amount for a stutter effect.
- Scratch (Beta) — Shuttle back and forth like a record scratch.
- Reverse (Beta) — Reverse the current playback direction.
- Pause/Resume — Toggle between paused and playing.
- Pause/Restart — Pause on first retrigger, restart from beginning on next.
- Stop — Stop the Clip and the current Song.
- Do Nothing — Ignore the retrigger. Useful to prevent accidental interruptions.
For more on retrigger behaviors, see Clip Retriggering Behaviors.
Controls what happens when a Clip finishes playing:
- Loop (Default) — Restart the Clip continuously.
- Bounce (Beta) — Reverse direction at the end for a ping-pong effect.
- Stop — Stop playback.
- Freeze — Hold on the last frame.
- Start Next Clip — Automatically play the next Clip in the Song.
- Cue Next Song — Navigate to the next Song and wait.
- Start Next Song — Navigate to the next Song and start playing it.
A small icon in the bottom-right corner of the Clip thumbnail indicates the current end behavior. See Clip End Behaviors for details.
Adjust the playback speed of a video Clip. The slider ranges from 0.05x to 4x with snap points at common values (0.25x, 0.5x, 1x, 2x, 4x).
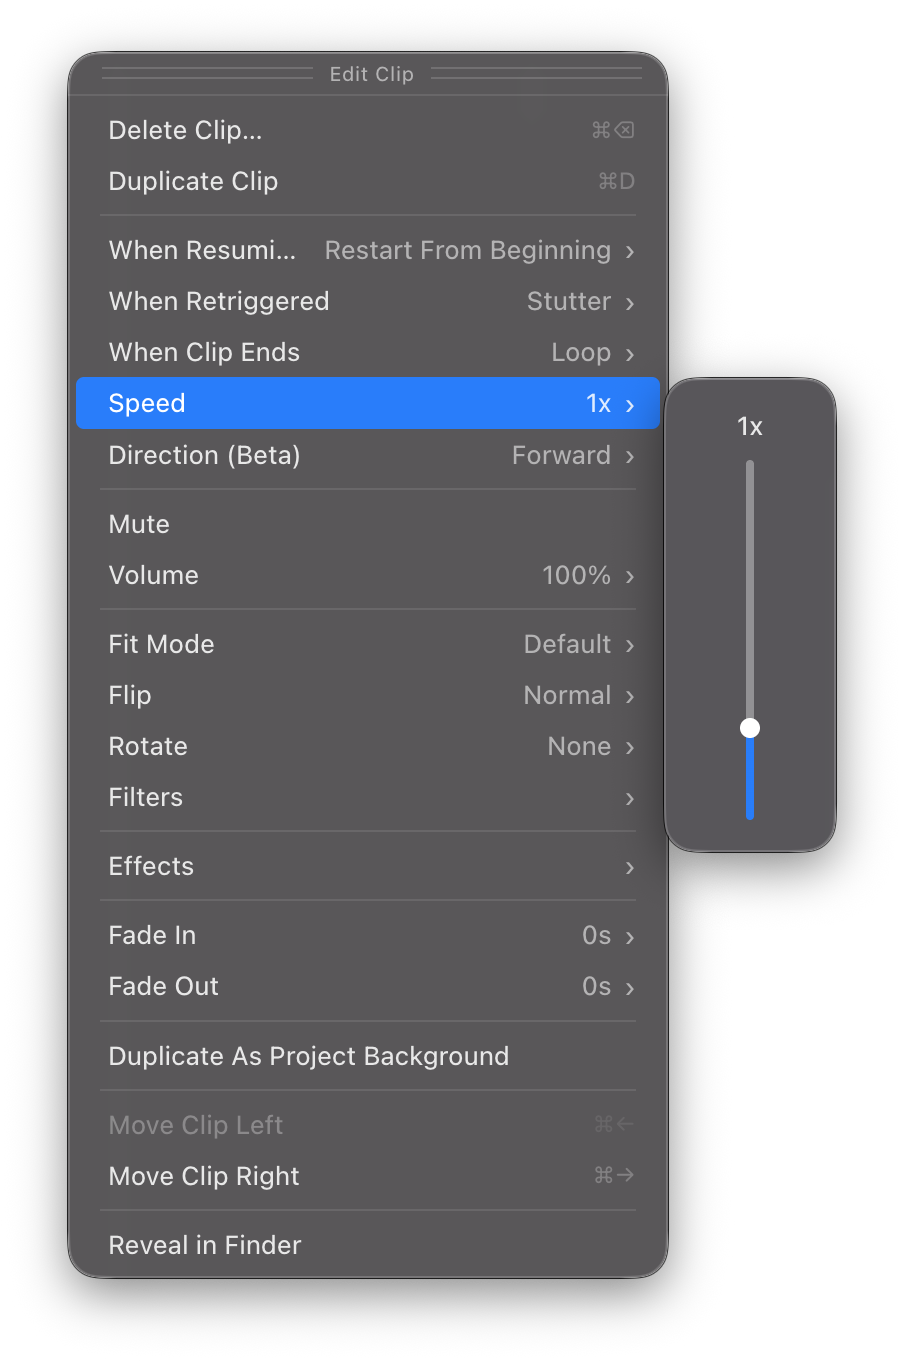
Click the displayed value to type a precise speed. You can enter values beyond the slider range for extreme slow-motion or fast-forward.
Double-click the slider to reset speed to 1x.
Set the Clip to play Forward (normal) or Backward. Clips are muted during backward playback.
Audio
Audio options are available for video and camera Clips that have an audio track.
Toggle the Clip’s audio on or off.
Adjust the Clip’s audio volume. The slider ranges from 0% to 200%, letting you boost quiet Clips or reduce loud ones.
Click the displayed value to type a precise percentage. You can enter values beyond the 200% slider range if needed.
This is useful for balancing audio levels across multiple Clips with audio tracks.
Display
Display options control how the Clip appears in the Output Window.
Available for Color Clips only. Choose the Clip’s background color using the color picker subpanel.
The color picker offers three ways to choose a color:
- System color picker — Click the color swatch to open your operating system’s native color picker for full color selection.
- Text input — Type any CSS color value directly: hex codes (
#FF5500), color names (tomato), or other CSS color formats. Press Enter to apply. - Preset swatches — Click one of 12 preset colors for quick selection: Black, White, Gray, Red, Orange, Gold, Yellow, Green, Sky Blue, Blue, Purple, and Magenta.
The color picker lets you enter precise color values that aren’t available through the Clip Menu, which only offers the preset list. Use the Clip Editor Panel when you need an exact color.
Controls how the Clip’s content fits within the Output Window:
- Default — Uses the Project-level Fit Mode setting.
- Crop — Fills the Output edge-to-edge, cropping content that doesn’t fit.
- Fit (Letterbox) — Shows the entire Clip with black bars to preserve the aspect ratio.
- Stretch — Stretches to fill the Output, which may distort the content.
See Cropping and Fit Mode for more on how fit modes work.
Flip selected Clips:
- Normal — No flip applied.
- Horizontal — Mirror left-to-right.
- Vertical — Mirror top-to-bottom.
- Both — Mirror in both directions.
Rotate selected Clips:
- None — No rotation.
- 90° Right — Rotate 90° clockwise.
- 180° — Rotate upside-down.
- 90° Left — Rotate 90° counter-clockwise.
Transitions
Transition options control how Clips fade in and out.
Set the fade-in duration in seconds. The slider ranges from 0 to 10 seconds. Click the value to type a precise duration or a value beyond the slider range.
The Fade In value also determines the cross-fade duration between Clips. It takes precedence over any Fade Out value of the previously-playing Clip.
Set the fade-out duration in seconds. Same controls as Fade In.
Clips with a Fade Out value will continue to play briefly after stopping Visibox while the fade completes.
Effects
Apply a visual Effect to the Clip. The subpanel shows a list of all available Effects, organized by category. Select an Effect to apply it, or select None to remove it.
Choose Edit Effects… at the top of the list to open the Effects Editor, where you can browse, customize, and create Effects. See the Effects page for full details.
You can stack multiple Effect layers on a single Clip. See Multiple Effects Per Clip for how layering works.
Filters
Open the filter editor subpanel to apply and adjust visual filters on the Clip. The filter editor lets you enable, combine, and fine-tune up to 8 filter types with individual controls for each.
Each filter has a toggle switch and a slider:
- Toggle a filter on to enable it. The slider appears when the filter is active.
- Drag the slider to adjust the filter’s intensity.
- Click the value to type a precise number.
- Double-click the slider to reset that filter to its default value.
- Use the Reset button at the bottom to clear all filters at once.
Available filters:
| Filter | Range | Description |
|---|---|---|
| Blur | 0–100% | Soften the image |
| Brightness | 0–5 | Brighten or darken |
| Contrast | 0–5 | Increase or reduce contrast |
| Grayscale | 0–1 | Desaturate toward black and white |
| Hue Rotate | 0–360° | Shift all colors around the color wheel |
| Invert | 0–1 | Invert colors (negative image) |
| Saturate | 0–5 | Boost or reduce color intensity |
| Sepia | 0–1 | Apply a warm, vintage tone |
Filters and Effects are different things. Filters are image adjustments (like Photoshop filters), while Effects are animated visual overlays. You can use both on the same Clip.
Visualizer
Visualizer options are available for Visualizer Clips only.
Choose which Visualizer preset to use. The subpanel shows all available MilkDrop and ISF presets. Select Edit Visualizers… to open the Visualizers Editor for browsing, customizing, and creating presets. See the Visualizers page for full details.
Set what audio the Visualizer reacts to:
- None — No audio input; the Visualizer plays without audio reactivity.
- Visibox — React to whatever audio Visibox is currently playing (Song audio, Clip audio).
- System Audio — React to all system audio output (when enabled in Settings).
- Audio input devices — Choose a specific microphone or audio input device from the list below the separator.
Control the rendering resolution of the Visualizer. The slider ranges from 0.25x to 2x. Lower values improve performance; higher values improve visual quality.
Set the target frame rate for the Visualizer. The slider ranges from 15 to 120 fps with snap points at 15, 30, 60, and 120.
Camera
Camera options are available for Camera Clips only.
Choose which connected camera or video input device to use for this Clip. The subpanel lists all available devices. See Connecting Cameras & Video Inputs for setup details.
Actions
The bottom of the Clip Editor Panel contains action items for managing Clips.
Delete the selected Clips. When multiple Clips are selected, the label shows the count (e.g., “Delete 3 Clips…”).
Make a copy of the selected Clips. The duplicate references the same media file as the original.
Move selected Clips to the left or right in the Song. You can also drag Clips to reorder them.
Duplicate the selected Clip and set it as the Project Background — a Clip that plays when no other Clip is active.
Open the folder containing the Clip’s source media file in Finder.