Effects
Effects are real-time visual transformations applied to individual Clips. They can add motion, texture, distortion, color shifts, and audio-reactive behavior to your visuals — all without modifying your original media files. You can apply one or more Effects to any Clip and customize them in the Effects Editor.
Applying an Effect to a Clip
To apply an Effect, right-click on a Clip thumbnail and select Effect from the contextual menu (or use the Clip menu at the top). You will see a list of available Effect presets organized by category. Select one and the Effect is applied immediately — you can see it in the Output Window right away if the Clip is playing.
To remove an Effect from a Clip, right-click and select Effect > None.
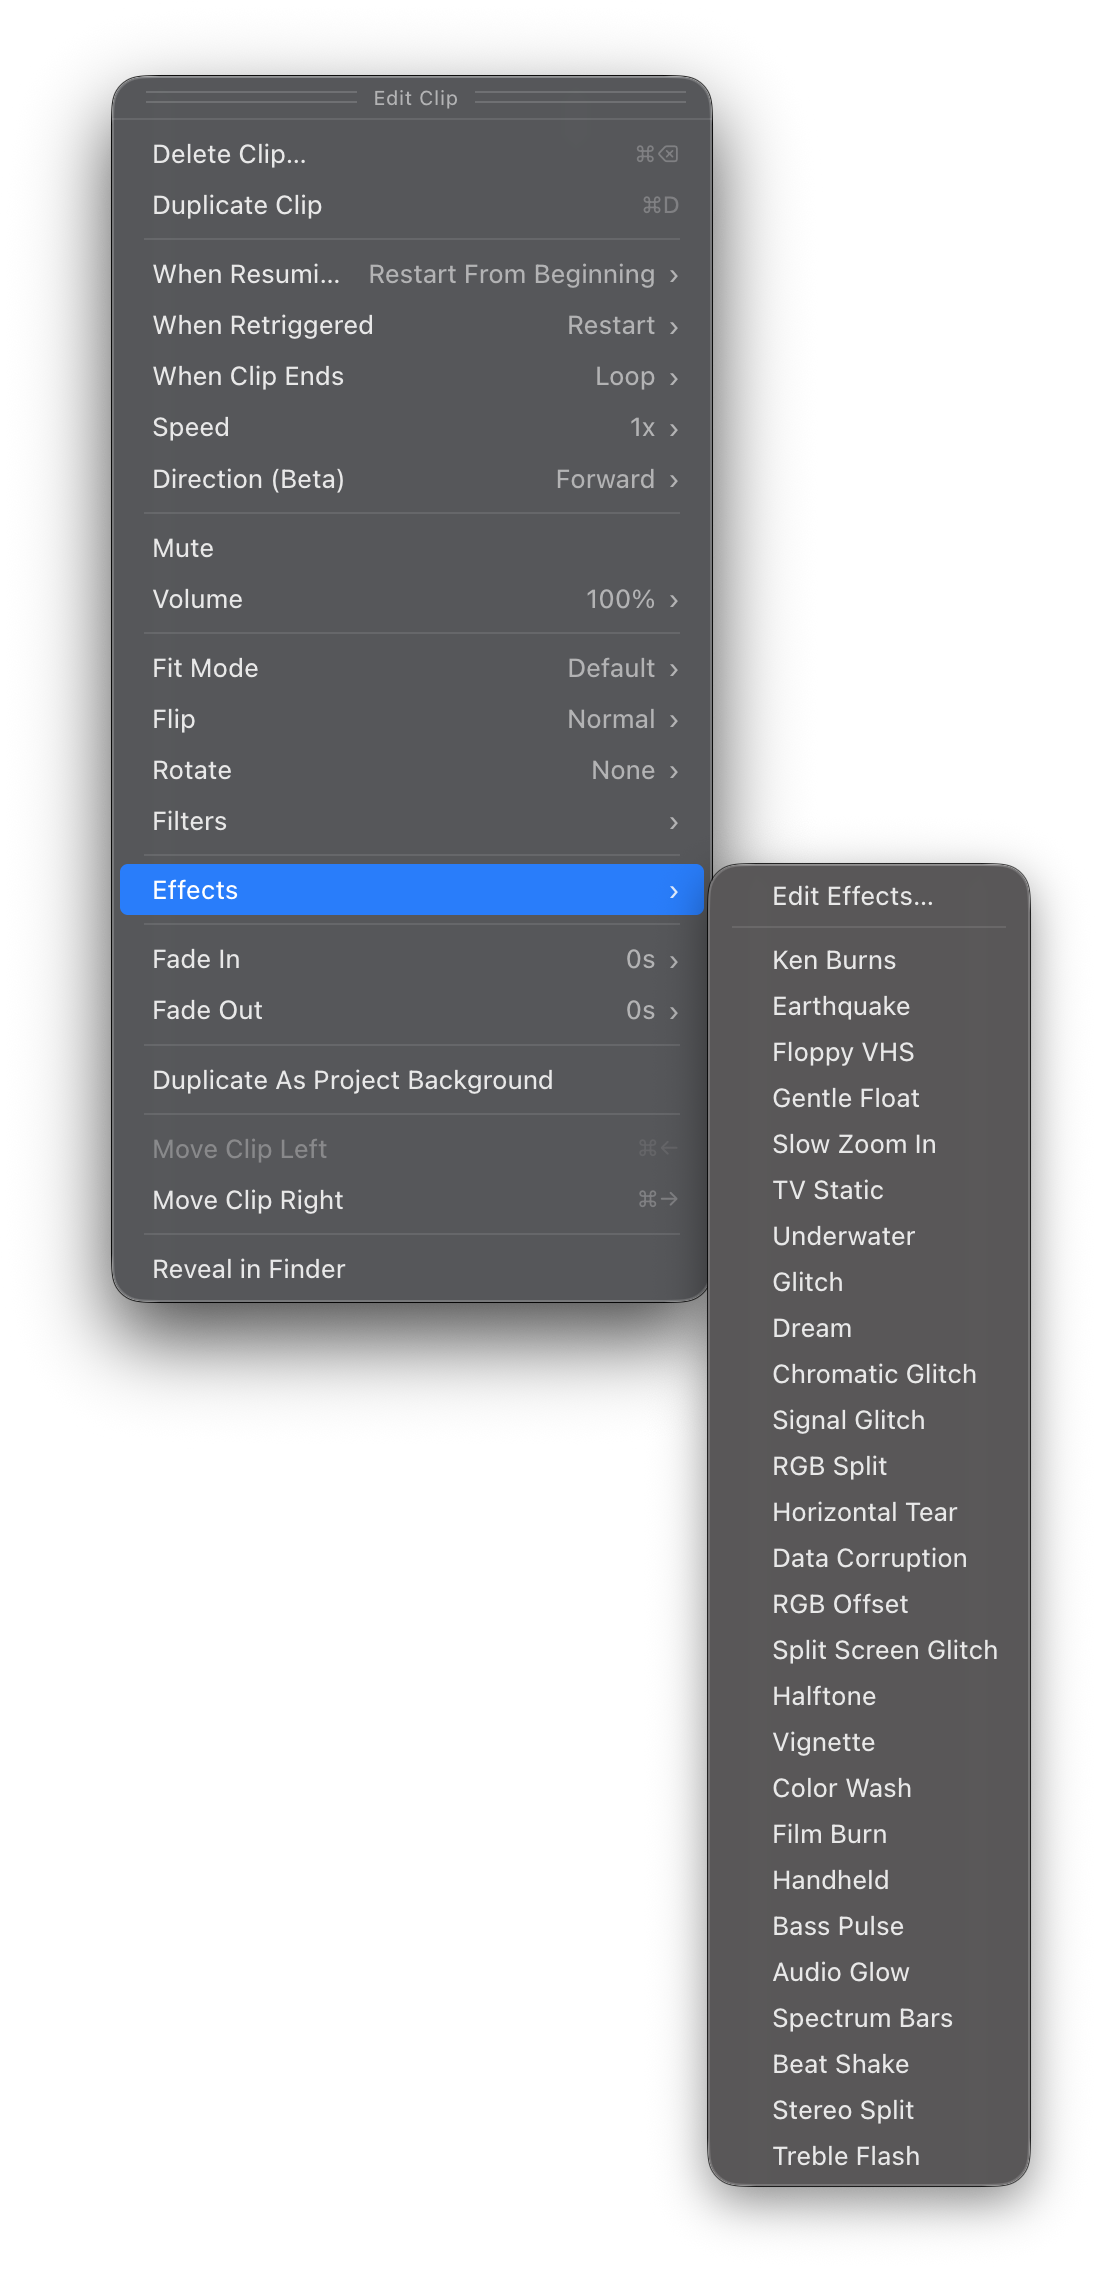
Visibox ships with a library of built-in Effects covering motion, retro/analog looks, glitch, filters, atmospheric treatments, and audio-reactive behaviors. Browse the full set in the Effects Editor.
Audio-reactive Effects look best with music that has clear dynamics — strong beats, distinct bass lines, or sharp transients. They are especially effective on Clips with darker backgrounds where the glow and pulse stand out. Note that audio-reactive Effects respond to the audio playing within Visibox — Clip audio, Song audio, or the master output — not to external system audio or input devices.
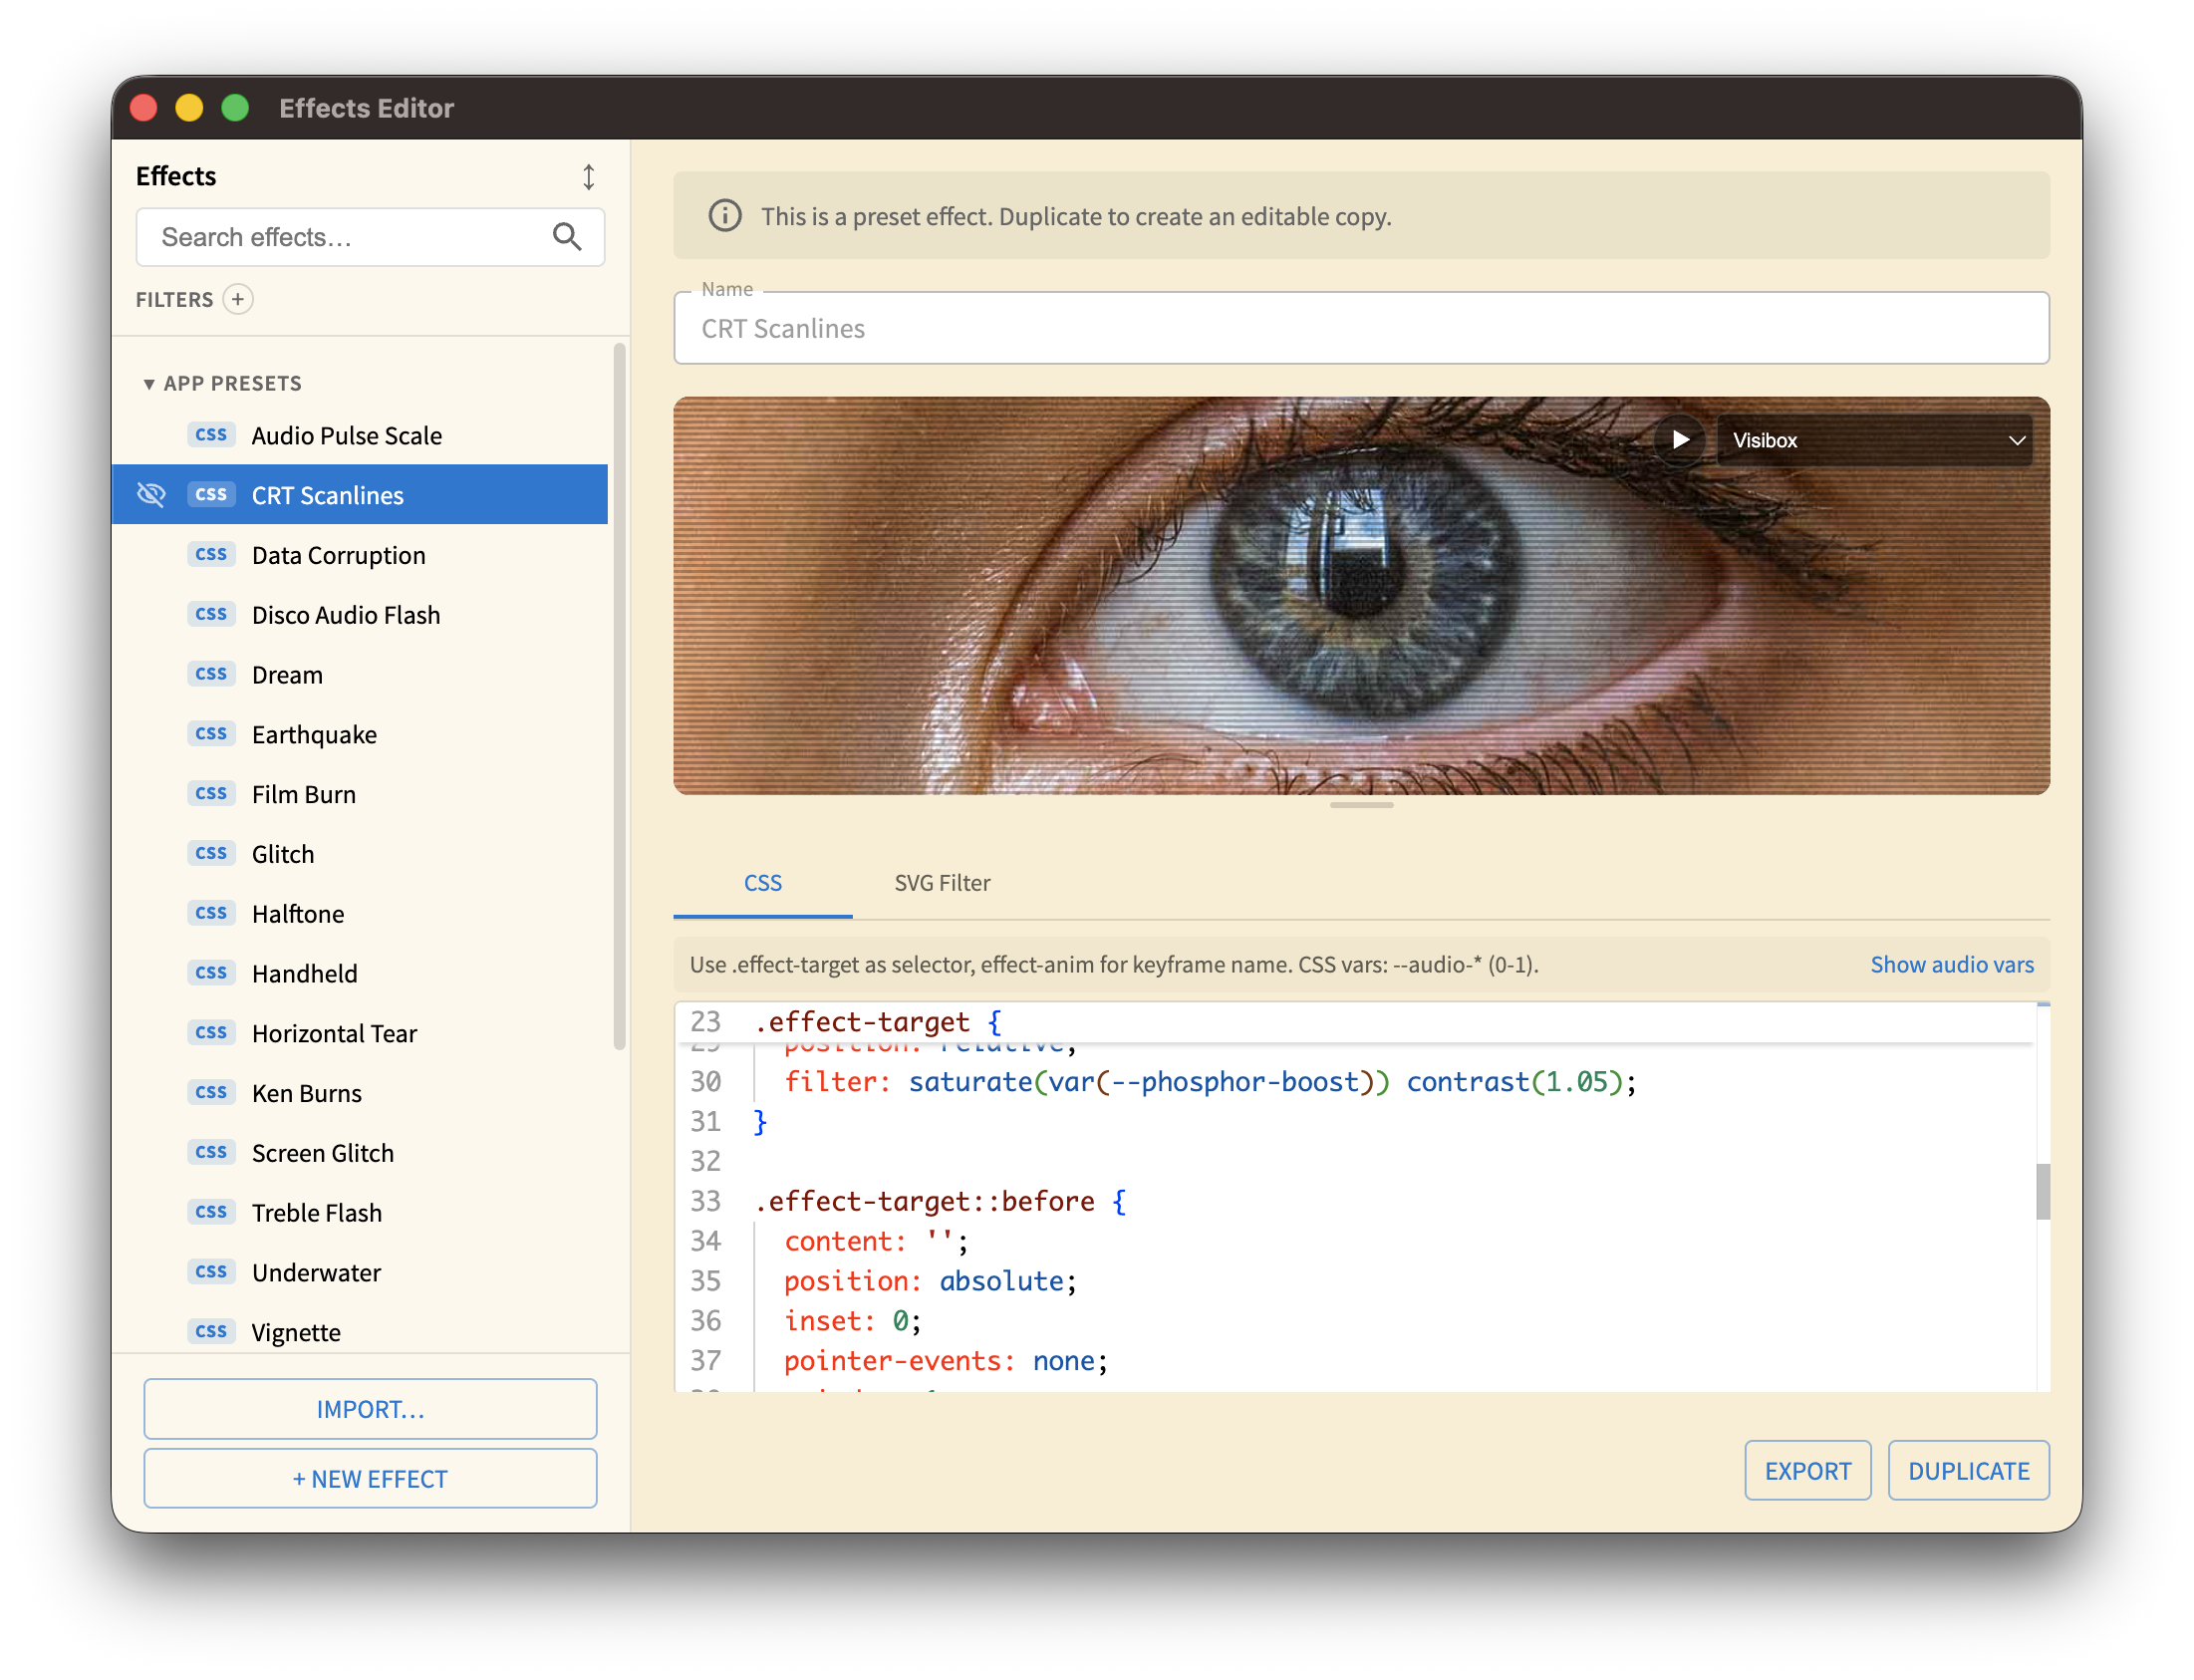
The Effects Editor
The Effects Editor is a dedicated window for browsing, creating, and customizing Effects. Open it from Window > Effects Editor.
Preset Hierarchy
Effects in Visibox follow a four-tier hierarchy:
| Tier | Name | Description |
|---|---|---|
| 1 | App Presets | The built-in Effects that ship with Visibox. Read-only. |
| 2 | Plugin Effects | Effects loaded from ~/Library/Visibox/Plugins/Effects/ at startup. Read-only. |
| 3 | My Effects | Effects you create in the Effects Editor. Fully editable. Stored locally on your machine. |
| 4 | Project Effects | Effects stored inside your Project file (.vbx). These are the copies that actually run at showtime. |
Linked and Unlinked
When you apply an App Preset, a Plugin Effect, or one of your My Effects to a Clip, Visibox creates a linked copy inside the Project. A linked copy:
- Stays in sync automatically. If you edit the original My Effects source, every Project using a linked copy of it updates the next time you open the Project — as long as the original is still available on the same computer.
- Cannot be edited directly. To customize it, duplicate it to unlink it.
To unlink, right-click the Effect in the Project Effects section and select Duplicate. The duplicate is independent and editable; future changes to the original won’t affect it.
Projects Are Self-Contained
Every Project stores a complete copy of its Effects — even linked ones. Unlike most software, where a missing preset breaks playback, Visibox Projects are portable:
- Deleting a My Effects preset won’t break your Projects. If you remove the original, the Project falls back to its embedded copy and keeps playing back exactly as it did. Visibox notes that the source is no longer available (the Effect becomes “orphaned”), but the visuals are unaffected.
- Projects travel with their Effects. Your
.vbxfile contains everything it needs to play back on another machine without chasing down preset files.
Browsing and Searching
The left panel of the Effects Editor lists all available Effects across all tiers. You can:
- Search by name using the search box at the top
- Filter by tier or category
- Sort alphabetically or by tier
- Show/Hide individual Effects from the preset list using the visibility icon on hover
Apply to Selected Clips
You can apply an Effect directly from the Effects Editor to your currently selected Clips. Select one or more Clips in the Controller, then right-click an Effect in the Effects Editor and choose Apply to Selected Clips. This is faster than applying Effects one Clip at a time through the context menu.
Audio Audition
To preview how an Effect responds to audio, hover over the Effect’s preview and click the play button that appears overlaid on it. Visibox plays a test audio signal so you can see the audio-reactive CSS variables in action while you design — no Project required.
Creating a Custom Effect
Effects in Visibox are defined using CSS and optional SVG filters. If you are familiar with CSS, you can create remarkably expressive visual effects.
- Click the + button in the Effects Editor to create a new Effect in “My Effects.”
- Give it a name by double-clicking the title.
- Write your CSS in the Stylesheet editor on the right.
- Optionally, add an SVG Filter for more advanced effects like blur, displacement, and color manipulation.
Audio-Reactive CSS Variables
When writing custom Effects, you can use CSS custom properties that Visibox updates in real time based on the audio playing within Visibox (Clip audio, Song audio, and the master output). Effects do not currently react to external system audio or audio input devices.
Frequency Bands (0.0 – 1.0, smoothed):
| Variable | Range |
|---|---|
--audio-bass | 20–250 Hz |
--audio-low-mid | 250 Hz – 1 kHz |
--audio-mid | 1–4 kHz |
--audio-high-mid | 4–8 kHz |
--audio-treble | 8–20 kHz |
Peak Values (0.0 – 1.0, fast attack, slow decay):
| Variable | Range |
|---|---|
--audio-bass-peak | 20–250 Hz peak |
--audio-low-mid-peak | 250 Hz – 1 kHz peak |
--audio-mid-peak | 1–4 kHz peak |
--audio-high-mid-peak | 4–8 kHz peak |
--audio-treble-peak | 8–20 kHz peak |
Level Meters (0.0 – 1.0):
| Variable | Description |
|---|---|
--audio-level | Overall RMS level (mono) |
--audio-level-l | Left channel RMS level |
--audio-level-r | Right channel RMS level |
--audio-peak | Overall peak level |
Use these in your CSS like any custom property:
.effect-target {
  transform: scale(calc(1 + var(--audio-bass-peak) * 0.15));
  filter: brightness(calc(1 + var(--audio-peak) * 0.5));
}
Editing Project Effects
Effects that are linked to an App Preset or Plugin cannot be edited directly. To customize one:
- Select the Effect in the Effects Editor.
- Right-click and choose Duplicate (or use the context menu).
- The duplicate is unlinked and fully editable.
- Edit the CSS and SVG Filter to suit your needs.
Importing and Exporting
Effects can be exported as .vbef files and shared with other Visibox users. To import, drop a .vbef file into the Effects Editor or place it in the Plugins folder:
- Mac:
~/Library/Visibox/Plugins/Effects/ - Windows:
%APPDATA%/Visibox/Plugins/Effects/
Plugin Effects are loaded at startup and appear in the Tier 2 section of the Effects Editor.