Project Menu
Project Menu
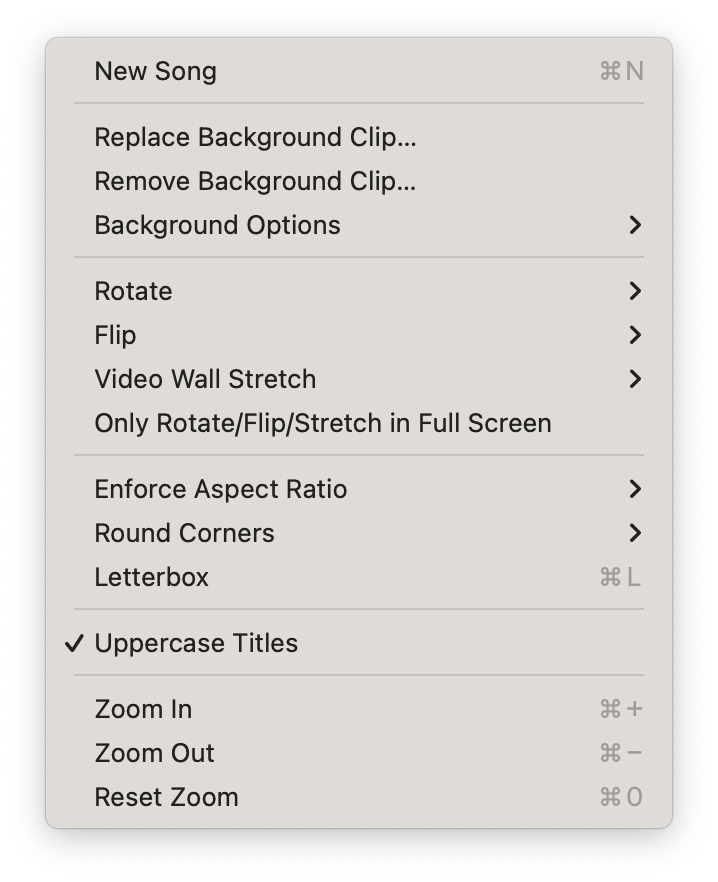
Settings in the Project menu apply to your Project as a whole. It’s where you add new Songs and customize your view of the Controller and Output windows. It’s where you specify how the Output window displays, and thus how your Project will look to your audience, allowing you to adapt your visuals to the environment where you are performing.
You’ll likely get used to adding new Songs with a keyboard shortcut (⌘N), but this menu item is here if that is not an option.
By default, a black screen is displayed when your content stops and nothing is playing. But you can use the Add Background Clip option to specify a background image or video to display instead. You can also set a background by dragging an image or video file from the desktop to the Output window.
Background Clips apply to the whole project; in other words, you can not specify different background images for each Song.
Lets you rotate the Output display in 90° increments.
This setting lets you accommodate different projection systems. Flip the content horizontally for use with a rear-project system. Or flip the content vertically for use with a ceiling-mounted projector.
By connecting a video wall controller to your computer, you can span the Output Window across multiple displays. However, most video wall controllers will stretch your output to fit the combined aspect ratio of all the displays. This setting will allow you to to compensate for this stretching and ensure that your content is displayed correctly.
Once your video wall controller is connected and configured, choose the item from this menu to match the arrangement of your displays in rows and columns. If you have 2 projectors (arranged either horizontally or vertically), set on each side of the stage, you would choose “1 row x 2 cols” from this menu. If you have 4 televisions stacked on top of each other, you would choose “4 rows x 1 col”. If you have 4 video projectors projecting on all of the walls in an art installation, you would choose “1 row x 4 cols”.
Find out more about connecting multiple screens to Visibox in the “Setting Up For Live Performance” section.
The Rotate, Flip, and Video Wall Stretch items are intended to configure your Output when presented in full screen on a ceiling mounted or rear projection projector, or stretched out with a video wall controller. Select this option, so these settings only appear in our Output window when it is presented in full screen. This makes it easier to set up your Project without the Output window appearing sideways, upside down, backwards, or stretched out.
By default, Clips fill the Output Window entirely, getting cropped as necessary. When the Output Window is set to “Full Screen”—as is typical for a performance environment—the Output Window resizes to match the aspect ratio of the display device (a projector, television, or some other display). Your Output gets resized along with it.
However, there may be cases where you will want your content to have a different aspect ratio than that of your presentation screen. The Enforce Aspect Ratio menu allows you to choose from many standard spec ratios (such as 4:3, 16:9, etc.) in both horizontal and vertical orientations in order to preserve the aspect ratio of the Clip, independent of the display device. Black bars will be added as necessary to make up the difference.
This option lets you apply rounded corners to all the clips in your Project. Select from square, 5%, 10%, 20%, 30%, 40% or circle. Combined the “circle” option with a square aspect ratio, to show your Visibox project in a circle, regardless of your output screen’s intrinsic output ratio.
Visibox’ default setting is to crop videos so that they show edge-to-edge on any screen. However, if you would like to ensure that all of the Clips in a project do not crop, you can choose Letterbox (⌘L) at the Project level. You can also letterbox individual Clips using the Clip menu.
The default setting is to show all song titles on the controller screen in UPPERCASE, but if you would rather show them as typed, we’ve got a menu item for that!
Make the Controller window content larger.
Make the Controller window content smaller.
This resets the zoom level of the Controller window to 100%. This is useful if you have zoomed in or out and want to return to the default size.