Adding Songs
When you create a Project, it is populated with one Song automatically.
The quickest way to add a new song is with the ⌘N keyboard shortcut. You can also use the Project > New Song menu option.
To rename a Song, double-click in the Song frame to highlight the text and simply start typing. You can also use the Song > Edit Current Song Title menu option.
A “Song” is the container uses for visual Clips because Visibox was designed with musical performances in mind. However, Visibox could be used for other types of performances in which a “Song” represents some other unit of the performance or presentation.
Customizing the Song list display
Note that by default, Visibox gives new Songs random spaceage-related names, but if you don’t like that feature, you can have them named “New Song” instead. Look for the setting in Visibox > Preferences > Use “New Song” for New Songs.
Notice also that Song names are in all UPPERCASE by default. If you’d rather they appear the way you type them in, toggle the Project > UPPERCASE titles menu item.
Finally, you will find that text for the Song list is BIG! It may look clunky at first, but this is a feature that makes it easy to see the list at a distance when you are using Visibox during your show. You can control the size of the Song list using the Zoom feature: ⌘+ to Zoom in and make it larger; ⌘- to Zoom out for smaller text. (These options are also available in the Project menu.)
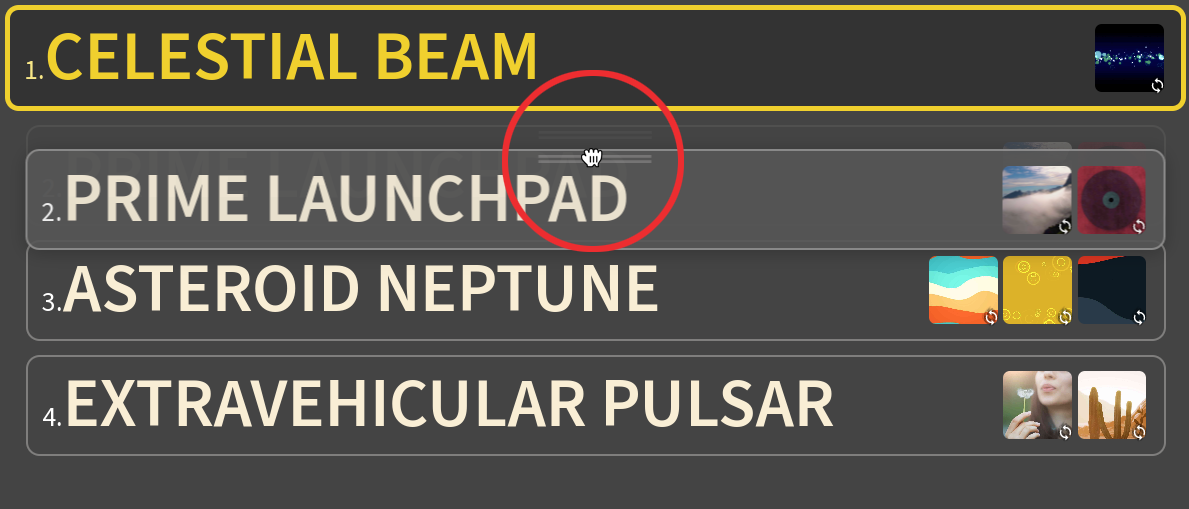
Rearranging Songs
You can change the song order by grabbing the handle at the top of a Song and dragging it into a new position. (Bonus—the song numbering updates automatically!) If keyboard control is your thing, select the Song and use the ⌘↑ and ⌘↓ keys to move it up and down in the stack.
To make a duplicate of a Song and all the Clips it contains, type ⌘D (or use the Song > Duplicate menu).
Continue adding and rearranging songs until you have your set list generally the way you want it. It’s easy to update on the fly.
Copying Songs between Projects
You can also drag a Song from one Project to another. This is a great way to reuse a Song or a set of Songs across multiple Projects. Simply open both Projects at once, grab the Song by its handle, and drag to the target Project. This will copy the Song, along with all of its Clips and settings to the target Project. Note this will copy the media files as well, so it may take a moment depending on the size and quantity of these files.
Attaching audio to a Song
You can attach an audio file to a song to be used as a backing track while the Clips for that Song play. Native audio formats include:
- Mpeg-3 (mp3)
- Advanced Audio Codec (aac)
- Mpeg-4 audio (m4a)
- WAV (wav)
- FLAC (flac)
- Ogg (oga)
- OPUS (opus)
If you add an audio file that Visibox does not play natively, it will attempt to convert it to a native format. If the file cannot be converted, an error will appear.
You will most likely be performing the primary audio for the Song (the song itself!), so attached audio is used for “something extra”. In other words, you do not need to attach an audio file of the song you’ll be playing.
To attach an audio track, right-click on the Song and choose Attach Audio from the contextual menu (the option is also available in the Song menu at the top.) When there is an audio attached to a Song, its waveform displays in the background of the Song frame.

There can only be one audio track attached to each Song. Be aware that if your videos have audio, the Clip audio and the Song backing track will play at the same time.
Seeking/Scrubbing Through Audio
Below the waveform display, you will see a seek bar that allows you to scrub through the audio. Click and drag the seek bar to move to a specific point in the audio.
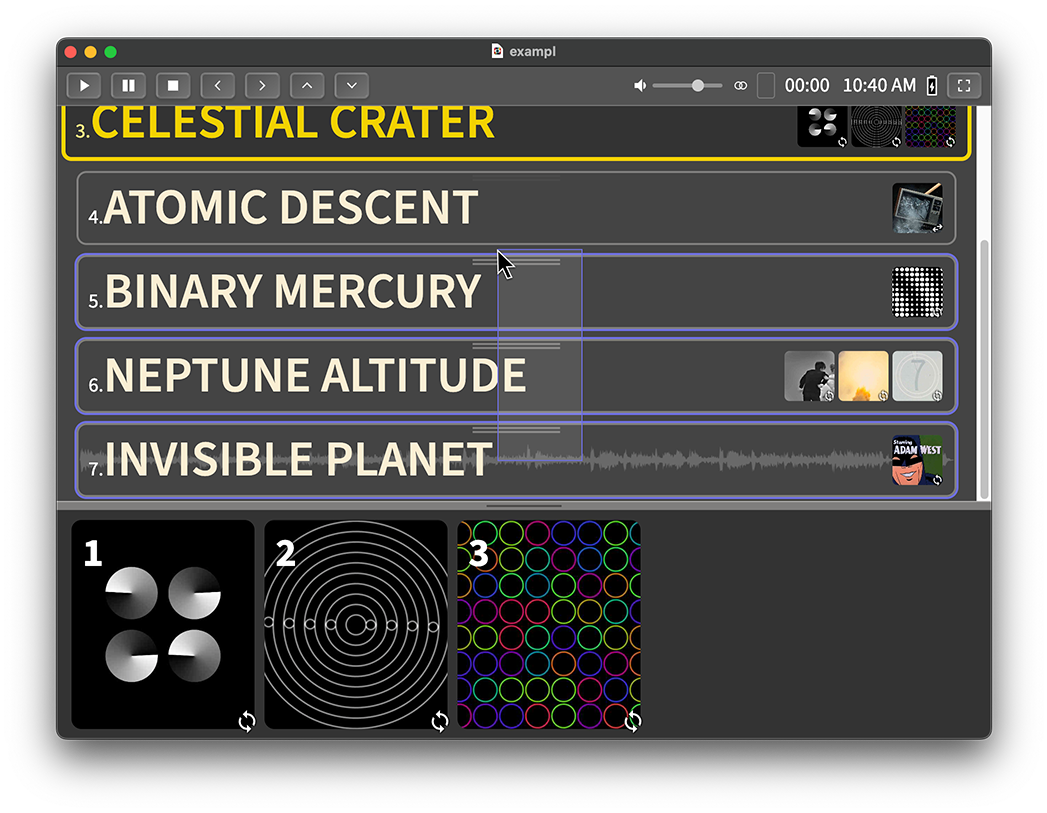
Selecting Multiple Songs
You can select multiple Songs at once by clicking the mouse outside of a Song handle and dragging the selection rectangle around multiple Songs handles at once. Selected Songs are outlined in blue. Repeat this behavior while holding down the shift (⇧) key to add more Songs to the selection. Hold down the alt/option (⌥) key to remove Songs from the selected group. Hold down the command (⌘) key on Mac or control (⌃) key on Windows and click individual Song handles to toggle their selection status.
Setting Options For Multiple Songs At Once
When multiple Songs are selected, you will be able to drag them, duplicate them, or edit them together. You will also be able to edit their common options together. For instance, if all selected Songs have audio attached, you can change the volume of all of them at once. If some of the selected Songs do not have audio attached, the volume option will not be available.
If you have multiple Projects open, you can copy single or multiple Songs by dragging from one Project’s Controller window to another. This will copy the Songs, their settings, as well as all of their Clips and settings.